When I first decided to tackle concrete countertops in my kitchen, I had visions of sleek, modern surfaces that would be the envy of all my friends. What I didn’t anticipate was just how tricky it would be to achieve that perfectly smooth finish. Through trial, error, and more than a few frustrating moments, I learned that creating smooth concrete countertops is absolutely possible, but it requires patience, the right techniques, and attention to detail at every stage. Let me share what I discovered along the way, so you can avoid the mistakes I made and get those beautiful, glass-like surfaces on your first try.
Starting With the Right Mix
I can’t stress enough how important your concrete mix is to achieving a smooth finish. When I started my project, I grabbed a basic concrete mix from the hardware store and wondered why my surface looked rough and pitted. The truth is, you need a high-quality mix specifically designed for countertops, with fine aggregates and additives that improve workability. I eventually switched to a countertop-specific mix that included plasticizers and fine sand, and the difference was remarkable.
The water-to-cement ratio is something I obsessed over, and for good reason. Too much water weakens the concrete and causes excessive shrinkage, while too little makes it impossible to work with and leaves air pockets throughout. I found my sweet spot by adding water gradually and mixing thoroughly until the consistency resembled thick pancake batter. It should flow smoothly but not be runny. Take your time with this step because getting the mix right sets the foundation for everything that follows.
Another lesson I learned the hard way: mix thoroughly and for longer than you think necessary. I rushed through mixing on my first attempt, and those unmixed pockets created weak spots and texture variations that showed up in my final surface. Now I use a drill with a paddle attachment and mix for at least five minutes, scraping the sides and bottom of my bucket multiple times. The extra effort here pays off tremendously when you’re working toward that smooth finish you’re dreaming of.
Proper Pouring and Vibration Techniques
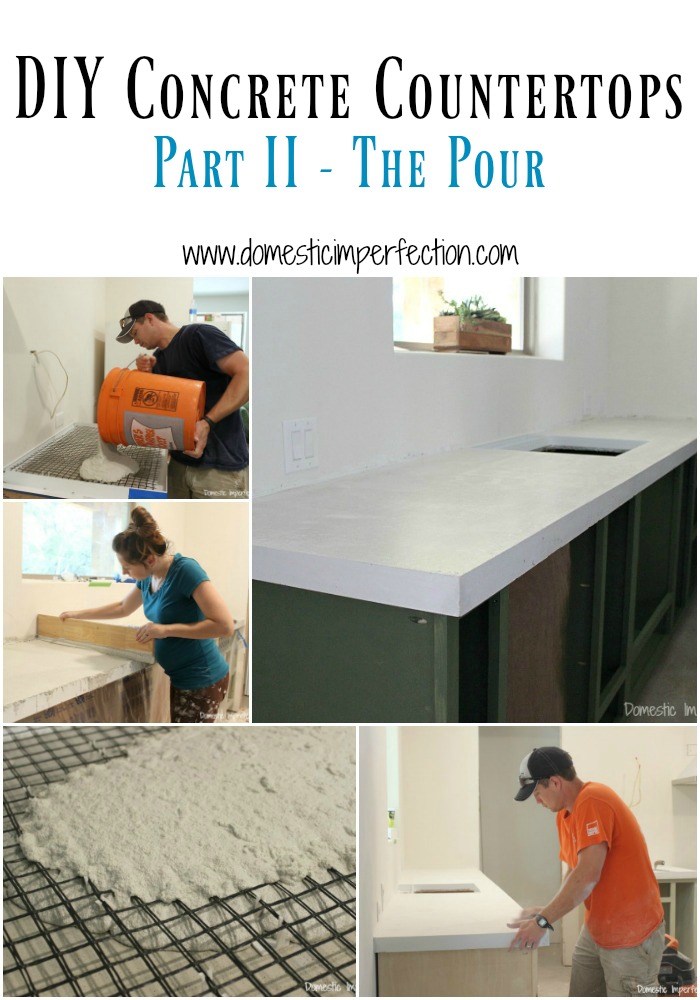
Pouring the concrete might seem straightforward, but there’s definitely an art to it. I learned to pour slowly and methodically, working from one end to the other rather than dumping concrete randomly into my form. This approach helps prevent air pockets from getting trapped, which would otherwise create small holes and imperfections in your finished surface. I also found that pouring from a lower height reduces the amount of air that gets mixed in during the pour itself.
Vibration changed everything for me. My first countertop attempt looked like the surface of the moon because I didn’t properly vibrate out the air bubbles. Now I use a palm sander without sandpaper attached, running it along the outside of my forms for several minutes. I can actually watch the air bubbles rise to the surface and pop. For really smooth results, I also gently tap the forms with a rubber mallet while vibrating. The goal is to get that concrete to settle completely and release every last bubble.
I discovered that you can over-vibrate, though, which causes the heavier aggregates to sink and the cream to rise unevenly. My sweet spot is about three to five minutes of vibration, checking frequently to see when bubbles stop appearing. If you see the surface becoming soupy or water pooling excessively, you’ve gone too far. It takes practice to recognize that perfect moment, but once you get it, your surfaces will be dramatically smoother right from the start.

Troweling and Screeding for Smoothness
The initial screeding process is where you really start shaping that smooth surface. I use a straight board that spans my entire form, sawing it back and forth while gradually moving forward. This levels the concrete and begins to bring the finer particles to the surface. The first time I did this, I rushed it and ended up with low spots that haunted me through every subsequent step. Now I take my time, making multiple passes and filling any depressions that appear.
After screeding comes the waiting game. I learned to watch for the concrete to lose its sheen as water evaporates from the surface. This is when I start my first troweling pass with a magnesium float, using smooth, sweeping motions. I keep the float nearly flat against the surface and work in overlapping arcs. This stage brings up more cream and begins to close the surface. If you trowel too early while there’s still surface water, you’ll weaken the top layer. Too late, and the concrete becomes too stiff to work properly.
My secret weapon for achieving that truly smooth finish is multiple troweling passes with a steel trowel. I typically do three to four passes, waiting between each for the surface to firm up slightly. With each pass, I apply more pressure and hold the trowel at a slightly steeper angle. By the final pass, I’m burnishing the surface with significant pressure, and I can feel the trowel gliding smoothly as the concrete becomes increasingly dense. This is where patience really pays off, and rushing this process will absolutely show in your final result.
Grinding and Polishing After Curing
Once my concrete had cured for at least a week, I was ready to start the grinding process. This is when you really transform the surface from good to spectacular. I started with a coarse 50-grit diamond pad on my variable-speed polisher, working in overlapping passes across the entire surface. This initial grinding removes any high spots, exposes the aggregate if you want that look, and flattens everything out. The first time I did this, dust went everywhere, so now I always use water to keep dust down and help the pads work more efficiently.
I progressed through increasingly finer grits: 100, 200, 400, 800, 1500, and finally 3000. Each grit removes the scratches from the previous one and makes the surface progressively smoother and more refined. I spent about fifteen minutes per grit level on my standard-sized countertop, making sure to keep the polisher moving and not dwelling in one spot. Skipping grits or rushing through them is a mistake I made early on, and it left visible scratches that required me to go back and redo entire sections with the previous grit.
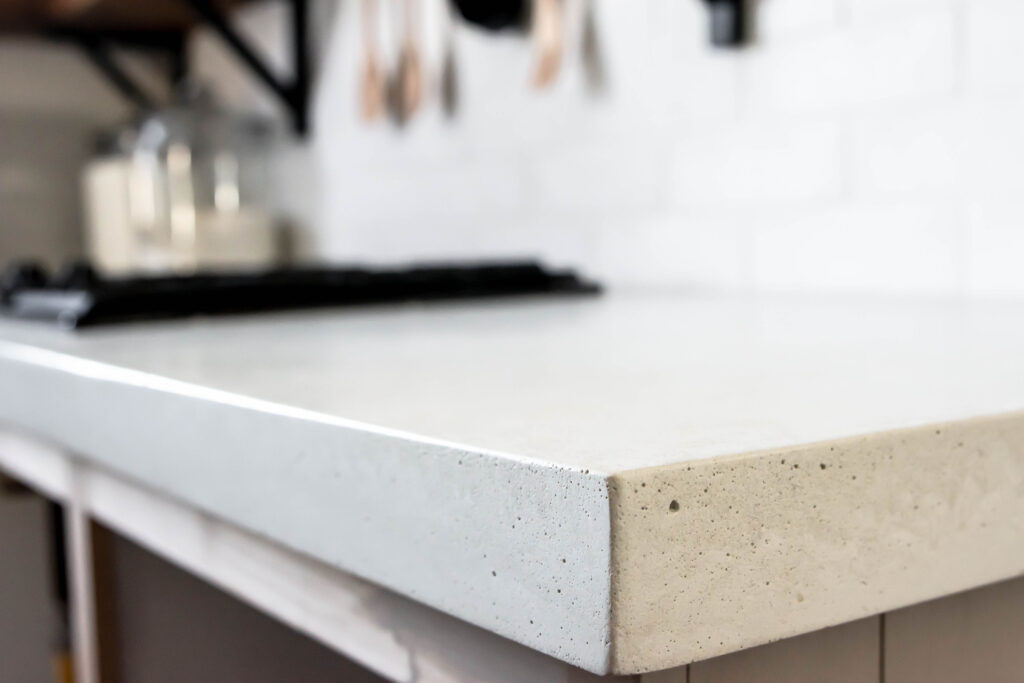
The transformation that happens between 400-grit and 3000-grit is absolutely stunning. Around 800-grit, the surface starts developing a soft sheen. By 1500, it’s noticeably reflective, and at 3000, it looks almost glass-like if you’ve done everything correctly. I found that working wet with each grit and cleaning the surface thoroughly between grits prevents cross-contamination that can cause scratches. The polishing process takes time and patience, but watching that smooth, luminous surface emerge is incredibly satisfying and makes all the effort worthwhile.
Filling Pinholes and Imperfections
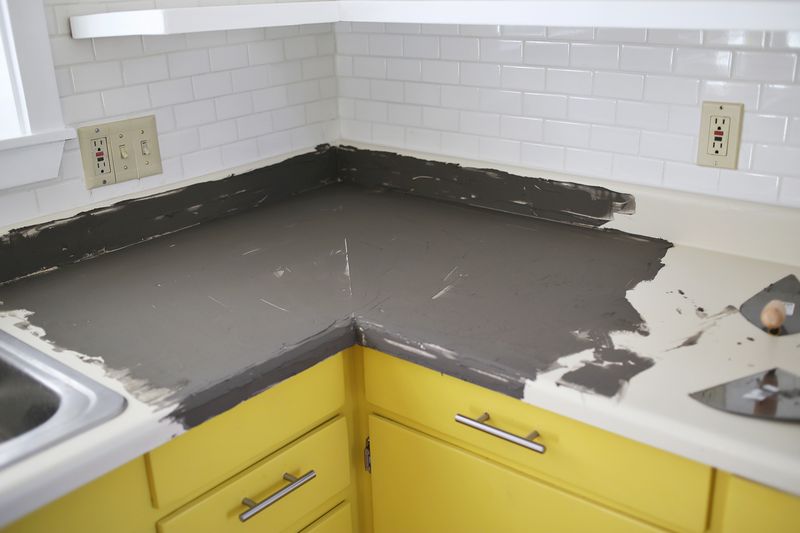
No matter how careful I was, I always ended up with some pinholes and tiny air bubbles on the surface. At first, I panicked, but then I learned that filling these imperfections is a normal part of the process. I make a slurry using the same concrete mix I used for the countertop, but with extra cement to make it finer. I thin it with water until it’s the consistency of heavy cream, then work it into the surface with a squeegee or trowel, pushing it firmly into every hole and imperfection.
The key is applying the slurry to a slightly damp surface, which helps it bond properly. I mist the countertop lightly with water, then spread the slurry across the entire surface, working it in with firm pressure. I make multiple passes from different directions to ensure I’m filling everything. Then I scrape off the excess with the edge of my trowel held nearly perpendicular to the surface. Some people do multiple slurry applications, but I found that one thorough application followed by careful grinding usually handles everything.
After the slurry dries, which takes about 24 hours, I grind and polish again, starting from around 200 or 400-grit, depending on how much material I need to remove. This process blends the filled areas seamlessly with the rest of the surface. I’ve learned not to rush this step or skip the slurry applicatio,n thinking my surface is good enough. Those tiny pinholes become much more visible once you apply sealer, and fixing them afterward is exponentially harder than addressing them now, when you still have the opportunity to create that flawless finish.
DIY White Concrete Countertops – Clover Lane
Sealing for a Perfect Finish
Choosing the right sealer was crucial to maintaining that smooth finish I worked so hard to achieve. I researched extensively and ended up using a penetrating sealer for the first coat, which soaks into the concrete and protects from within without changing the surface texture. I applied it generously with a foam brush, letting it soak in for about fifteen minutes before wiping away any excess. This step protects against staining and moisture penetration while keeping that natural concrete feel I wanted.
For the topcoat, I chose a food-safe, water-based polyurethane sealer that adds a slight sheen and provides a protective barrier. I applied three thin coats rather than one thick coat, which prevents drips, ensures even coverage, and builds up a more durable protective layer. Between coats, I lightly sanded with 400-grit sandpaper to remove any dust particles or minor imperfections that had settled into the previous layer. Each coat made the surface feel smoother and more refined to the touch.
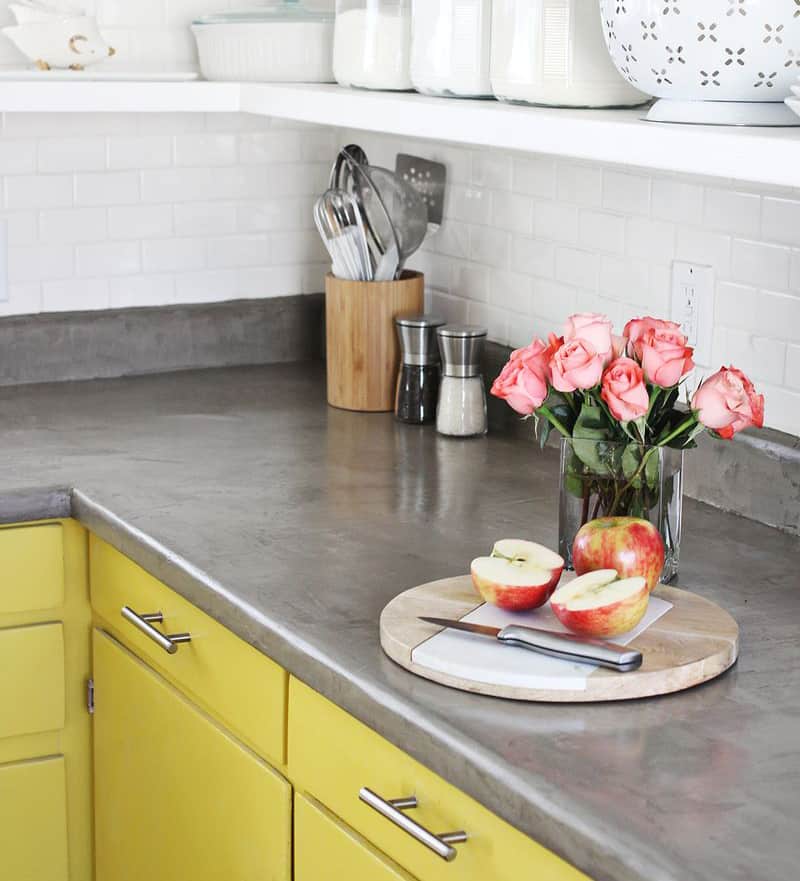
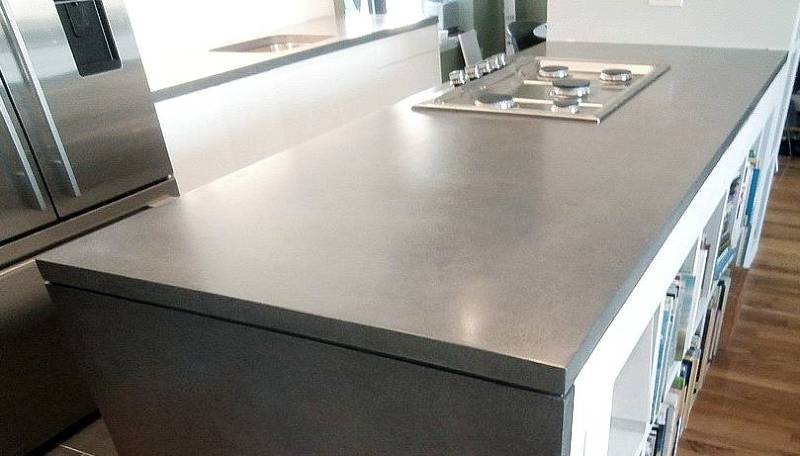
The final result after sealing was absolutely worth all the effort. The surface feels silky smooth, almost like polished stone, and water beads up beautifully on the protected surface. I learned that maintenance matters too; I reapply a coat of the topcoat sealer every year or so to keep the protection strong. Using cutting boards and trivets has become second nature, and these simple precautions help maintain that smooth, beautiful finish that makes everyone who visits my kitchen ask about my countertops and how I achieved such professional-looking results.
How long does it take for concrete countertops to cure before I can start the smoothing process?
I always wait at least seven days before I start grinding and polishing, though the concrete continues to cure for weeks afterward. During those first few days, I keep the surface moist by misting it with water and covering it with plastic sheeting. This slow cure creates a stronger, denser surface that’s easier to polish to a smooth finish. Rushing this process weakens the concrete and can lead to surface problems later.
Can I make existing concrete countertops smoother if they’re already installed?
Absolutely! I actually refinished my bathroom countertops this way. You can grind and polish existing concrete countertops using the same grit progression I mentioned. Start with a coarser grit to level the surface, then work your way through finer grits. You might need to apply a slurry to fill any pinholes, then continue polishing. It’s dusty work, but the transformation is remarkable and much cheaper than replacing them entirely.
What’s the biggest mistake people make when trying to achieve smooth concrete countertops?
From my experience and talking with others, rushing the process is the number one mistake. Whether it’s not vibrating long enough, troweling before the concrete is ready, skipping grit levels during polishing, or not applying enough sealer coats, impatience shows in the final result. Each step builds on the previous one, and cutting corners at any stage compromises your smooth finish. Plan for this project to take several weeks from start to finish.
Do I need special tools to make concrete countertops smooth, or can I use what I already have?
You’ll definitely need some specific tools. I tried using regular sandpaper and a basic sander initially, and it was a disaster. You really need diamond polishing pads in various grits and a variable-speed polisher or grinder. A good steel trowel is essential, and a vibrating tool makes a huge difference. These aren’t everyday tools, but they’re not prohibitively expensive either, and they make the difference between mediocre and professional-looking results.

How smooth can I actually get concrete countertops compared to granite or quartz?
I was amazed at how smooth I could get my concrete, honestly. With proper grinding and polishing through 3000-grit, concrete can achieve a surface that rivals polished stone. It won’t be quite as hard as granite, but the smoothness is comparable. The sealed surface feels silky and luxurious. Some people even polish to higher grits for an even glossier finish, but I found 3000-grit gave me the perfect balance of smoothness and a natural look.
Is the smoothing process difficult for a DIY person, or should I hire a professional?
I’m a fairly handy person, but I had never worked with concrete before this project. The learning curve is real, and my first attempt had some issues that I had to fix. However, with research, patience, and attention to detail, it’s totally doable. I’d recommend practicing on a small test piece first to get comfortable with the techniques. If you’re naturally detail-oriented and don’t mind a physical workout, you can absolutely do this yourself and save thousands of dollars.

Related articles:
- Outdoor Concrete Countertops
- How To Make Concrete Countertops Smooth
- Rustic Concrete Countertops
- Farmhouse Concrete Countertops
- Concrete Countertops Outdoor Kitchen
- How To Stain Concrete Countertops
- DIY Concrete Countertop Mix
- Concrete Countertops Made Easy
- Concrete Countertop Overlay
- Black Concrete Countertops