When I started planning my bathroom renovation, everyone assumed I’d go with granite or marble, like most people do. But I’d fallen in love with concrete countertops after seeing them in a boutique hotel, and I couldn’t shake the idea of having that same industrial-chic look in my own home. The process of choosing, installing, and now living with concrete countertops has been such a journey. I’ve learned that concrete offers incredible versatility, from sleek modern finishes to textured organic looks, and it’s far more customizable than traditional stone. Let me walk you through everything I discovered about concrete bathroom countertops and how they might be perfect for your space, too.
Understanding the Different Types of Concrete Finishes
I had no idea concrete came in so many finish options until I started researching. Polished concrete became my first love, with its smooth, glossy surface that reflects light beautifully and feels almost like glass under your hand. The polishing process exposes the aggregate inside, creating subtle variations and depth that make each countertop unique. I visited showrooms where I could touch different polish levels, from satin to high-gloss, and learned that higher polish means more maintenance but incredible visual impact.
Matte or honed finishes offered a completely different aesthetic that I seriously considered. This finish feels velvety smooth but doesn’t have the shine of polished concrete, creating a more understated, organic look. I loved how the matte surface minimized water spots and fingerprints, which seemed practical for a busy bathroom. The natural texture also felt warmer and less industrial, which would have worked beautifully if I’d wanted a softer overall design.
Textured finishes surprised me with their artistic possibilities during my exploration. My concrete fabricator showed me samples with intentional imperfections, exposed aggregate, and even hand-troweled surfaces that looked like they’d aged naturally over decades. Some had ridges and valleys that caught light dramatically, while others incorporated fossils or shells for coastal themes. I ultimately chose a lightly textured finish that added character without making the surface difficult to clean or uncomfortable for daily use.

Exploring Custom Color and Staining Options
The color possibilities completely changed my perspective on what concrete could be. I’d assumed concrete meant gray, but integral color mixes allow any shade imaginable before the concrete even sets. My fabricator showed me samples ranging from warm earth tones to cool blues and even dramatic blacks. I chose a warm charcoal gray that complements my white subway tiles perfectly while adding sophisticated depth to the space.
Acid staining opened up even more creative options that I hadn’t anticipated. This chemical process reacts with the concrete to create variegated, organic patterns that look almost like watercolor paintings. I saw countertops with rust oranges, sage greens, and deep browns that developed naturally through the staining process. The unpredictability appealed to my artistic side, though I ultimately wanted more control over my final color, so I skipped this technique for my own bathroom.
I also learned about layering techniques where multiple colors create depth and dimension. Some fabricators pour white concrete and then apply colored sealers or stains to create subtle variations. Others embed colored glass or stones into the surface for sparkle and visual interest. I kept my design relatively simple with solid color, but I incorporated tiny copper flecks in the mix that catch bathroom lighting beautifully and add unexpected warmth to the gray base.

Incorporating Integrated Sinks and Unique Edge Profiles
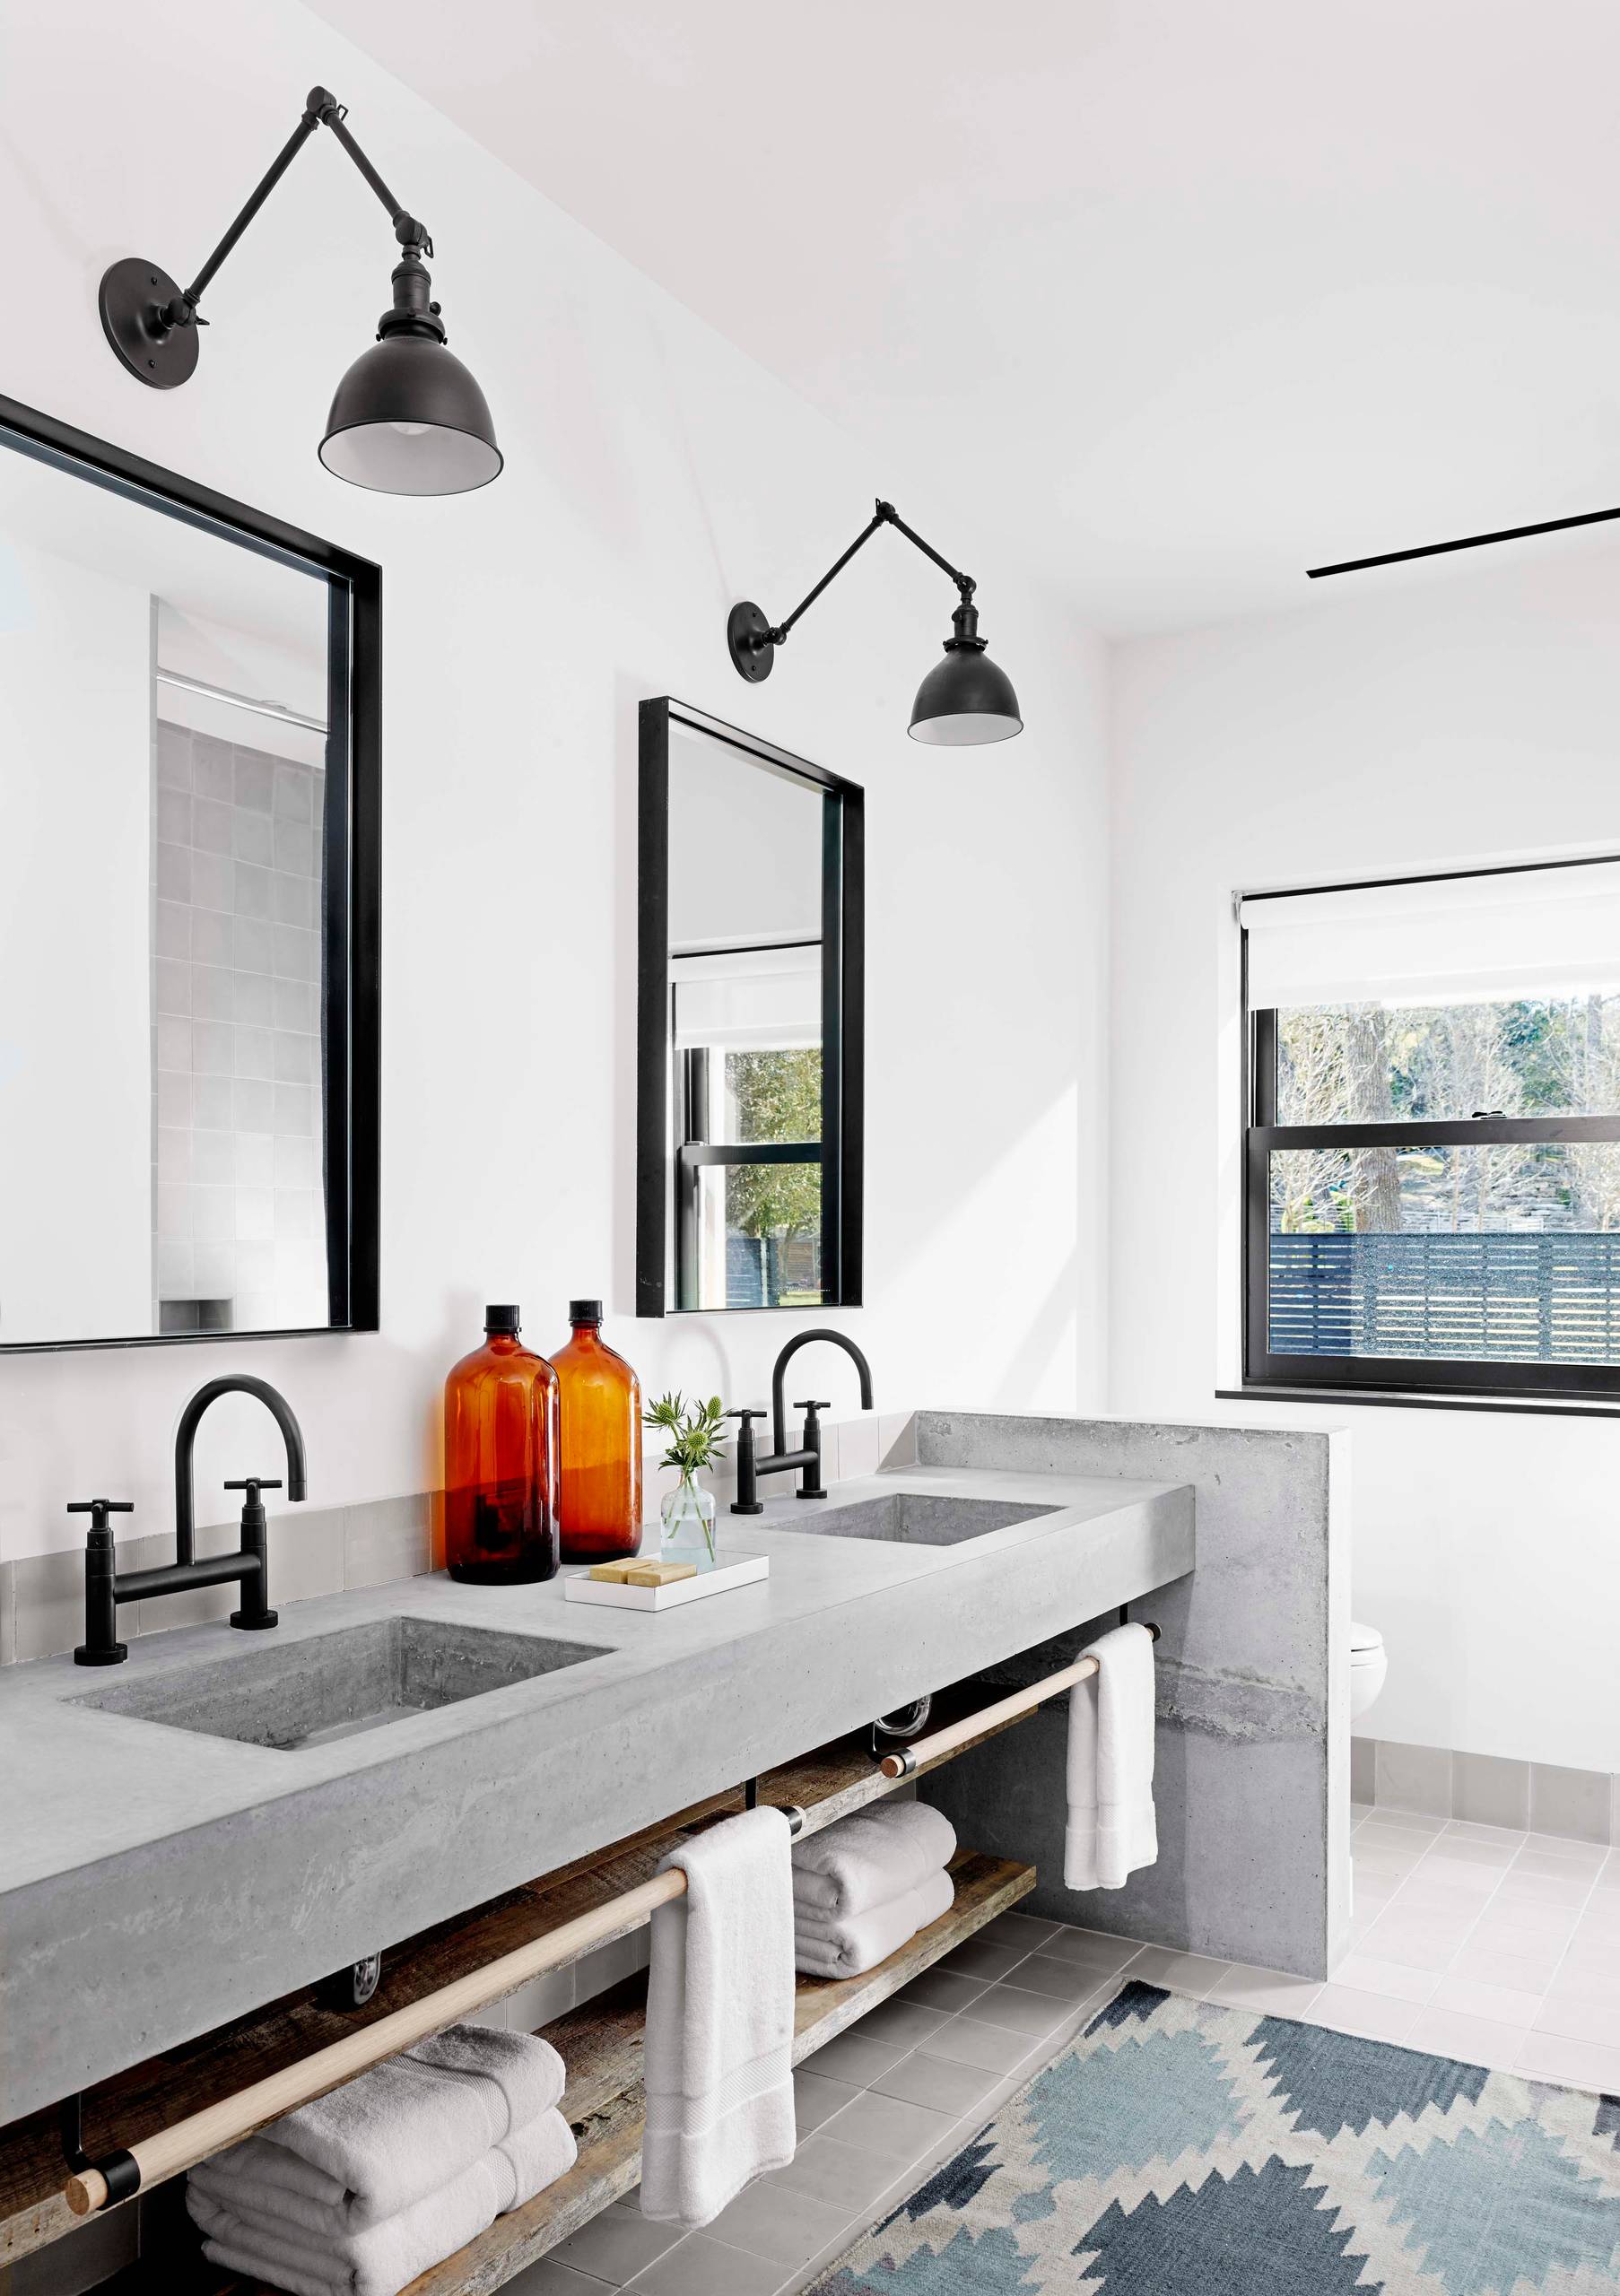
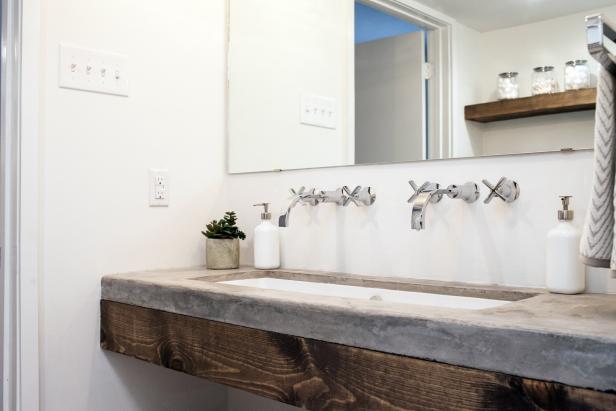
The integrated sink option completely sold me on concrete for my bathroom. Having the sink and countertop formed as one seamless piece eliminates that annoying gap where gunk accumulates with traditional undermount or drop-in sinks. My fabricator created a rectangular vessel-style sink that emerges from the counter like a sculpture. The cleaning is so much easier without seams, and the cohesive look feels incredibly high-end and intentional.
Edge profiles offered another way to personalize my countertop beyond standard square edges. I chose a thick, chunky edge at two inches that makes my countertop feel substantial and anchored. The weight and presence create a focal point in my bathroom that guests always notice and comment on. Other options included beveled edges, rounded bullnose profiles, or even live-edge looks that mimic natural stone, but the modern, blocky edge suited my industrial aesthetic perfectly.
I also considered a trough-style integrated sink that would have accommodated two faucets for a double vanity effect. This long, narrow sink style looks stunning and maximizes counter space around the basin. I didn’t have room in my small bathroom, but I’ve seen it executed beautifully in larger spaces. The ability to customize every aspect of the sink, from depth to shape to drain placement, gave me design freedom that prefabricated options simply can’t match.
Adding Decorative Elements and Personal Touches
Embedding objects into concrete became my favorite way to add personality. I incorporated small pieces of beach glass I’d collected over years of coastal vacations, scattering them throughout the surface like little treasures. They’re sealed beneath the top layer but visible through the concrete, creating a personal touch that sparks memories every time I use the bathroom. The possibilities are endless, from coins to stones to shells or even meaningful small objects.
Inlays allowed me to add contrasting materials in planned patterns. I seriously considered thin strips of brass or copper running through my concrete like veins, which would have created stunning visual interest. Some people inlay wood, tiles, or even LED lighting strips for a dramatic effect. I ultimately kept things simple, but seeing these creative combinations at the showroom expanded my understanding of concrete’s versatility beyond traditional applications.
Custom cut-outs and recesses added functional artistry that I didn’t anticipate. My fabricator created a small recessed area near the sink for soap and toothbrush storage, keeping items contained and the counter less cluttered. These practical details can be formed directly into the concrete during casting. I’ve seen counters with built-in draining grooves, recessed outlets, and even carved patterns that serve both decorative and functional purposes, proving concrete can be both beautiful and brilliantly practical.

Sealing and Protecting Your Concrete Investment
Sealing my concrete properly became my biggest concern after installation. Concrete is porous by nature, so without proper sealing, it absorbs water, stains, and develops etching from acidic products like toothpaste and cosmetics. My fabricator applied multiple coats of penetrating sealer followed by a topical sealer for maximum protection. I learned that maintenance would require resealing every one to three year,s depending on use, which felt manageable for the look I loved.
Different sealer types offered varying levels of protection and appearance. Penetrating sealers soak into the concrete and protect from within while maintaining the natural matte look I wanted. Topical sealers sit on the surface and provide a protective barrier with options for different sheen levels. I chose a combination approach, getting protection deep in the concrete plus a satin-finish topical sealer that’s easy to reapply when needed without professional help.
Daily maintenance proved simpler than I’d feared after living with my countertop. I wipe it down with pH-neutral cleaner and avoid harsh chemicals or abrasive scrubbers that could damage the sealer. I immediately clean up spills, especially anything acidic like perfume or nail polish remover. Every few months I apply a coat of wax recommended by my fabricator, which takes about 15 minutes and helps maintain the sealer’s protective layer. The routine became second nature quickly.

Weighing DIY Versus Professional Installation
I seriously contemplated DIYing my concrete countertop to save money. Concrete mix is relatively inexpensive, and countless online tutorials have made it look achievable. I watched videos of people casting countertops in place or building forms in their garages. The appeal of creating something entirely by hand and customizing every detail was strong. However, after calculating the cost of materials, tools, and forms, plus considering my limited experience, I decided to hire a professional.
Professional fabricators brought expertise I simply didn’t have for achieving the finish quality I wanted. They understood proper reinforcement to prevent cracking, optimal mix ratios for bathroom moisture exposure, and techniques for avoiding air bubbles and ensuring level surfaces. My fabricator templated my exact space, cast the counter in their shop where they controlled conditions perfectly, then installed it seamlessly. The precision and finish quality justified the higher cost compared to my amateur attempts.
The investment in professional work gave me warranty protection and peace of mind. My fabricator guaranteed their work for five years against cracking or major defects. If I’d DIYed and something went wrong, I’d be starting over from scratch at full expense. For smaller projects like a simple rectangular counter with a basic finish, DIY might work well for handy people. But my integrated sink and specific finish requirements needed professional expertise to execute properly and beautifully.
How much do concrete bathroom countertops typically cost?
Professional concrete countertops cost me about $100-$150 per square foot installed, comparable to high-end granite or marble. Simple designs run cheaper, while integrated sinks, decorative elements, and complex finishes increase costs. DIY projects can run $50-$75 per square foot for materials if you’re willing to do the labor. Custom concrete costs more upfront, but the personalization and uniqueness justified the investment for me.
Will concrete countertops crack over time?
Hairline cracks can develop, though proper installation minimizes this risk significantly. My fabricator used steel reinforcement and fiber additives in the mix to prevent cracking. I’ve had mine for three years without issues. Small cracks that do appear are often viewed as a characteristic that adds to concrete’s organic aesthetic. Proper sealing prevents cracks from becoming functional problems by keeping water from penetrating beneath the surface.

How do concrete counters handle bathroom moisture and humidity?
Properly sealed concrete handles bathroom moisture excellently. The multiple sealer layers my fabricator applied create a waterproof barrier that protects the porous concrete underneath. I run a bathroom fan during showers and wipe up standing water, standard bathroom practices. After three years, I’ve seen no water damage, staining, or deterioration. Regular resealing every few years maintains this protection as long as you own the countertop.
Are concrete countertops difficult to clean and maintain daily?
Daily maintenance is actually simple and similar to other countertop materials. I wipe mine with mild soap and water or a pH-neutral cleaner made for stone. I avoid harsh chemicals, bleach, and abrasive scrubbers that could damage the sealer. Spills wipe up easily when addressed promptly. The quarterly wax application takes minimal time. Overall, maintenance requires awareness and gentleness but isn’t burdensome compared to the look and customization I achieved.

Can I place hot styling tools directly on concrete counters?
I avoid placing very hot items directly on my concrete to protect the sealer, not the concrete itself. The sealer can discolor or be damaged from extreme heat. I use a heat-resistant mat under my curling iron and flat iron, just like I would with most countertop materials. Brief contact with warm items causes no issues. This minor precaution prevents potential damage to the protective finish that keeps my countertop looking pristine.
How long does installation take from order to completion?
My entire process took about six weeks from initial consultation to installation. This included design meetings, template creation, a three-week fabrication period while the concrete cured properly, and the final installation day. The actual installation took only a few hours since everything was prefabricated. Rush jobs are possible, but proper curing produces stronger, better-performing countertops. Plan and don’t rush the process for the best results and durability.

Palomar Concrete Vanity Top with Integrated Sink Native Trails

Concrete Countertops
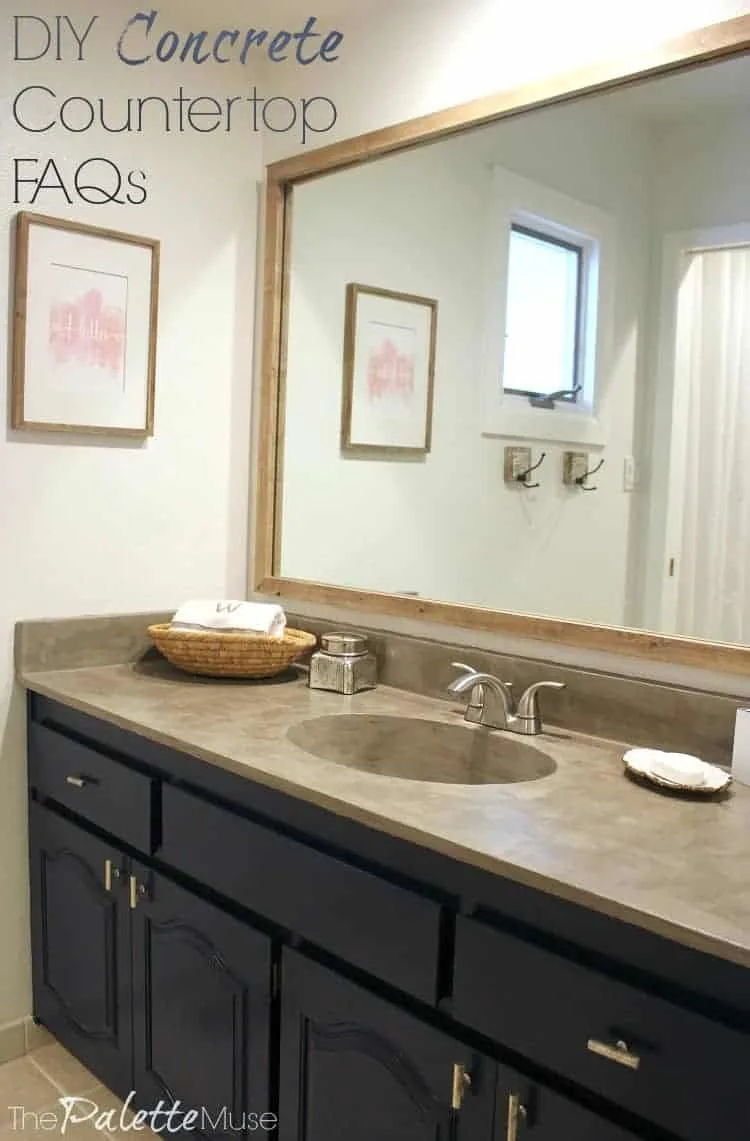
DIY Concrete Bathroom Countertops
Related articles: