When I started planning my kitchen renovation three years ago, I knew I wanted countertops that would bring character and warmth to the space rather than the cold, contemporary look of polished granite. That’s when I discovered antique granite finishes, also called leathered or honed granite, and I instantly fell in love. The textured, matte surface has this incredibly rich, old-world quality that makes my kitchen feel established and sophisticated. I spent months researching different granite colors, finishes, and edge profiles before making my final selections. Living with these countertops has taught me so much about their beauty, durability, and maintenance needs, and I’m excited to share what I’ve learned through both research and real-world experience.
Understanding Antique Finish Versus Polished Granite
I’ll be honest, before my renovation, I thought all granite countertops had that shiny, reflective surface I’d seen in countless kitchens. Learning about antique finishes opened up a completely different aesthetic possibility that aligned much better with my design vision. The antique finish, sometimes called a leather finish, is created by running diamond-tipped brushes over honed granite to create subtle texture and dimension. When I first touched a sample at the stone yard, I was struck by how soft and natural it felt compared to the slick surface of polished granite.
The fabricator explained that the antiquing process brings out the natural character of the stone in ways polishing never could. I watched them demonstrate the technique on a piece of granite, and I could see how the brushing accentuated the stone’s inherent texture and crystalline structure. The result is a surface that has depth and visual interest from every angle, catching light differently throughout the day. In my kitchen, the morning sun creates subtle shadows across the textured surface that I find absolutely beautiful, and it changes the appearance of the countertops in the most wonderful way.
What really sold me on the antique finish was how it minimized the appearance of the busy patterns in some granite varieties. I chose a granite with a lot of movement and color variation, and I was worried it might be overwhelming with a high polish. The antique finish softened the bold patterns just enough to make them feel sophisticated rather than chaotic. I’ve noticed that fingerprints, water spots, and minor scratches are also far less visible on the textured surface compared to my friend’s polished granite countertops. This practical benefit has made daily life in my kitchen much more relaxed and enjoyable.

Selecting the Right Granite Color for an Antique Look
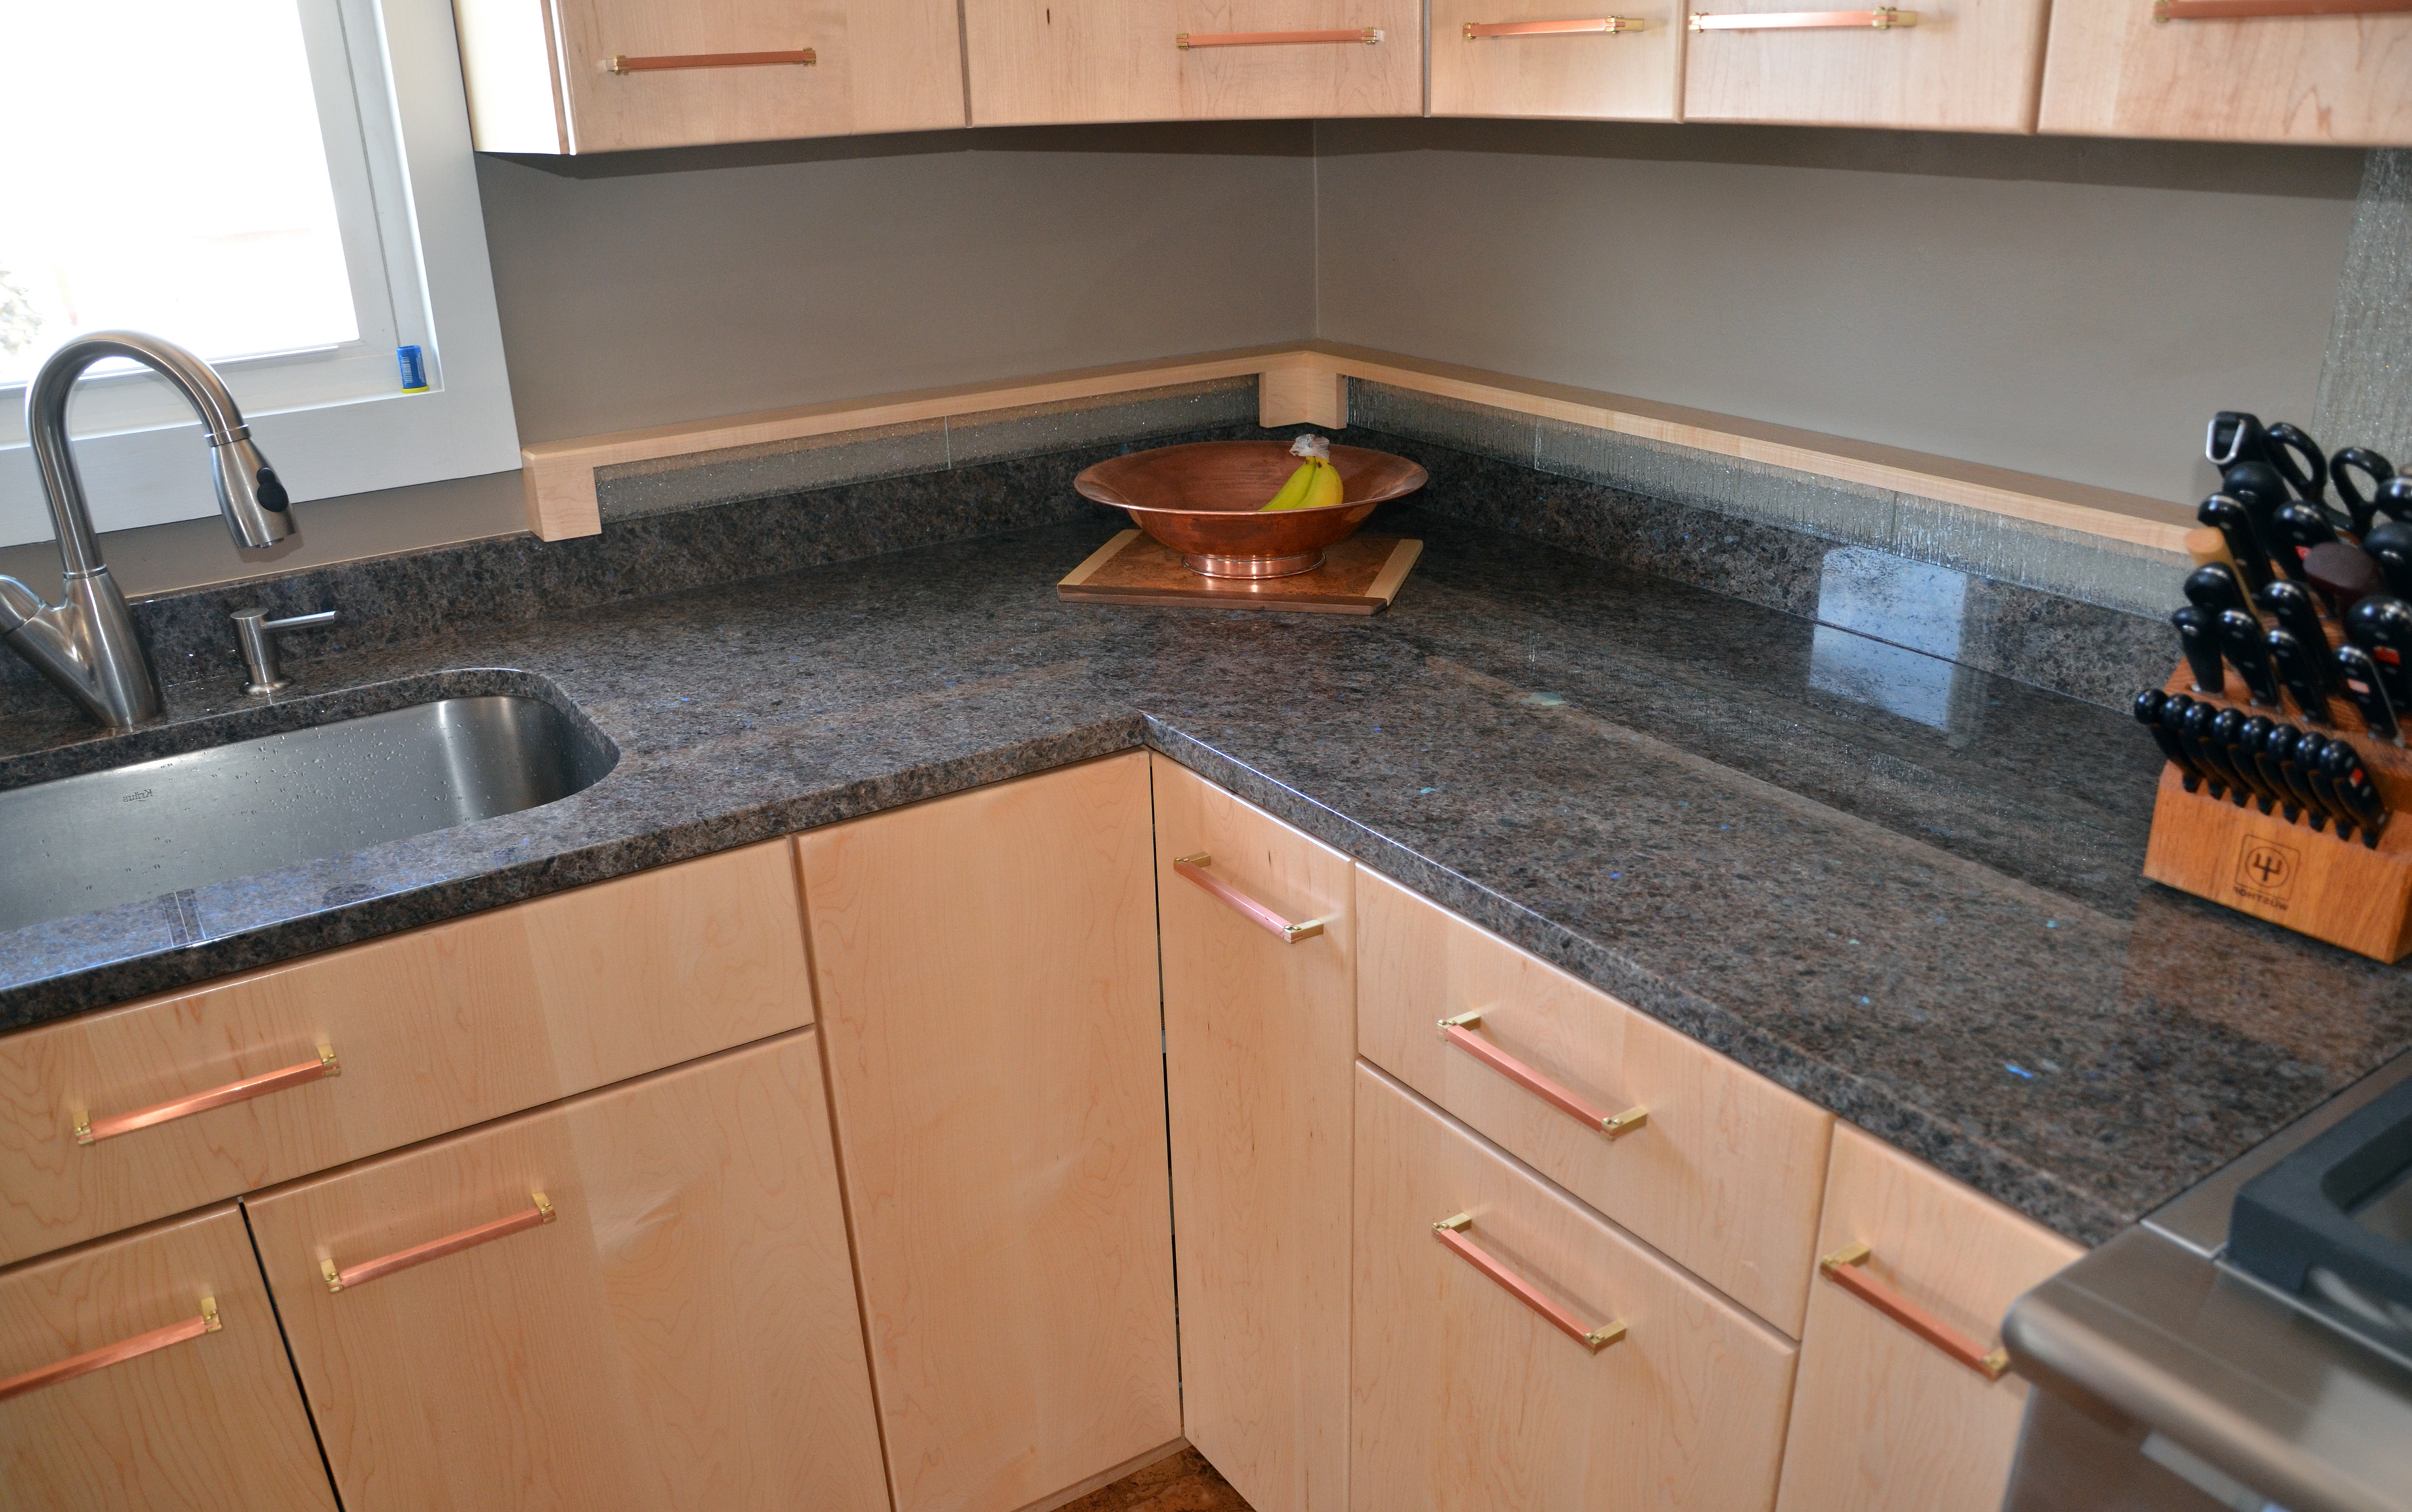
Choosing the granite color for my countertops was the most time-consuming part of my renovation, and I must have looked at a hundred different slabs before making my decision. I ultimately selected a warm brown granite with cream, gold, and black flecks that has an earthy, natural quality. I loved how the antique finish brought out the warmer tones in the stone, creating a rich, chocolatey appearance that complements my cherry cabinets beautifully. The color reads as neutral enough to work with different design elements, but it has enough character to be interesting.
I seriously considered a black granite with gold veining for a dramatic look, and I still think about how stunning that would have been. The antique finish on darker granites creates an incredibly sophisticated and almost velvety appearance. However, I ultimately decided that lighter colors would make my kitchen feel more open and inviting, which was important in my space with limited natural light. I’ve seen friends use dark antique granite in kitchens with white cabinets, and the contrast is absolutely striking. The choice really depends on your overall design goals and lighting conditions.
One lesson I learned during the selection process is that you need to look at full slabs rather than small samples to truly understand how a granite will look in your space. I visited the stone yard three times, examining different slabs under various lighting conditions. I even took photos and viewed them on my phone in my actual kitchen to get a sense of how the colors would work. Granite is a natural material, so every slab is unique with different patterns and color concentrations. I spent time walking around the yard, comparing options, and I’m so glad I took that time because I found a slab with the perfect balance of movement and subtlety for my taste.

Edge Profiles That Enhance the Antique Aesthetic
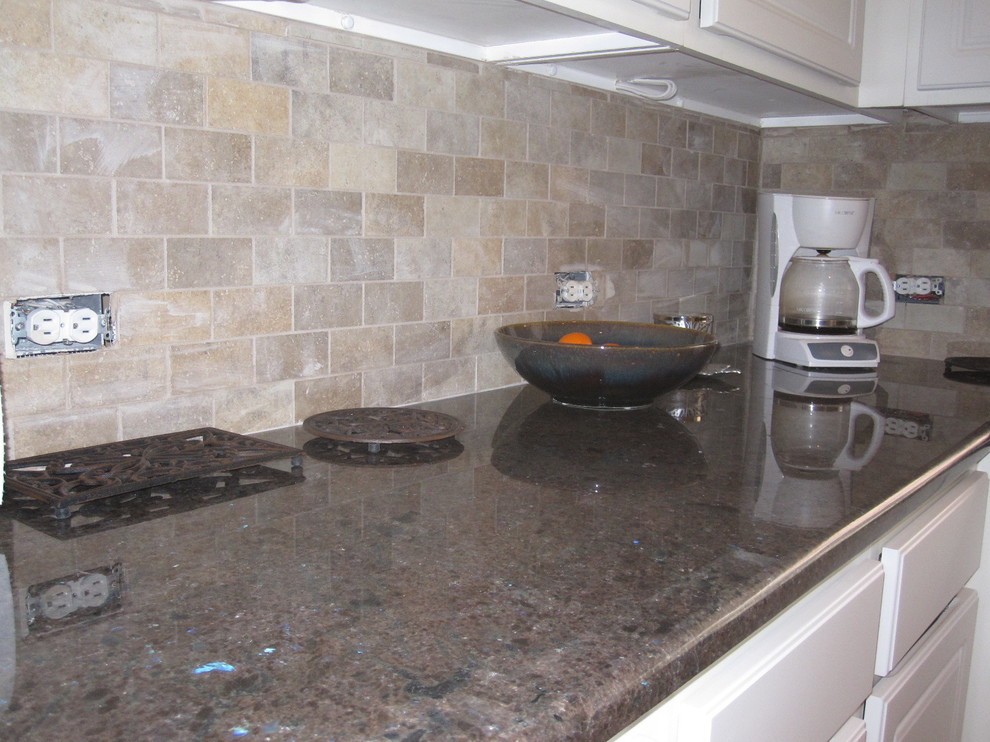
The edge profile I chose for my countertops made a bigger impact on the overall look than I ever imagined it would. I selected a chiseled edge, which has an intentionally rough, hand-hewn appearance that perfectly complements the antique finish. The irregular edge looks like it was carved by hand, and it enhances that old-world, rustic quality I was after. When people visit my kitchen for the first time, the edge detail is often the first thing they notice and comment on because it’s so distinctive and unexpected compared to standard beveled or bullnose edges.
My fabricator showed me several edge options that work particularly well with antique granite, and I learned that some edges suit this finish better than others. Beyond the chiseled edge I chose, I considered an ogee edge, which has that classic S-curve profile that’s been used for centuries. I also looked at a simple eased edge, which has just a slight roundover that’s understated and timeless. For my island, I actually went with a different edge, a more subtle half-bullnose, to create some variety while maintaining the overall aesthetic. Having two different edge styles added visual interest without feeling disjointed.
The thickness of the granite also influenced my edge decisions, and I’m really happy I opted for thicker countertops. I chose 3cm granite rather than the thinner 2cm option, which gave the countertopsa more substantial presence and allowed for more dramatic edge profiles. The added thickness makes the chiseled edge really pop and creates shadows that emphasize the hand-crafted quality. My fabricator mentioned that thicker granite is also more durable and less prone to chipping, which has proven true in my experience. The investment in thicker material was worth it for both the aesthetic impact and the added durability.

Installation Considerations and Timeline
I learned during my renovation that granite countertop installation is a multi-step process that requires careful planning and patience. The first step was templating, where my fabricator came to measure my existing cabinets with the sink base removed. They created precise templates using thin plywood and laser measurements, marking exactly where my sink and cooktop would be positioned. This process took about two hours, and I’m glad I was home to answer questions about outlet placement and overhang preferences. Small decisions made during templating had big impacts on the final result.
The fabrication period took about three weeks from templating to installation, which was longer than I expected but pretty standard for custom granite work. During this time, the fabricator cut my slabs, applied the antique finish, created the edge profiles, and cut out the sink and cooktop openings. They called me to the shop for a final inspection before installation, which I highly recommend doing if possible. I was able to see the finished pieces and approve everything before they came to my house, which gave me peace of mind and prevented any unwelcome surprises on installation day.
Installation day was both exciting and nerve-wracking. The installers arrived early with my countertop pieces carefully wrapped and transported on a specialized truck. The actual installation took about six hours for my kitchen, which included the perimeter countertops and a large island. They used clear epoxy to join the seams and carefully leveled everything to ensure proper support. I watched them work and was impressed by how precise and careful they were, especially when lowering the heavy pieces into place. They sealed the countertops before leaving, and I had to wait 24 hours before using my sink or putting anything on the surfaces. The wait was hard, but seeing the finished result was absolutely worth it.

Sealing and Maintaining Your Antique Granite
I quickly learned that antique finish granite requires slightly different maintenance than polished granite, and understanding this from the start has helped me keep my countertops looking beautiful. The textured surface has more surface area than polished granite, which means it’s slightly more porous and benefits from regular sealing. My installer sealed the countertops initially, and I reseal them myself every six months using a high-quality granite sealer. The process takes about 30 minutes and is incredibly straightforward. I just apply the sealer with a cloth, let it sit for a few minutes, then buff it dry.
My daily cleaning routine is simple and keeps my countertops in great shape without much effort. I use warm water and a few drops of dish soap on a soft cloth or sponge for everyday cleaning, avoiding harsh chemicals or acidic cleaners that could damage the seal or etch the surface. For tougher messes, I use a pH-neutral stone cleaner that’s specifically formulated for granite. I learned early on to clean up spills promptly, especially acidic substances like lemon juice, wine, or tomato sauce, because even sealed granite can stain if liquids are left sitting for extended periods.
One of the best investments I made was a set of trivets and cutting boards to protect my countertops from heat and knife marks. While granite is heat resistant, I don’t take chances with extremely hot pots and pans placed directly on the surface. I always use a trivet or hot pad, which has become second nature after three years. I also never cut directly on the granite, even though it’s hard enough to dull knives. These protective habits, combined with regular sealing and gentle cleaning, have kept my antique granite looking nearly as good as the day it was installed. The textured finish has been remarkably forgiving of minor scratches and wear.

Coordinating Antique Granite With Cabinetry and Backsplash
Getting the relationship between my countertops, cabinets, and backsplash right was crucial for creating the cohesive look I wanted. I chose warm cherry cabinets that echo the reddish-brown tones in my antique granite, and the combination creates such a rich, inviting atmosphere in my kitchen. The key was making sure the wood tones complemented rather than competed with the stone. I brought granite samples to the cabinet showroom and held them against different wood species and stains until I found the perfect match. This extra effort made all the difference in achieving a harmonious design.
For my backsplash, I selected a simple cream subway tile with a tumbled finish that has the same soft, matte quality as my antique granite. I was tempted to use a more elaborate tile with patterns or metallic accents, but I’m glad I kept it simple. The subway tile provides a neutral backdrop that lets both the granite and the cabinets shine without creating visual competition. I used a warm beige grout that coordinates with the lighter tones in the granite, which tied everything together beautifully. The overall effect is classic and timeless rather than trendy or busy.
I also paid careful attention to hardware and fixture finishes to complement my antique granite. I chose oil-rubbed bronze cabinet pulls and faucets that have an aged, hand-rubbed appearance similar to the textured quality of the granite. The darker metal provides nice contrast against the cabinets while coordinating with the black flecks in the stone. I considered brushed nickel, which would have been beautiful too, but the bronze felt more appropriate for the old-world aesthetic I was creating. Every element works together to tell a cohesive design story, and the antique granite serves as the anchor that grounds all these choices.

Cost Analysis and Long-Term Value
When I was budgeting for my kitchen renovation, I discovered that antique finish granite actually costs slightly more than standard polished granite due to the additional fabrication steps required. I paid about $65 per square foot installed for my mid-range granite with the antique finish, compared to about $55 per square foot I was quoted for the same stone with a standard polish. The extra $10 per square foot added up to about $800 more for my 80 square feet of countertops, but I considered it a worthwhile investment for the unique aesthetic I wanted.
The cost of antique granite varies significantly based on the rarity and origin of the stone you choose. I selected a relatively common granite that’s quarried domestically, which kept costs reasonable. I looked at some exotic varieties with dramatic patterns that were priced at $100 to $150 per square foot, which was beyond my budget. However, even at the mid-range price point, I feel like I got incredible value. The quality and durability of granite means these countertops will likely last as long as I own my home, making the per-year cost very reasonable when I think about it over a 20 or 30-year timespan.
From a resale perspective, I’ve learned that quality granite countertops are always a selling point for homes, and the antique finish appeals to buyers looking for character and craftsmanship. My real estate agent friend mentioned that unique details like antique granite can help a home stand out in the market and may appeal to buyers tired of seeing the same builder-grade finishes everywhere. While I didn’t choose my countertops with resale in mind, it’s reassuring to know that my investment adds real value to my home. More importantly, I love them every single day, which is the true measure of their worth.
What’s the difference between antique, leathered, and honed granite finishes?
From my research and experience, these terms are often used interchangeably, though there are subtle differences. Honed granite is smooth but matte, without texture. Leathered or antique finishes take honed granite and add texture through diamond-brush techniques. My fabricator called my finish “antique,” but others might call it “leathered.” The result is similar, a textured, matte surface with soft sheen. I recommend asking to see and feel samples rather than relying on terminology alone, since different fabricators may use these terms differently.
Is antique granite more difficult to clean than polished granite?
I’ve found it’s actually easier to maintain in daily use. The textured surface hides fingerprints, water spots, and minor marks much better than shiny polished granite. However, the increased surface area means I’m more diligent about sealing every six months. My cleaning routine is simple, just soap and water for daily use, and I avoid acidic cleaners. Spills need to be wiped up relatively quickly, but I haven’t found this burdensome. The forgiving nature of the finish means my countertops always look clean and well-maintained.
Can antique granite chip or scratch more easily than polished granite?
The antique finish doesn’t make granite more susceptible to damage; the hardness of the stone itself determines durability. My countertops have held up beautifully over three years with two active kids. I’ve accidentally dropped heavy pots and utensils without causing chips. The textured finish actually makes minor scratches less visible than they would be on polished surfaces. I still use cutting boards and trivets as precautions, but I’ve found antique granite to be extremely durable and forgiving of everyday kitchen use.
How much does it cost to have granite refinished with an antique texture?
I looked into this option for my bathroom vanity that has polished granite. Refinishing existing granite with an antique finish costs around $15 to $30 per square foot, depending on your location and the complexity of the job. This is much less expensive than replacing countertops entirely. However, the granite needs to be thick enough to withstand the brushing process, and some granites don’t take the antique finish as well as others. I’d recommend getting quotes from multiple fabricators who specialize in this type of refinishing work.

Does antique granite work in bathrooms as well as kitchens?
Absolutely! I used the same granite with an antique finish for my master bathroom vanity, and it’s perfect for that application. The matte surface doesn’t show water spots from splashing at the sink, which is a huge practical benefit. The textured finish adds warmth and luxury to the bathroom in a way polished stone wouldn’t. I sealed it the same way as my kitchen counters, and maintenance has been equally straightforward. The antique finish is actually ideal for bathrooms where you want elegance without the cold, slick feel of polished stone.
Will the antique finish wear down or change over time?
After three years, my countertops look essentially the same as on installation day. The texture is permanent since it’s mechanically created in the stone itself, not a coating or surface treatment. I’ve noticed very slight softening in the highest-use areas near my sink and cooktop, but it’s barely perceptible and actually adds to the authentic aged quality I love. Regular sealing protects the stone from staining and keeps it looking great. Based on my experience and what my fabricator told me, I expect these countertops to last for decades with proper care.

Related articles: