Hey there! Today, I want to talk to you about a common issue with laminate countertops: bubbles. If you’ve noticed bubbles forming on your laminate countertop, don’t worry! Repairing them is a relatively straightforward process.
Before diving into the repair, it’s essential to understand why bubbles occur. Bubbles in laminate countertops typically happen when moisture seeps into the layers of the laminate, causing them to separate and create air pockets. These bubbles can be unsightly and may lead to further damage if left unattended. But fear not, you can fix them!

Here’s a step-by-step guide to repairing laminate countertop bubbles:
- Gather your materials: You’ll need a utility knife, a small roller, contact cement, a putty knife, and a heavy object like a book or a board.
- Start by identifying the bubble area. Carefully examine the countertop surface to locate the bubbles and determine their size and extent.
- Using the utility knife, make a small incision at one end of the bubble. Be careful not to cut too deep; you want to puncture the laminate layer without damaging the countertop substrate.
- Once you’ve made the incision, apply contact cement to both the underside of the laminate and the substrate. Make sure to follow the manufacturer’s instructions for proper application. Allow the cement to dry until it becomes tacky.
- Gently press down on the laminate, starting from the incision point and working toward the edges of the bubble. Use the small roller to apply even pressure and ensure proper adhesion between the layers.
- After pressing down the laminate, use a putty knife to remove any excess cement that may have squeezed out. This will help create a smooth and seamless repair.
- Place a heavy object, such as a book or a board, on the repaired area. Leave it there for a few hours or overnight to allow the cement to cure and bond the layers together fully.
- Once the cement has cured, remove the weight and check the repaired area. It should now be flat and free from bubbles. If you notice any remaining imperfections, you can gently sand the surface to achieve a smooth finish.
And voila! Your laminate countertop bubble is now repaired and looking good as new.

Remember, preventing future bubbles is essential. Avoid exposing your laminate countertop to excessive moisture, and promptly clean up any spills. Regular maintenance and care will help extend the lifespan of your countertop and minimize the chances of bubble formation.
With a little patience and the right tools, you can successfully repair bubbles in your laminate countertop. So don’t let those bubbles bother you any longer—take action and restore the beauty and functionality of your countertop in no time.

Worktop Bubble DIYnot Forums
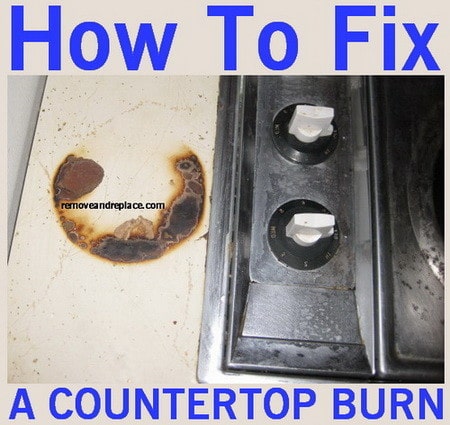
DIY How to Fix a Burnt Laminate Countertop?

Getting Bubble Marks Off a Laminate Countertop

How to fix a bubble in a laminate countertop or work table top

How To Fix And Remove Laminate Countertop Burns And Scratches

How To Fix And Remove Laminate Countertop Burns And Scratches

DIY Furniture Repair Veneer Bubble Repair

Related articles:
- Retro Laminate Countertops
- Laminate Countertops For Bathroom
- Black Marble Laminate Countertop
- Painting Kitchen Laminate Countertops
- Quartz Laminate Countertops
- Laminate Countertops Installation
- Laminate Countertop For Kitchen Island
- Kitchen Island Laminate Countertops
- Cheap Laminate Countertops
- Laminate Countertops That Look Like Stone
Fixing Laminate Countertop Bubbles: A Step-by-Step Guide
Laminate countertops are a popular choice for kitchens and bathrooms due to their durability and affordability. However, over time, these countertops can develop bubbles, which can be unsightly and potentially weaken the structure of the countertop.
Fortunately, repairing a laminate countertop bubble is a relatively simple DIY project that can be done with a few tools and materials. In this article, we’ll walk you through the steps to fix a laminate countertop bubble, so you can enjoy a smooth and flawless surface once again.
Materials Needed
- Laminate repair kit
- Scissors
- Putty knife
- Hair dryer or heat gun
Step 1: Clean the Surface
Start by cleaning the surface of the countertop where the bubble is located. Use a damp cloth to remove any dust or debris, and make sure the surface is completely dry before proceeding.
Step 2: Cut the Repair Kit
Cut a piece of laminate repair material that is slightly larger than the size of the bubble. This will ensure that the material will fully cover the bubble and adhere to the surrounding surface.
Step 3: Heat the Surface
Using a hair dryer or heat gun, heat the surface of the countertop where the bubble is located. This will soften the laminate, making it easier to apply the repair material. Keep the heat gun or hair dryer moving continuously to avoid overheating the surface.
Step 4: Apply the Repair Material
Once the surface is heated, apply the repair material over the bubble using a putty knife. Smooth out the material and make sure it fully covers the bubble, pressing down firmly to ensure adhesion.
Step 5: Trim the Repair Material
Once the repair material has been applied, use scissors to trim any excess material around the edges of the repair. Be sure to cut away any material that does not adhere to the countertop.
Step 6: Allow to Dry
Allow the repair material to dry completely, following the instructions on the repair kit for drying time.
Step 7: Sand and Finish
Once the repair material is dry, use sandpaper to smooth out any rough edges or bumps. Finish the repair by applying a laminate countertop sealant, if desired, to protect the surface and restore its shine.
In conclusion, fixing a laminate countertop bubble is a quick and easy DIY project that can save you money and restore the beauty of your countertop. With a few simple steps, you can enjoy a smooth and flawless surface once again.
