Installing an undermount kitchen sink on a granite countertop can be a challenging yet rewarding DIY project. In this comprehensive guide, we will walk you through the step-by-step process to ensure a successful installation. From choosing the right sink and tools to sealing the countertop, we’ve got you covered.
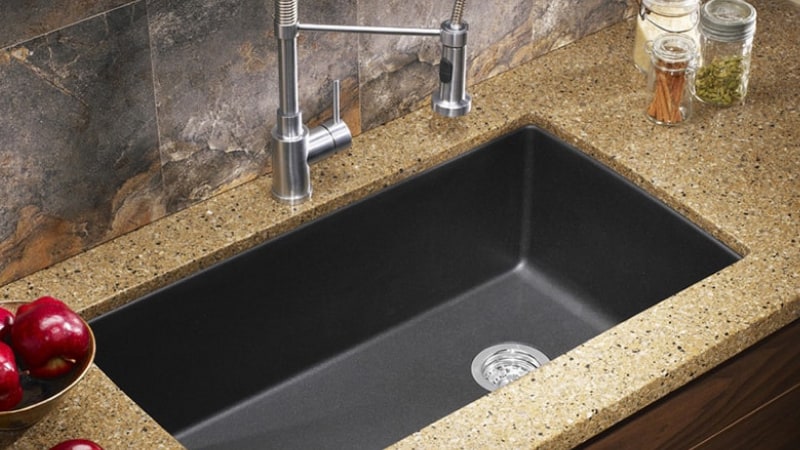
Selecting the Right Sink: The first step is choosing the perfect undermount sink for your kitchen. Consider factors like size, shape, and material. Stainless steel sinks are a popular choice due to their durability, while composite granite sinks can match your countertop seamlessly.
Gathering Essential Tools: You’ll need a variety of tools, including a jigsaw, a silicone adhesive, clamps, a tape measure, a drill with a hole saw, and safety equipment like gloves and goggles. Make sure you have everything on hand before starting.
Measure and Mark: Accurate measurements are crucial. Measure the sink opening and mark the location for the cutout on the countertop. Double-check your measurements to avoid costly mistakes.

Safety First: Safety should be a priority. Wear your safety gear, including goggles and gloves, and ensure the workspace is well-ventilated to protect yourself from dust and fumes.
Cutting the Countertop: Use a jigsaw or a circular saw with a diamond blade to carefully cut along the marked lines for the sink cutout. Take your time to ensure precision and avoid splintering.
Test-Fitting the Sink: Before applying adhesive, perform a test fit to ensure the sink fits snugly into the cutout. Make any necessary adjustments at this stage.
Applying Adhesive: Apply a bead of silicone adhesive around the edge of the sink’s rim. This adhesive will create a strong bond between the sink and the countertop.
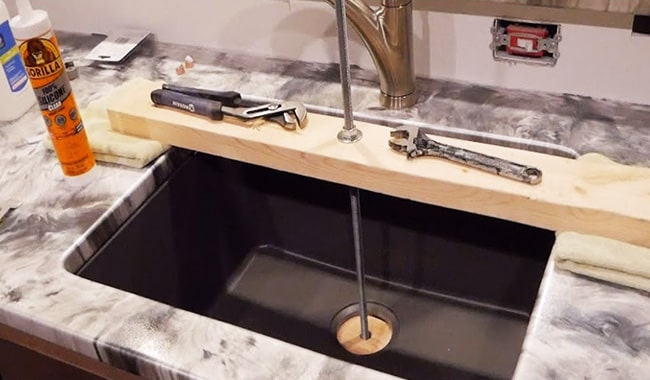
Setting the Sink: Gently lower the sink into the cutout, ensuring a tight fit. Use clamps to hold the sink in place while the adhesive dries. Follow the manufacturer’s recommendations for drying time.
Securing the Sink: Once the adhesive has dried, remove the clamps. Secure the sink in place with clips or brackets provided by the sink manufacturer. This will prevent any shifting over time.
Connecting Plumbing: Connect the plumbing to the sink, ensuring proper sealing to prevent leaks. Double-check for any loose connections and tighten them as needed.
Sealing the Countertop: To protect your granite countertop from moisture, apply a stone sealer. This will help prevent water damage and keep your countertop looking pristine.
Final Touches: Clean up any excess adhesive, and ensure that the sink and countertop are spotless. Now, your undermount sink is installed and ready for use!
How to Install Undermount Sink on Granite Countertop
Installing an undermount kitchen sink on a granite countertop requires careful planning, precise measurements, and attention to detail. By following these steps and taking your time, you can achieve a professional-looking installation that will enhance the beauty and functionality of your kitchen. Whether you’re a seasoned DIY enthusiast or a novice, this guide should help you tackle this project with confidence and success.
How To Install An Undermount Sink To A Granite Countertop

How To install Undermount Sink in Granite (Stud and Clip Method)

How to Install an Undermount Sink to a Granite Countertop

BFD Rona Products DIY INSTALL UNDERMOUNT SINK IN GRANITE

How To Support Undermount Sinks

How to Install an Undermount Sink

Related articles:
- Vintage Granite Countertops
- Country Granite Countertops
- Antique Granite Countertops
- Farmhouse Granite Countertops
- White Granite Countertops Ideas
- Granite Countertops Cost
- Chipped Granite Countertop Repair
- White Granite Countertops
- Granite Countertop Overlay
- Stains On Granite Countertops