Installing a quartz countertop can transform your kitchen or bathroom, adding a touch of elegance and durability. Quartz, an engineered stone, combines natural quartz crystals with resins and pigments, creating a robust and visually appealing surface. The installation process requires precision and attention to detail, but it can be a rewarding DIY project with the right tools and preparation. To start, ensure you have all the necessary materials: a quartz countertop slab, adhesive, a caulking gun, a level, measuring tape, a saw with a diamond blade, and safety equipment like gloves and goggles.
Before beginning the installation, measure the area where the countertop will be placed. Accurate measurements are crucial to avoid cutting errors and ensure a perfect fit. Measure the length, width, and any cutouts for sinks or cooktops. When measuring, account for overhangs and any edge details you desire. Once measurements are finalized, transfer them to the quartz slab. Using a marker, outline where cuts are needed, ensuring precision to avoid wastage or errors.
Cutting quartz requires a diamond blade saw, as quartz is tough. Set up the saw in a well-ventilated area and wear safety gear to protect it from dust and debris. Slowly and steadily guide the saw along the marked lines. Cutting too quickly can cause chipping or cracking. After cutting, dry-fit the countertop to ensure it fits perfectly. If adjustments are needed, carefully trim the edges with the saw. Once satisfied with the fit, the next step is preparing the cabinets.
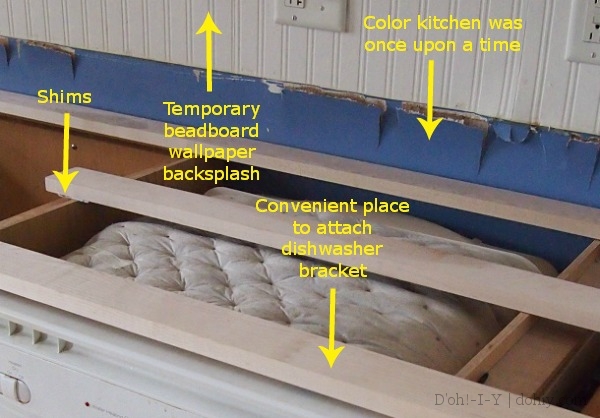
Ensure the cabinets are level and securely installed. Uneven cabinets can cause stress on the quartz, leading to cracks over time. Use shims to adjust the height where necessary. Clean the surface of the cabinets to ensure proper adhesion. Apply a thin bead of adhesive along the top edges of the cabinets. Carefully place the quartz countertop onto the adhesive, gently pressing down to secure it. Check for levelness and adjust if necessary.

For countertops with seams, use a two-part epoxy to join the pieces. Mix the epoxy according to the manufacturer’s instructions and apply it to the seam. Use clamps to hold the pieces together while the epoxy cures. Wipe away any excess epoxy before it hardens. Once the seams are set, use a color-matched caulk to fill in any gaps, creating a seamless appearance. Smooth the caulk with a damp finger or tool for a professional finish.
Installing a sink or cooktop requires additional steps. For under-mount sinks, apply a bead of silicone caulk around the edge of the sink cutout. Position the sink under the cutout and secure it with clips or brackets provided by the sink manufacturer. For drop-in sinks, apply silicone caulk around the sink’s edge and place it into the cutout, pressing down to create a watertight seal. Similarly, for cooktops, ensure a snug fit and use heat-resistant caulk if needed.
Finishing touches are crucial for a polished look. Once the countertop is securely in place, install backsplashes or edge treatments. For backsplashes, measure and cut the material to fit the space. Apply adhesive to the wall and press the backsplash into place, ensuring it is level. For edge treatments, choose from options like bevel, bullnose, or ogee. These edges are usually fabricated during the slab preparation but can be done on-site with the right tools.
After installation, clean the countertop with a non-abrasive cleaner and soft cloth. Avoid harsh chemicals that can damage the resin in the quartz. Regular maintenance involves wiping up spills promptly and using cutting boards to prevent scratches. Although quartz is heat resistant, it is advisable to use trivets or hot pads to protect the surface from extreme temperatures.

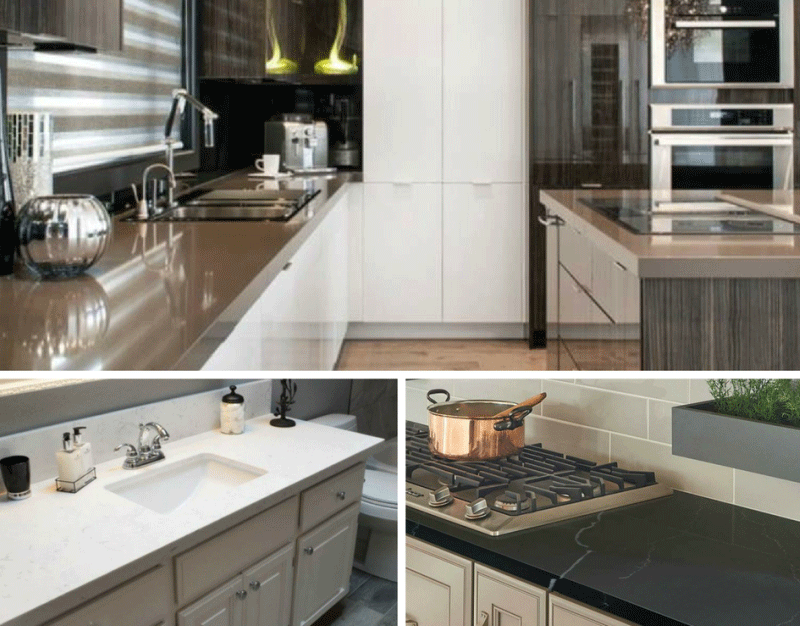
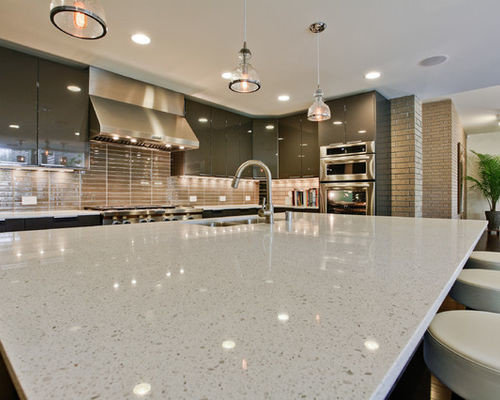
The durability of quartz makes it an excellent choice for high-traffic areas. Its non-porous nature resists staining and bacterial growth, making it hygienic and easy to clean. The wide range of colors and patterns available allows for customization to match any design aesthetic. Quartz can mimic the look of natural stone or be completely unique, offering versatility in design.
However, DIY quartz countertop installation is not without challenges. The weight of the material requires careful handling to avoid injury or damage. It is advisable to have assistance when lifting and positioning the countertop. Additionally, precision in measurement and cutting is vital to avoid costly mistakes. If unsure about any step, consult a professional to ensure a flawless installation.
Cost is another factor to consider. While DIY installation can save money, the initial investment in tools and materials can be significant. Weigh the cost savings against the potential for errors and the value of professional expertise. Sometimes, a hybrid approach of professional cutting and DIY installation can be a cost-effective solution.
In summary, installing a quartz countertop can enhance the aesthetic and functionality of your space. With careful planning, accurate measurements, and the right tools, it is a feasible DIY project. Attention to detail in every step ensures a professional-quality result. Whether you choose to install it yourself or seek professional help, a quartz countertop is a worthwhile investment for any home.

Common Mistakes to Avoid
Inaccurate Measurements: Incorrect measurements can lead to improper fitting and wastage of material. Always double-check your measurements before cutting.
Rushing the Cutting Process: Cutting too quickly can cause chipping or cracking. Take your time and use the right tools.
Ignoring Cabinet Preparation: Uneven or unstable cabinets can lead to countertop damage. Ensure cabinets are level and secure before installation.
Using Incorrect Adhesives: Use adhesives specifically recommended for quartz to ensure proper bonding and durability.
Skipping Seam Preparation: Properly joining seams is crucial for a seamless appearance. Use the correct epoxy and clamps to ensure a strong bond.
Neglecting Safety Measures: Handling quartz requires protective gear to avoid injury from dust and debris. Always wear gloves, goggles, and masks.
Improper Sink Installation: Ensure a watertight seal around sinks to prevent water damage. Follow manufacturer instructions for both undermount and drop-in sinks.
Lack of Support: Due to the weight of quartz, improper support during installation can lead to cracks. Have assistance when lifting and positioning the countertop.
Overlooking Maintenance Instructions: Quartz requires specific cleaning and maintenance. Avoid harsh chemicals and use recommended products.
Underestimating Tool Requirements: Ensure you have all the necessary tools before starting. Investing in the right tools can prevent mistakes and improve the quality of your installation.

What are the benefits of quartz countertops?
Quartz countertops are highly durable, non-porous, and resistant to stains and scratches. They offer a wide range of colors and patterns, allowing for customization to fit any design aesthetic. Additionally, their non-porous nature makes them hygienic and easy to clean, resisting bacterial growth. The combination of natural quartz crystals with resins and pigments provides both beauty and strength, making quartz a popular choice for kitchens and bathrooms.
Can I install a quartz countertop myself, or should I hire a professional?
DIY installation of a quartz countertop is possible but requires precision and the right tools. If you are confident in your ability to measure accurately, cut with precision, and handle heavy materials, you can undertake the project yourself. However, hiring a professional ensures a flawless installation and can be beneficial, especially for complex layouts or large countertops. A hybrid approach, where a professional cuts the slab, and you handle the installation, can also be a cost-effective solution.
How do I maintain a quartz countertop?
Maintaining a quartz countertop is relatively easy. Clean the surface regularly with a non-abrasive cleaner and a soft cloth. Avoid using harsh chemicals or abrasive pads that can damage the resin. Wipe up spills promptly to prevent staining, although quartz is highly resistant to stains. Use cutting boards to avoid scratches and trivets or hot pads to protect against heat. With proper care, a quartz countertop can maintain its appearance and functionality for many years.

What tools are necessary for installing a quartz countertop?
Essential tools for installing a quartz countertop include a diamond blade saw for cutting, measuring tape, a level, adhesive, a caulking gun, clamps for securing seams, and safety equipment like gloves, goggles, and a mask. Having the right tools is crucial for precision and safety during the installation process. Investing in quality tools can prevent mistakes and ensure a professional-quality result.
What are common mistakes to avoid during quartz countertop installation?
Common mistakes include inaccurate measurements, rushing the cutting process, ignoring cabinet preparation, using incorrect adhesives, and neglecting seam preparation. Skipping safety measures, improper sink installation, lack of support, overlooking maintenance instructions, and underestimating tool requirements can also lead to issues. Taking the time to plan, measure accurately, and follow proper procedures is essential for a successful installation.

How to Install Quartz Counters Diy countertops, Quartz kitchen

Homemade Quartz Countertops Plans You Can DIY Easily

Homemade Quartz Countertops Plans You Can DIY Easily

DIY White Sparkle Epoxy Countertops

Related articles: