I’ll never forget the moment I installed marble as my kitchen backsplash – it completely transformed the space from ordinary to extraordinary. The natural veining and luminous quality of marble create a focal point that elevates my entire kitchen design. While some warned me about maintenance, I’ve found that with proper care, a marble backsplash offers unparalleled beauty that’s worth the extra attention. Paired with my countertops, it creates a seamless, high-end look that makes my kitchen feel like it belongs in a luxury home magazine. The way light plays off the polished surface at different times of day continues to amaze me months after installation.
Why I Fell in Love With Marble Backsplashes
The first thing that drew me to marble was its organic beauty – no two slabs are exactly alike. My backsplash has these gorgeous gray veins running through white stone that developed naturally over millions of years. Unlike manufactured materials trying to mimic stone, real marble has depth and character that changes depending on how the light hits it. I often catch myself staring at the patterns while washing dishes, noticing new details I hadn’t seen before.
Durability surprised me more than I expected. While marble is softer than granite, my backsplash has held up beautifully to daily cooking splatters and steam. The vertical installation helps because liquids don’t pool on the surface like they would on countertops. I did seal it properly during installation, which I believe makes all the difference in preventing stains from setting in.
What finally convinced me was how marble ages gracefully. Instead of looking worn over time, it develops a patina that adds character. Some people might see etching as damage, but I appreciate how it tells the story of my kitchen’s daily life. This natural evolution gives the space warmth and personality that sterile, perfect surfaces often lack.

Choosing the Right Marble for Your Backsplash
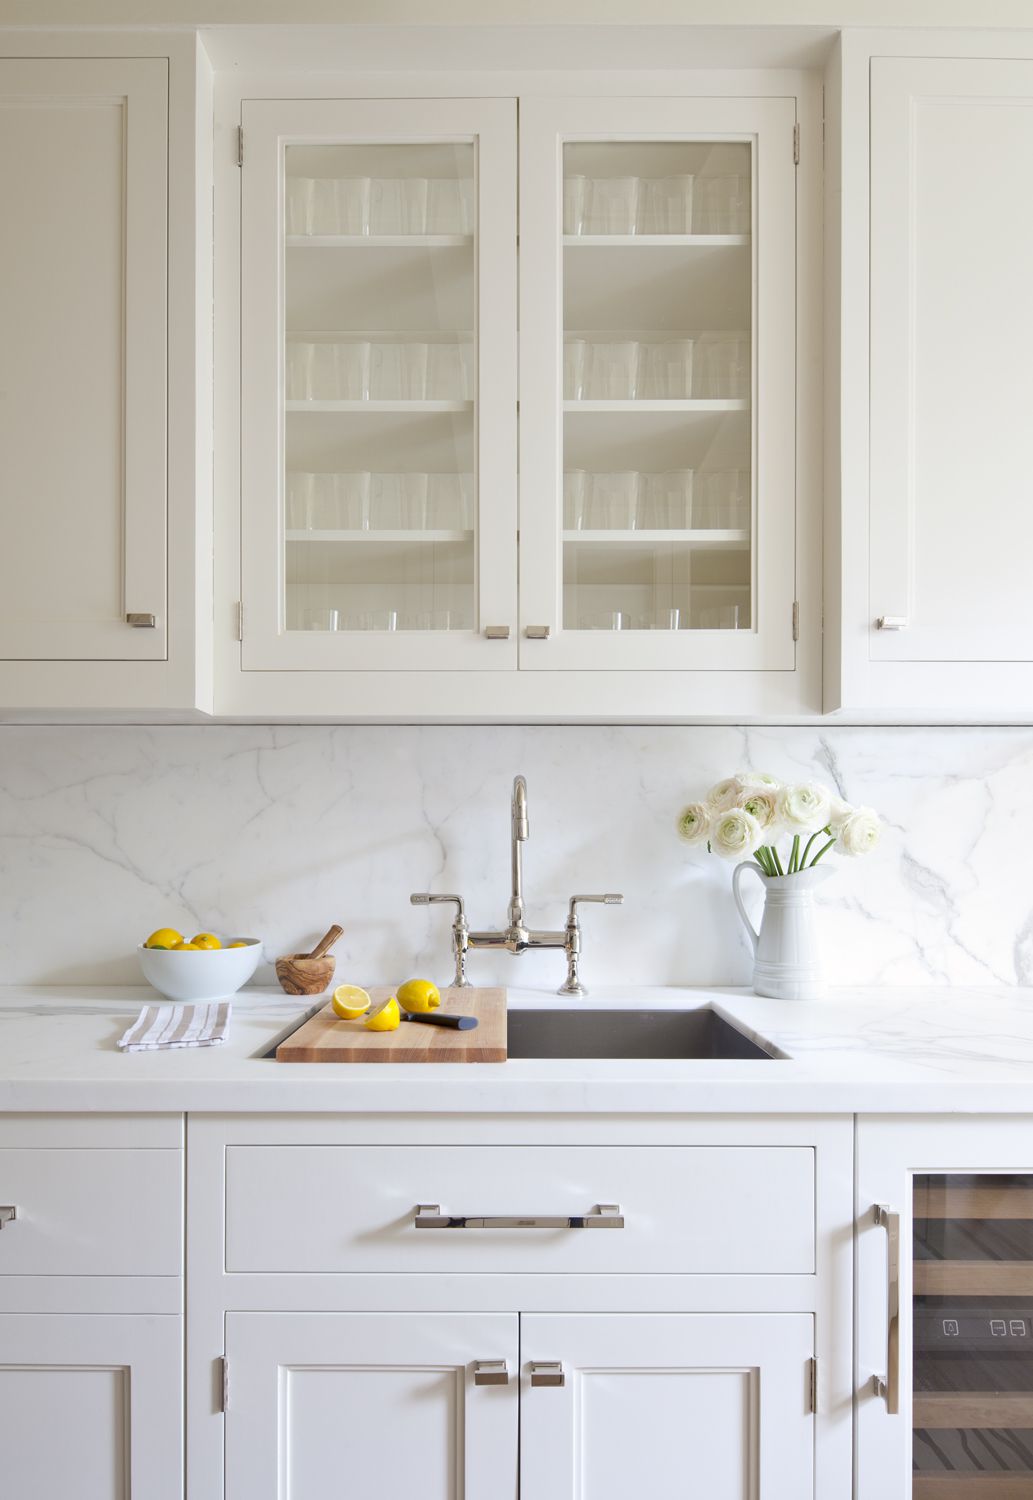
After extensive research, I settled on Carrara marble for its classic look and relatively affordable price point. The soft gray veining on white background pairs perfectly with both my stainless steel appliances and warm wood cabinets. For those wanting bolder contrast, Calacatta marble offers more dramatic gold and gray veining, though at a higher cost. I recommend viewing full slabs in person if possible – photos don’t capture the true color variations.
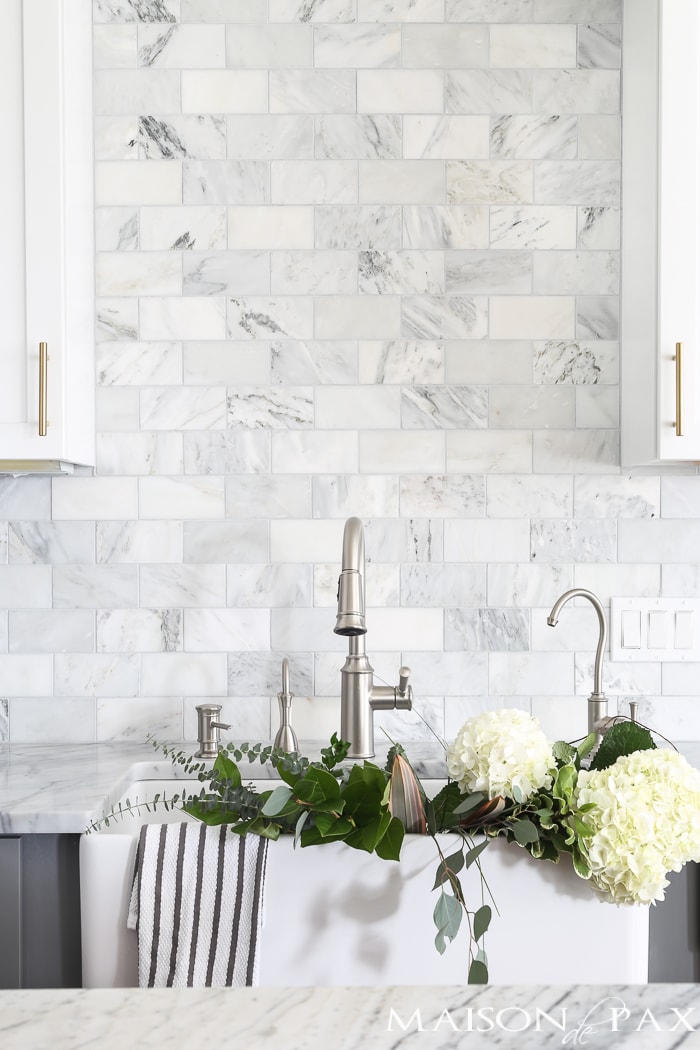
Tile size dramatically affects the overall aesthetic. I chose 3×6 subway tiles for a timeless look that doesn’t compete with my marble countertops. Larger format tiles minimize grout lines for a cleaner appearance, while mosaic sheets can create stunning feature walls. Consider how the tile size relates to your countertop thickness – I kept mine proportional for visual harmony.
Finish options include polished, honed, or tumbled. My polished backsplash reflects light beautifully but shows water spots more easily. Honed marble has a matte finish that’s more forgiving with fingerprints, while tumbled marble offers rustic charm with its textured edges. Think about how much maintenance you’re willing to do when selecting the finish.

Installation Insights From My Experience
Proper surface preparation proved crucial for my successful installation. I had my contractor install cement backer board over the drywall to create a stable, waterproof base. This extra step cost more upfront but prevents moisture damage that could occur with direct tile application to drywall. We also used a premium thin-set mortar specifically formulated for marble.
Cutting marble tiles requires special care to prevent chipping. My tile installer used a wet saw with a diamond blade for clean edges. We planned the layout carefully to minimize cuts and keep them in less visible areas. The most challenging part was aligning the veining pattern across multiple tiles – it took patience but created that seamless natural stone look I wanted.
Grout color selection makes a huge difference in the final appearance. I went with a light gray that blends with the marble veins rather than contrasts. Epoxy grout would have offered more stain resistance, but I preferred the workability of traditional cement grout. Sealing both the marble and grout after installation was the final protective step.
Daily Maintenance That Actually Works
My cleaning routine is simpler than many assume. For daily maintenance, warm water with a drop of mild dish soap on a soft cloth removes most splatters. I avoid abrasive scrubbers that could scratch the polished surface. The key is wiping down the backsplash after cooking sessions rather than letting grease sit overnight.
For tougher stains, I make a paste of baking soda and water, let it sit briefly, then gently wipe away. This works wonders on tomato sauce splashes or oil spots without damaging the stone. I never use vinegar or acidic cleaners that could etch the surface – a lesson I learned the hard way on a small test piece before installation.
Resealing every 6-12 months maintains protection. I do the water test – if water stops beading on the surface, it’s time to reseal. The process takes me about an hour on a Sunday morning and gives me peace of mind knowing my backsplash stays protected. Quality impregnating sealers don’t change the marble’s appearance while providing invisible protection.

Design Pairings That Make Marble Shine
Contrasting my white Carrara backsplash with dark grout created stunning definition. While most opt for matching light grout, the dark gray lines make each tile pop dramatically. This works especially well with the subway tile pattern, highlighting the classic layout. My kitchen has an edge I didn’t expect from traditional marble.
Brass fixtures complement marble’s warmth beautifully. The gold tones in my cabinet hardware and faucet pick up subtle hues in the stone’s veining. This combination feels both timeless and current, bridging traditional and contemporary styles. I’ve noticed many high-end kitchens using similar pairings lately.
Open shelving beside the marble backsplash showcases my dishware collection. The white stone serves as a perfect neutral backdrop for colorful ceramics and glassware. This setup makes my everyday dishes feel like displayed art while keeping them conveniently accessible. The reflection in the polished marble makes the shelves appear to glow.
What I’d Do Differently Next Time
I wish I’d known how much the marble would darken when wet. During installation, the water from the thinset made the tiles look nearly gray until they dried completely. Those tense hours waiting to see the final color taught me to always check dry samples before committing to a large order.
More extensive sealing before grout application would have prevented some slight staining. While my grout lines are generally clean, a few spots absorbed pigment during installation. Next time, I’d apply two coats of sealer before grouting and work in smaller sections for better control.
Considering the cost, I might explore marble look-alike porcelain tiles for a larger kitchen. While nothing replicates real marble’s depth, some premium porcelain options come remarkably close with far less maintenance. For my modest-sized backsplash, the real stone was affordable, but I understand why others might choose alternatives for bigger projects.

How do you prevent oil stains on marble backsplashes?
From my experience, prevention is key – I wipe down the backsplash after any cooking involving oils. Quality sealing creates an invisible barrier that gives me time to clean spills before they penetrate. For existing oil stains, a poultice made of baking soda and acetone (left overnight under plastic wrap) has successfully pulled out deep stains without damaging my marble’s finish. Regular resealing maintains this protection.
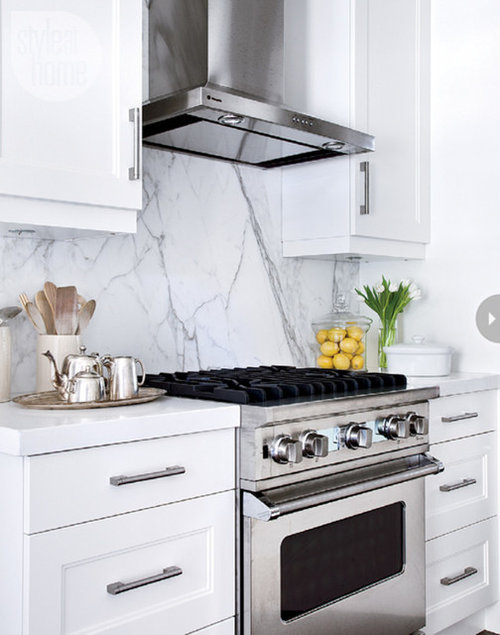
Can you use marble backsplash behind a gas stove?
I have marble behind my gas range with no issues, but took precautions. I installed a larger tile (6×12 inches) directly behind the burners to minimize grout lines where grease could collect. Using a metal trim piece at the bottom edge protects against direct heat exposure. I’m diligent about cleaning this area after each use to prevent buildup. A heat-resistant backsplash panel would be safer, but I preferred the seamless marble look.
How does marble compare to quartz for backsplashes?
While quartz is more durable and maintenance-free, it lacks marble’s natural luminosity and unique veining. My marble backsplash reflects light in ways manufactured materials can’t replicate. Quartz would be more practical behind cooking areas, but I accepted marble’s need for careful upkeep to get that authentic stone beauty. For those wanting marble’s look without hassle, some quartz manufacturers now offer convincing marble patterns.
What’s the best way to clean marble backsplash grout?
I’ve found oxygen bleach (not chlorine bleach) works wonders on grout without harming marble. Mixing it into a paste and scrubbing with a soft toothbrush lifts stains effectively. For daily cleaning, a steam cleaner with appropriate attachment keeps my grout lines fresh between deep cleanings. Sealing the grout during installation and reapplying sealant annually prevents most staining issues before they start.

Does marble backsplash work in small kitchens?
Absolutely – in fact, my modest-sized kitchen benefits greatly from marble’s light-reflecting qualities. The white Carrara makes the space feel larger and brighter. I kept the pattern simple (subway tile layout) to avoid overwhelming the small area. The key is maintaining visual continuity – my marble backsplash ties into the same color family as my countertops and cabinets, creating a cohesive look that expands the space visually.
How much does marble backsplash installation typically cost?
In my kitchen, materials cost about 15−25 per square foot for Carrara marble tile, plus 10−15 per square foot for professional installation. More premium marbles like Calacatta can run 30−50 per square foot. My total for 30 square feet was around $1,200 installed. While not cheap, it’s far less than doing entire countertops in marble. Consider it a strategic splurge that delivers luxury impact at a fraction of full marble countertop costs.

Related articles:
- Marble Countertops Backsplash
- DIY Refinishing Cultured Marble Countertops
- Marble Countertops In Bathrooms
- Cultured Marble Countertops
- Gray Kitchen Cabinets Marble Countertops
- Modern Kitchen Marble Countertops
- Refinish Cultured Marble Countertop
- Carrara Marble Countertops Bathroom
- Marble Countertops Types
- How To Refinish Marble Countertops