Granite countertops are a beautiful and durable addition to any kitchen, but accidents happen. A chipped edge or surface can be frustrating, especially when you’ve invested in high-quality stone. The good news is that many chips can be repaired without replacing the entire slab. Let me walk you through the steps to fix a chipped granite countertop, from assessing the damage to applying the right materials for a seamless finish.
Assessing the Damage
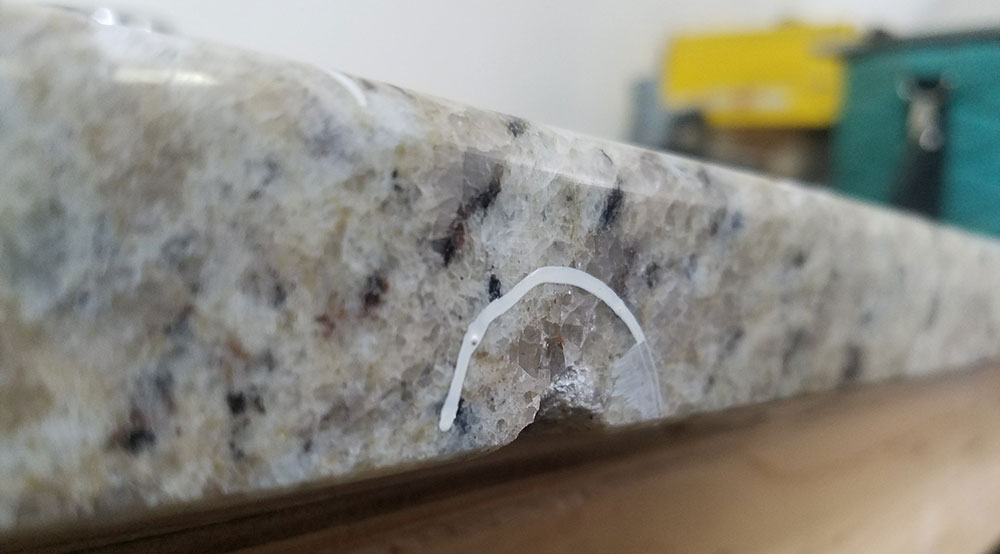
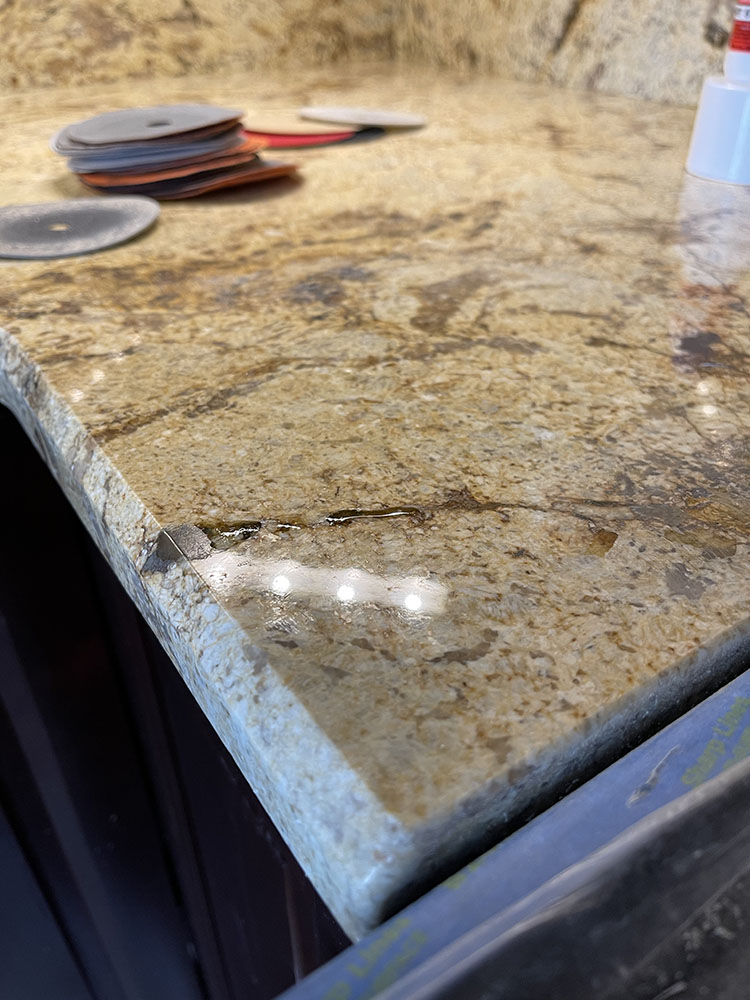
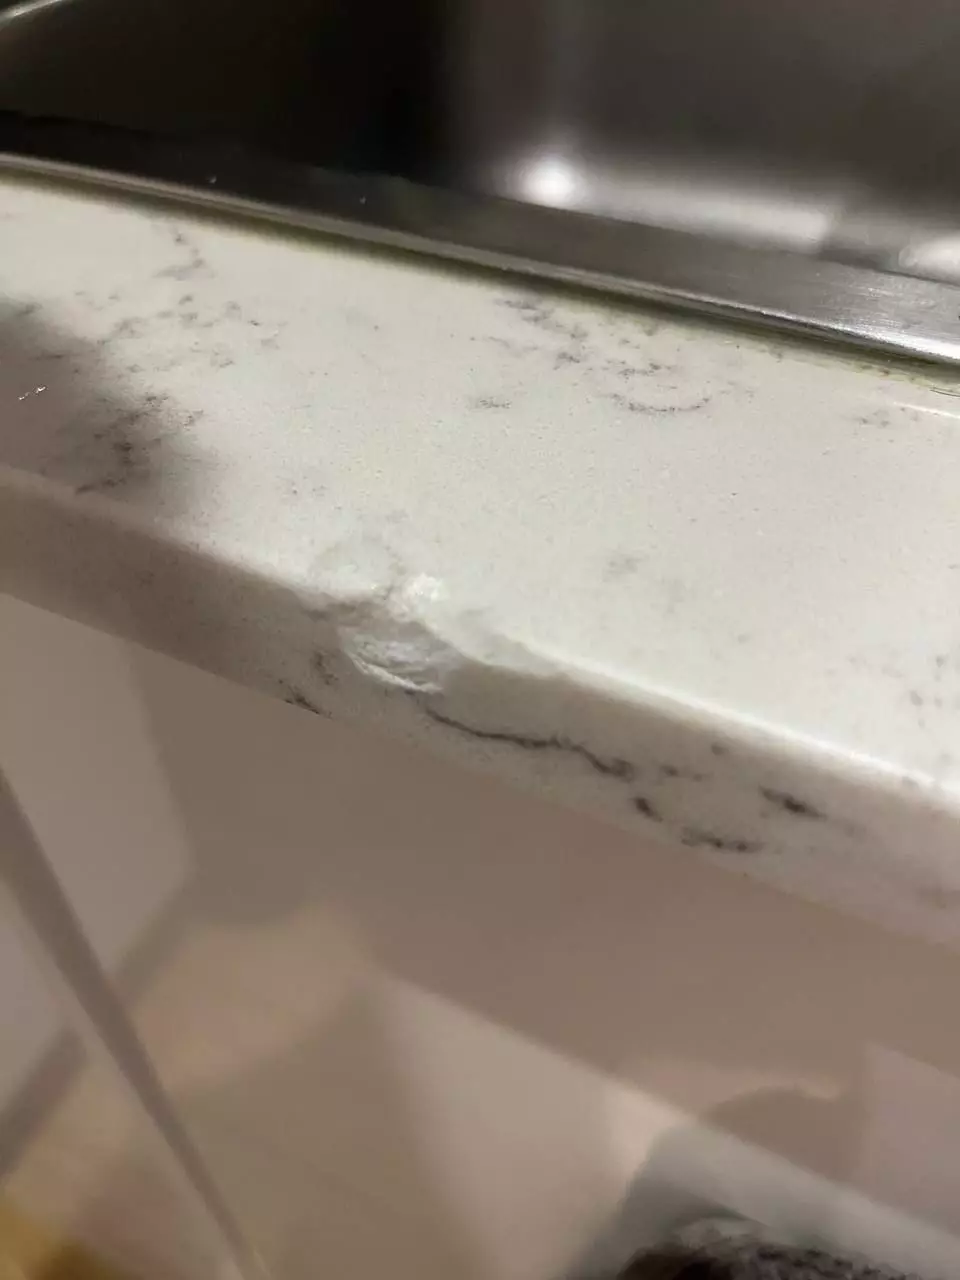
The first step in repairing a chipped granite countertop is evaluating the extent of the damage. Small chips along the edge or surface are often fixable, while deep cracks or large missing pieces may require professional help. I always recommend cleaning the area first to remove dirt or debris that could interfere with the repair. A magnifying glass can help you see if the chip has sharp edges or if tiny fractures are spreading from it.
Next, determine the type of granite you have. Some granites have uniform patterns, making repairs easier to blend, while others have heavy veining or speckles that require color matching. If you have leftover granite from installation, that’s ideal for creating a matching filler. If not, you’ll need to find an epoxy or resin that closely matches your countertop’s color. Taking a clear photo of the chip under good lighting can help when shopping for repair kits.
Finally, consider the chip’s location. Edge chips are common and usually easier to fix than surface chips, which may need more precision. If the chip is near a sink or cooktop, make sure the repair material is heat- and water-resistant. I’ve found that small chips (under a quarter-inch) are manageable for DIY repairs, but larger damage might need a professional touch to avoid further issues.
Gathering the Right Materials
Once you’ve assessed the chip, it’s time to gather the necessary materials. For most granite repairs, you’ll need a high-quality epoxy or acrylic resin designed for stone. I prefer two-part epoxy because it’s strong and can be tinted to match the granite. Some kits come with color-matching options, which can be helpful if you’re unsure about the exact shade. You’ll also need fine-grit sandpaper, a putty knife, and a razor blade for smoothing.
If the chip is deep, you might need a filler like crushed granite or stone dust mixed with epoxy. I’ve used leftover granite pieces ground into powder for a perfect color match. For edge repairs, a clamp or masking tape can help hold the epoxy in place while it cures. Don’t forget rubbing alcohol or acetone for cleaning the area before applying the epoxy—any grease or residue will weaken the bond.
Safety is important, so wear gloves and work in a well-ventilated area. Some epoxies emit strong fumes, so an open window or fan can help. I always keep paper towels and a damp cloth nearby for quick cleanups. If you’re nervous about color matching, test the epoxy on a hidden spot first. It’s better to adjust the mix before applying it to the visible chip.
Preparing the Chip for Repair
Proper preparation is key to a long-lasting repair. Start by cleaning the chipped area with acetone or rubbing alcohol to remove oils and debris. Even small particles can prevent the epoxy from adhering properly. I use a cotton swab for precision, especially in tight corners. If the chip has loose fragments, gently remove them with tweezers to create a clean surface.
Next, lightly sand the edges of the chip with 400-grit sandpaper to smooth rough spots. This helps the epoxy bond better and creates a more natural finish. Be careful not to sand too aggressively—granite is hard, but you don’t want to widen the chip. I usually wipe the area again with alcohol after sanding to ensure it’s completely clean.
If the chip is deep, apply a thin layer of epoxy first to seal any tiny cracks. Let it cure slightly before adding the main filler. This prevents air bubbles and ensures a solid base. For edge chips, I use masking tape to create a barrier, keeping the epoxy from dripping. The goal is to fill the chip just slightly above the surface, as you’ll sand it down later for a smooth finish.

Applying the Epoxy Filler
Now it’s time to fill the chip. Mix the epoxy according to the instructions, adding colorant if needed. I use a toothpick or small spatula to press the epoxy into the chip, making sure there are no air gaps. For larger chips, apply the epoxy in layers, letting each one set for a few minutes before adding more. This prevents shrinkage and ensures a solid fill.
Once the epoxy is in place, smooth it with a razor blade or putty knife, leveling it with the countertop surface. If you’re working on an edge, use clamps or tape to hold the epoxy in place while it cures. I check for any dips or excess epoxy before it fully hardens—adjustments are easier at this stage. Some epoxies dry clear, while others may need tinting, so double-check the color match before it sets completely.
Let the epoxy cure fully, usually for 24 hours, before moving to the next step. Rushing this can weaken the repair. I keep the area dry and avoid placing anything on it during this time. If the epoxy shrinks as it dries, you may need a second application. Patience here makes a big difference in the final result.
Sanding and Polishing the Repair
After the epoxy has cured, it’s time to sand and polish the repaired area. Start with 400-grit sandpaper to level the epoxy with the countertop. Use light, circular motions to avoid scratching the surrounding granite. I keep a spray bottle of water nearby to wet-sand, which reduces dust and helps achieve a smoother finish.
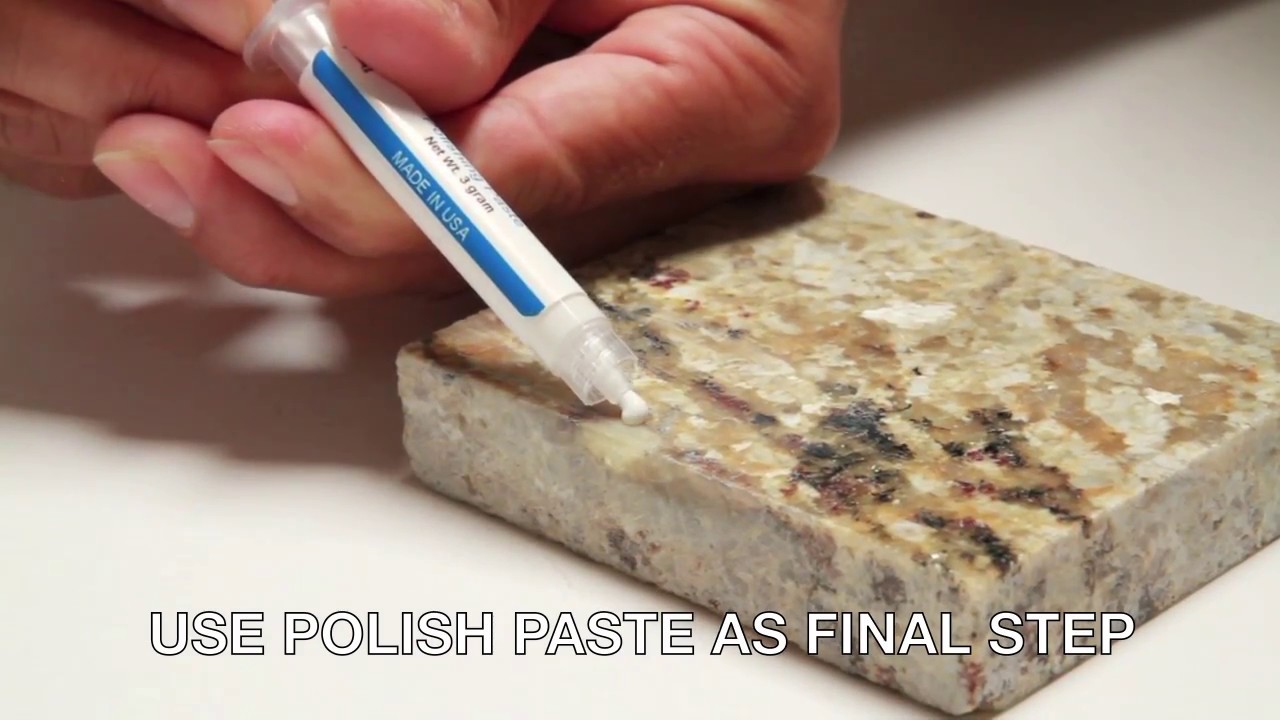
Switch to 600-grit, then 1,000-grit sandpaper for finer smoothing. The goal is to blend the repair seamlessly with the rest of the countertop. Wipe the area frequently with a damp cloth to check your progress. If the epoxy feels uneven, keep sanding until it’s flush. For polished granite finishes, I use a polishing compound and a soft cloth to restore the shine.
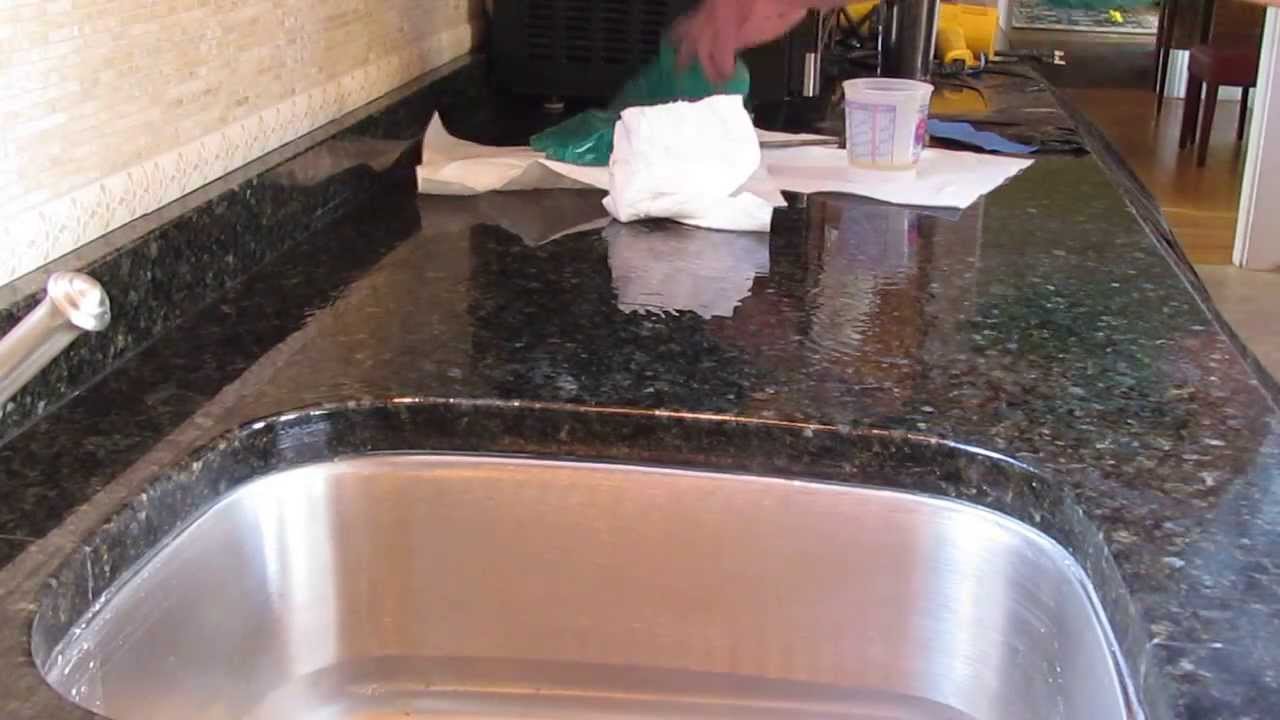
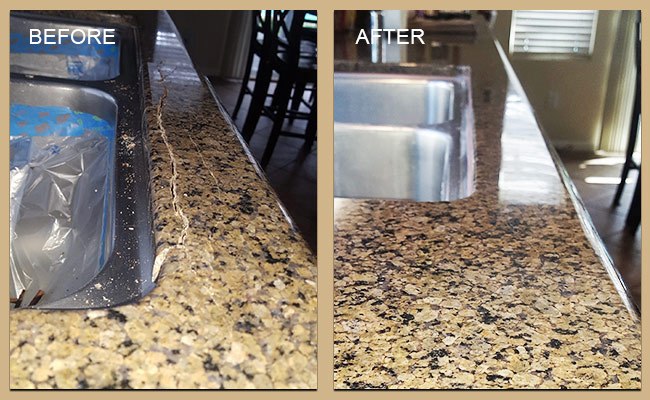
Finally, apply a granite sealer to protect the repaired area and the rest of the countertop. This helps prevent future stains and keeps the surface looking uniform. Buff the area with a clean cloth for a glossy finish. The repair should now be nearly invisible, with only a close inspection revealing any traces of the chip.
Preventing Future Damage
Once your granite countertop is repaired, taking steps to prevent future chips will save you time and hassle. Avoid dropping heavy objects near the edges, as this is where most damage occurs. I use cutting boards for food prep instead of placing knives directly on the granite. Even though granite is tough, sharp impacts can still cause chips.
Regular maintenance helps too. Resealing the countertop every 1-2 years keeps it resistant to stains and minor abrasions. I check for loose seams or cracks during cleaning, catching small issues before they worsen. Placing soft pads under heavy appliances can also reduce stress on the countertop.
If you notice new chips early, repair them quickly to prevent further damage. Small fixes are easier than large ones, and keeping up with maintenance ensures your granite stays beautiful for years. With proper care, your countertop will continue to look pristine, even after a repair.

Can I use super glue to fix a chipped granite countertop?
Super glue isn’t the best choice for granite repairs because it lacks the strength and durability of epoxy. While it might hold temporarily, it can discolor or weaken over time, especially with heat or moisture exposure. I recommend a high-quality stone epoxy instead, as it bonds better and can be color-matched to your countertop. For a long-lasting fix, investing in the right materials is worth it.
How much does professional granite repair cost?
The cost varies depending on the chip’s size and location, but most professionals charge between 200and200and500 per repair. Small edge chips are usually on the lower end, while large or complex repairs may cost more. If you’re comfortable with DIY, an epoxy kit costs around 20−20−50. However, for extensive damage or valuable countertops, hiring a pro ensures a flawless finish.
Will the repaired area be noticeable?
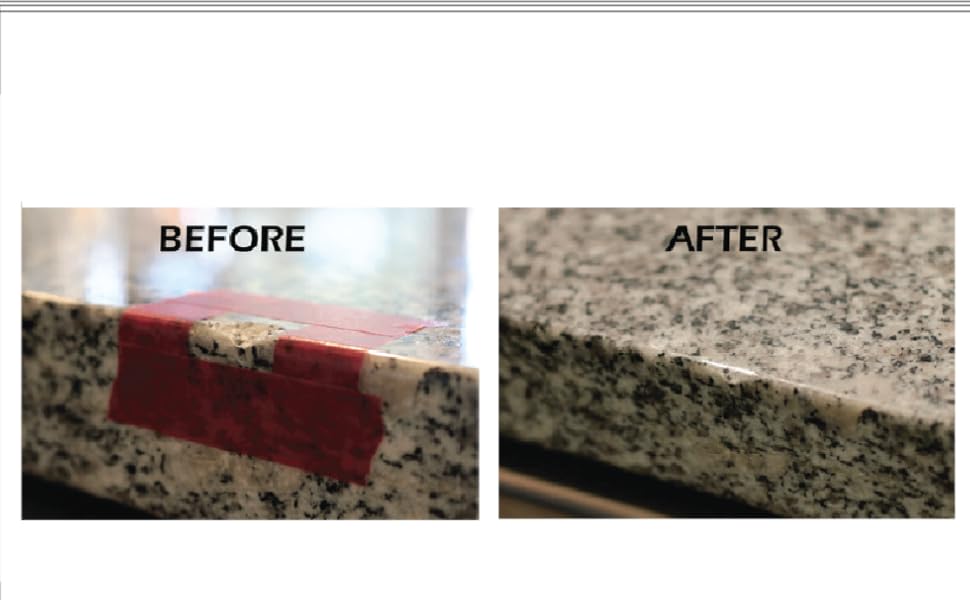
If done carefully, a well-repaired chip should blend in seamlessly. The key is color-matching the epoxy and sanding it flush with the surface. Polishing the area afterward helps restore the natural shine. While you might see a slight difference under close inspection, most guests won’t notice unless they’re looking for it.
Can I repair a chip near the sink without water damage?
Yes, but you’ll need a waterproof epoxy and should let it cure fully before exposing it to water. I recommend waiting at least 48 hours before using the sink near the repair. Applying a granite sealer afterward adds extra protection. If the chip is in a high-moisture area, consider a professional repair for maximum durability.
How long does a DIY granite repair last?
A properly done DIY repair can last for years if the countertop is well-maintained. Using high-quality epoxy, sealing the surface, and avoiding heavy impacts on the repaired area all help. However, if the chip is in a high-traffic spot, it may wear faster. Periodic resealing keeps the repair in good condition.
What if my granite has multiple chips?
If your countertop has several chips, assess whether a full restoration is needed. Small chips can be repaired individually, but widespread damage might indicate underlying issues like poor installation or weak seams. In such cases, consulting a professional ensures the countertop’s structural integrity. For minor chips, repairing them one at a time with careful color matching works well.
How to repair a damaged granite counter corner edge w/ HIMG® Surface Repair
Related articles: