Painting a bathroom countertop can be an excellent and cost-effective way to refresh and update the look of your bathroom without the need for a complete remodel. The process requires careful planning, preparation, and the right materials to ensure a durable and attractive finish. The first step in painting a bathroom countertop is to choose the right type of paint. Epoxy paint is highly recommended for its durability and resistance to water and stains. Acrylic paint can also be used but might not be as long-lasting. The choice of color is equally important, as it should complement the existing decor and fixtures in your bathroom.
Before you begin painting, it’s crucial to thoroughly clean the countertop. Use a strong cleaner to remove all dirt, grease, and soap scum. This step is vital because any residue left on the surface can prevent the paint from adhering properly. Once the countertop is clean, rinse it thoroughly with water and let it dry completely. Sanding the surface is the next step. Use medium-grit sandpaper to lightly sand the entire countertop. This creates a rough surface that helps the paint adhere better. After sanding, wipe away the dust with a damp cloth and let the surface dry.
Applying a primer is an essential part of the process. A good primer will help the paint stick to the surface and provide a uniform base for the paint color. Choose a primer that is suitable for the type of countertop material you have, whether it’s laminate, tile, or another material. Apply the primer with a brush or roller, ensuring an even coat. Let the primer dry according to the manufacturer’s instructions, which usually takes a few hours. Once the primer is dry, lightly sand it with a fine-grit sandpaper to smooth out any imperfections, and then wipe away the dust.
When it comes to painting, use a high-quality brush or roller to apply the paint. Start with a thin coat, allowing it to dry completely before applying additional coats. This method prevents drips and ensures a smooth finish. Depending on the color and type of paint, you might need two to three coats to achieve full coverage. Make sure to follow the drying times recommended by the paint manufacturer between coats. If you’re using epoxy paint, mix it according to the instructions, as it usually comes in two parts that need to be combined.
After the final coat of paint has dried, it’s important to apply a clear topcoat for added protection. This topcoat acts as a sealant, protecting the paint from moisture, scratches, and daily wear and tear. Choose a polyurethane or epoxy clear coat that is suitable for use on countertops. Apply the topcoat with a clean brush or roller in a thin, even layer. Depending on the product, you might need to apply multiple coats for maximum durability. Allow each coat to dry thoroughly before applying the next one.
Throughout the painting process, ensure good ventilation in your bathroom. Open windows and use fans to circulate air and help the paint dry more quickly. Additionally, wearing a mask and gloves can protect you from fumes and chemicals in the paint and primer. Keep in mind that the entire process, from cleaning to applying the topcoat, can take several days due to drying times, so plan accordingly.
Maintaining your newly painted countertop is essential for its longevity. Avoid using harsh chemicals or abrasive cleaners, as they can damage the paint. Instead, use a mild soap and water solution for daily cleaning. Be cautious with hot items and heavy objects, as they can chip or scratch the surface. Placing mats or coasters under these items can help protect your countertop.

While painting a bathroom countertop can be a DIY project, it does require patience and attention to detail. If you feel unsure about any part of the process, consider consulting with a professional. They can provide guidance and ensure that the job is done correctly. A well-painted countertop can last for many years and significantly enhance the appearance of your bathroom.
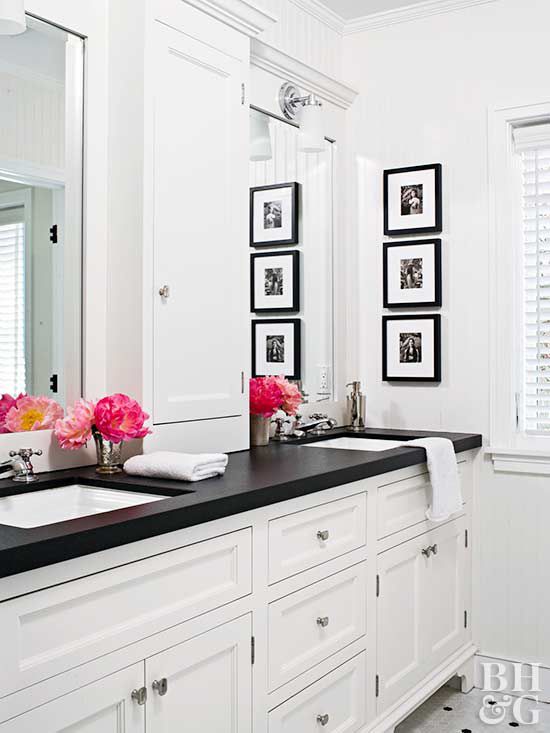
It’s also worth considering the aesthetic possibilities when painting your countertop. You can choose a solid color for a classic look, or try a faux finish to mimic the appearance of stone or marble. There are also paint kits available specifically for countertops that include everything you need for the project, including detailed instructions and tools.
One creative option is to use stencils to add patterns or designs to your countertop. This can give your bathroom a unique and personalized touch. If you choose to go this route, make sure to practice on a piece of cardboard or another surface first to perfect your technique. Apply the stencil designs after the base color has dried and before applying the topcoat.
Painting a bathroom countertop is an affordable way to refresh your bathroom’s look. The process involves thorough cleaning, sanding, priming, painting, and sealing. With the right materials and careful execution, you can achieve a professional-looking finish that enhances your bathroom’s overall aesthetic. Regular maintenance and care will help keep your countertop looking its best for years to come.
Common Mistakes to Avoid
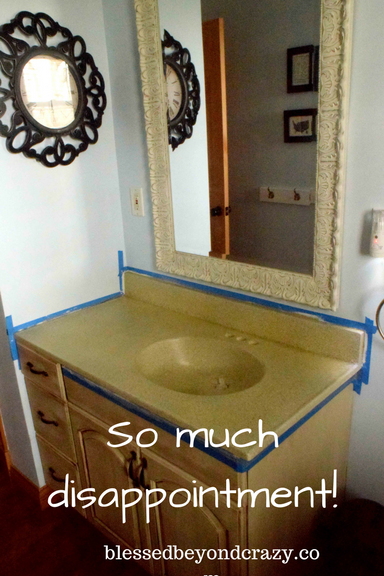
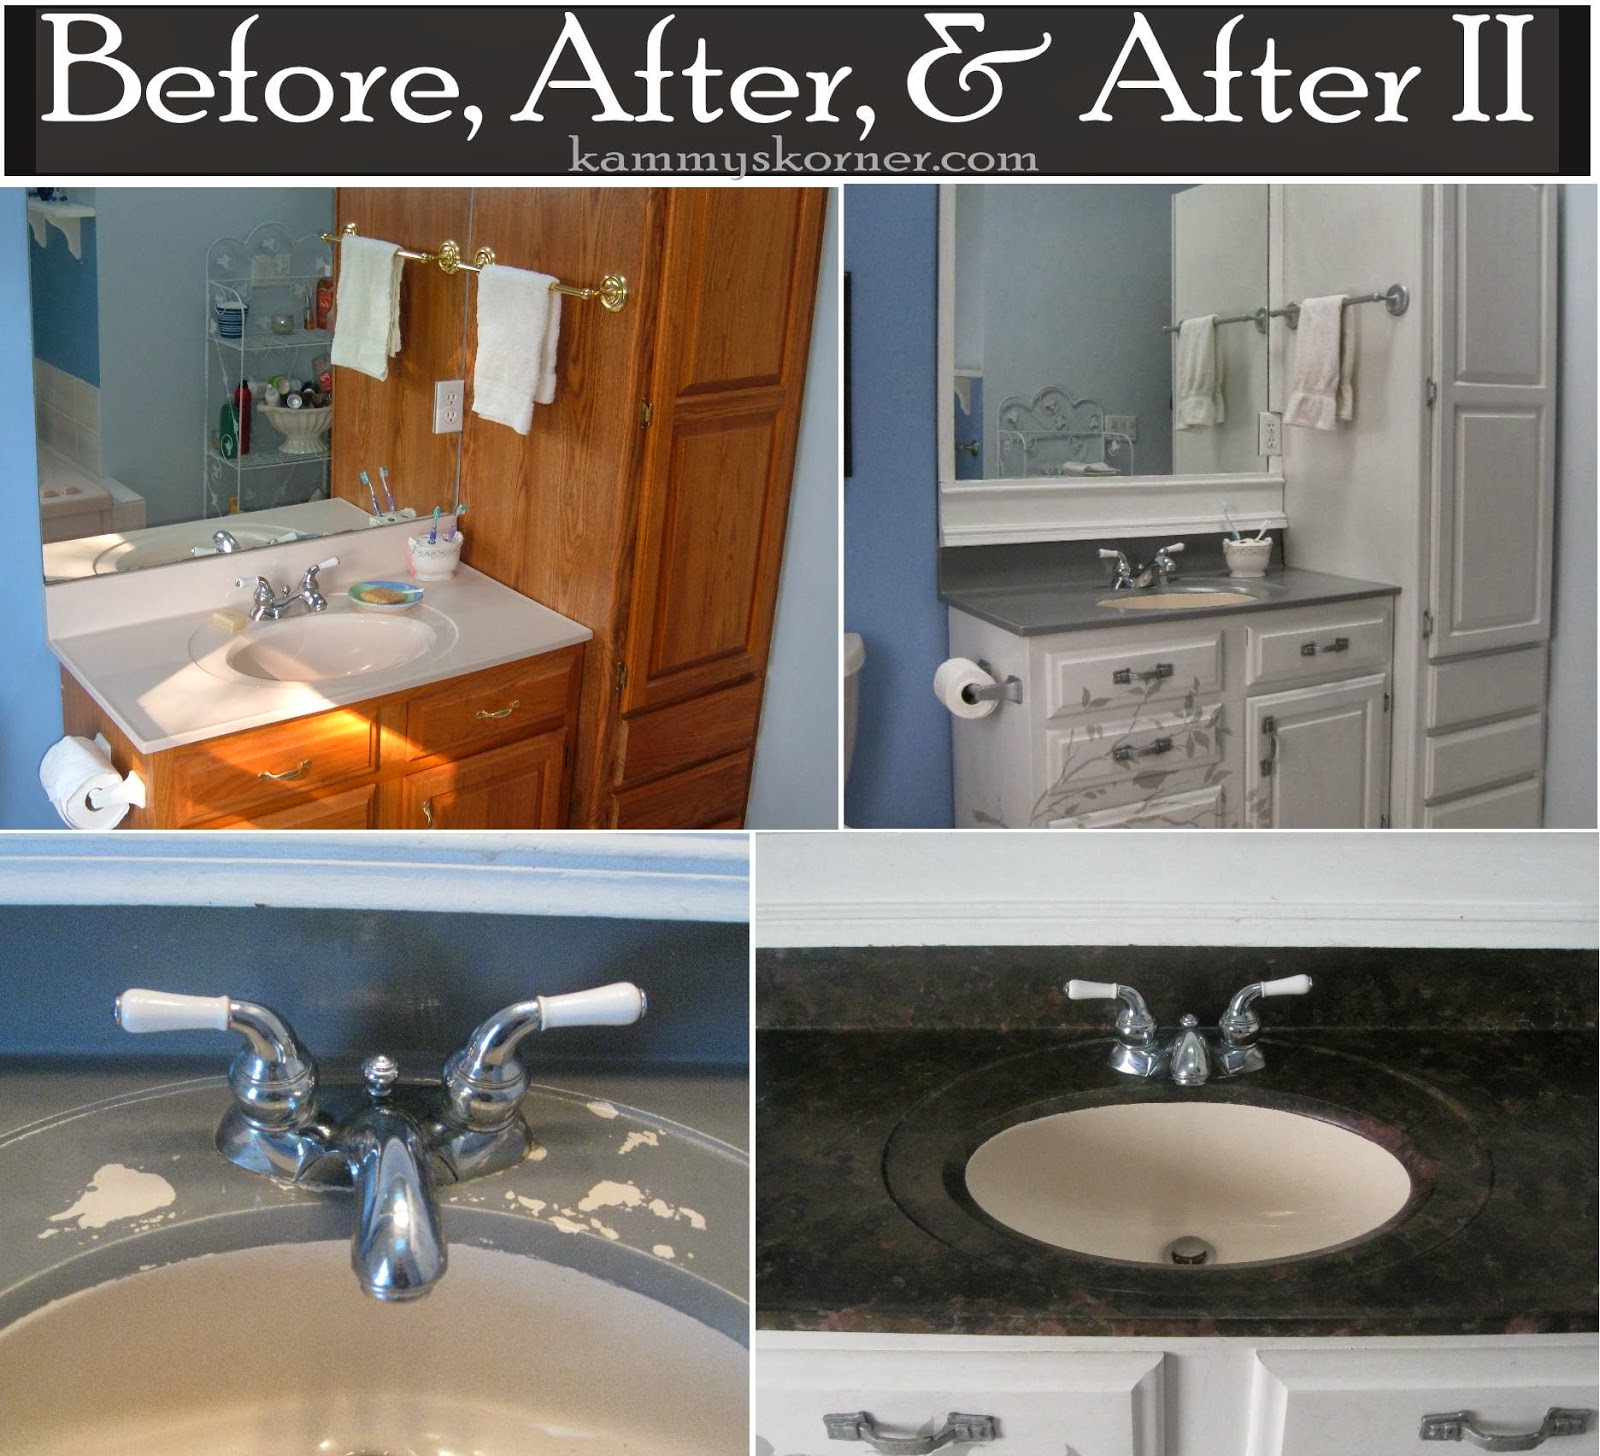
When painting a bathroom countertop, several common mistakes can undermine the success of your project. One frequent error is inadequate surface preparation. Skipping steps like thorough cleaning or proper sanding can result in poor paint adhesion, leading to peeling or chipping over time. Another mistake is choosing the wrong type of paint. Not all paints are suitable for countertops, and using an incorrect type can result in a finish that doesn’t withstand moisture or daily wear. Always opt for paints specifically designed for high-traffic areas, such as epoxy or acrylic latex.
Applying paint too thickly is another common issue. Thick coats can lead to drips, uneven texture, and longer drying times. Instead, apply multiple thin coats, allowing each to dry completely before adding the next. Additionally, neglecting to use a primer or topcoat can significantly reduce the durability of your painted countertop. Primer helps the paint adhere better, while a topcoat provides essential protection against moisture and scratches. Finally, rushing the project is a common pitfall. Each stage, from cleaning to applying the final topcoat, requires adequate drying time. Rushing through these steps can compromise the quality and longevity of your work.

How long does it take to paint a bathroom countertop?
The entire process of painting a bathroom countertop typically takes several days to a week. This timeframe includes the initial cleaning, sanding, priming, painting, and applying a topcoat. Each step requires adequate drying time to ensure a durable finish. For instance, primer and each coat of paint usually need several hours to a day to dry completely, and the final topcoat might need up to 24 hours or more to fully cure. Rushing through these steps can compromise the quality of the finish, so it’s important to follow the manufacturer’s drying times.
What type of paint is best for bathroom countertops?
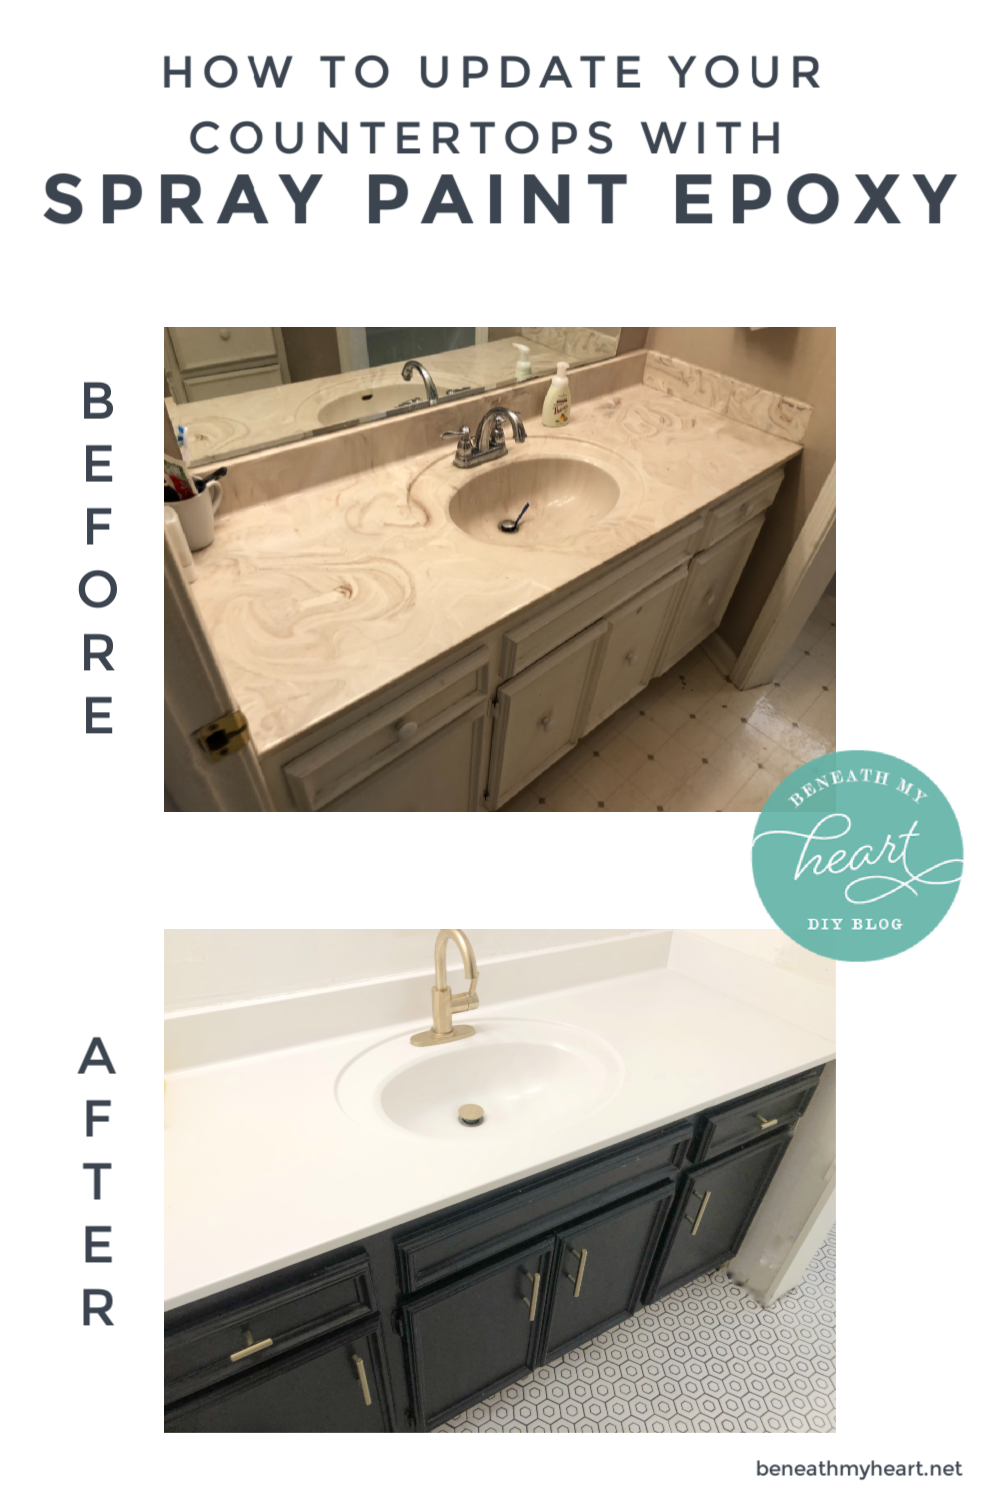
Epoxy paint is often considered the best choice for bathroom countertops due to its durability and resistance to moisture, stains, and daily wear. It creates a hard, durable finish that can withstand the humid conditions commonly found in bathrooms. Acrylic latex paint can also be used, but it might not offer the same level of durability as epoxy. It’s crucial to select a paint that is specifically formulated for countertops or high-traffic surfaces to ensure it can handle the demands of a bathroom environment.
Can I use regular wall paint on my bathroom countertop?
Regular wall paint is not suitable for bathroom countertops. Wall paint is designed for vertical surfaces and does not offer the durability or moisture resistance needed for a countertop. Countertops are subjected to more wear and tear, moisture, and potential chemical exposure, all of which require a more robust type of paint. Using regular wall paint can result in a finish that quickly deteriorates, leading to peeling, chipping, and staining. It’s important to use a paint specifically formulated for countertops or high-traffic surfaces.
How do I maintain my painted bathroom countertop?
To maintain a painted bathroom countertop, avoid using harsh chemicals or abrasive cleaners, as they can damage the paint. Instead, clean the surface with a mild soap and water solution. Be cautious with hot items and heavy objects that could scratch or chip the paint. Using mats, trivets, or coasters under such items can help protect the surface. Regularly inspect the countertop for any chips or scratches and touch them up promptly to prevent further damage. Proper care and maintenance will extend the life of your painted countertop.
Is it necessary to sand the countertop before painting?
Yes, sanding the countertop before painting is necessary. Sanding helps to create a rough surface that allows the paint to adhere better. It removes any gloss or finish that might prevent the paint from sticking properly. Use medium-grit sandpaper to lightly sand the entire surface, then wipe away the dust with a damp cloth. Skipping this step can result in poor paint adhesion, leading to peeling or chipping over time. Proper surface preparation, including sanding, is crucial for achieving a durable and long-lasting finish.

How to Update Your Countertops with Appliance Epoxy – Beneath My Heart
Can You Paint Bathroom Countertops? [ANSWERED WITH TIPS]
How to Paint a Countertop
DIY Painted Bathroom Sink Countertops

Painting A Porcelain Vanity Countertop
How to Easily Spray Paint Bathroom Countertops – My Homier Home

Related articles: