Gluing laminate countertop ends is an essential skill for ensuring a seamless and professional finish in kitchen and bathroom installations. Properly adhered laminate not only improves the aesthetics of the countertops but also extends their lifespan by preventing moisture and dirt from infiltrating the edges. The process requires precision, the right materials, and a methodical approach to ensure that the laminate adheres correctly and remains durable over time.
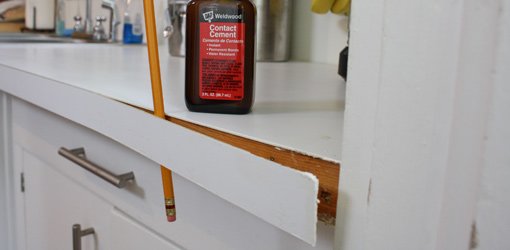
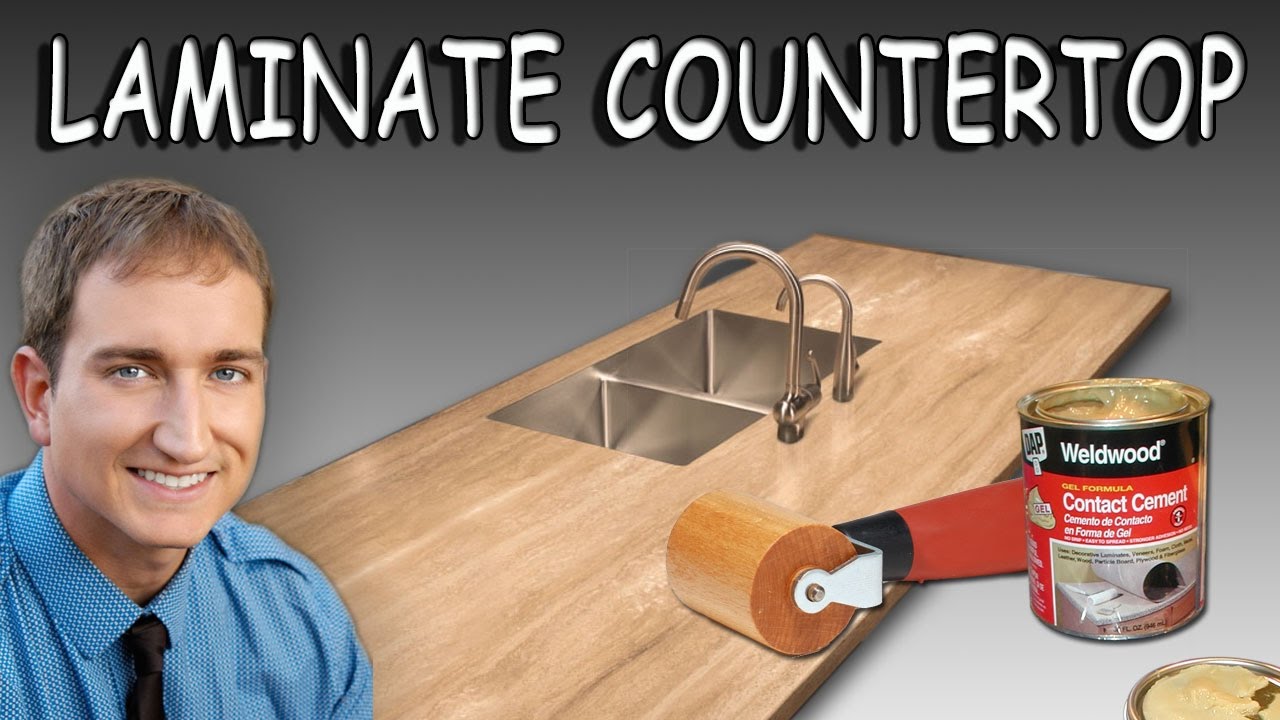
The first step in gluing laminate countertop ends is to gather the necessary materials. This typically includes contact cement or laminate adhesive, a roller or laminate roller, a utility knife, a straight edge, sandpaper, a clean cloth, and clamps. Having these tools readily available will streamline the process and help achieve a smooth, professional result.
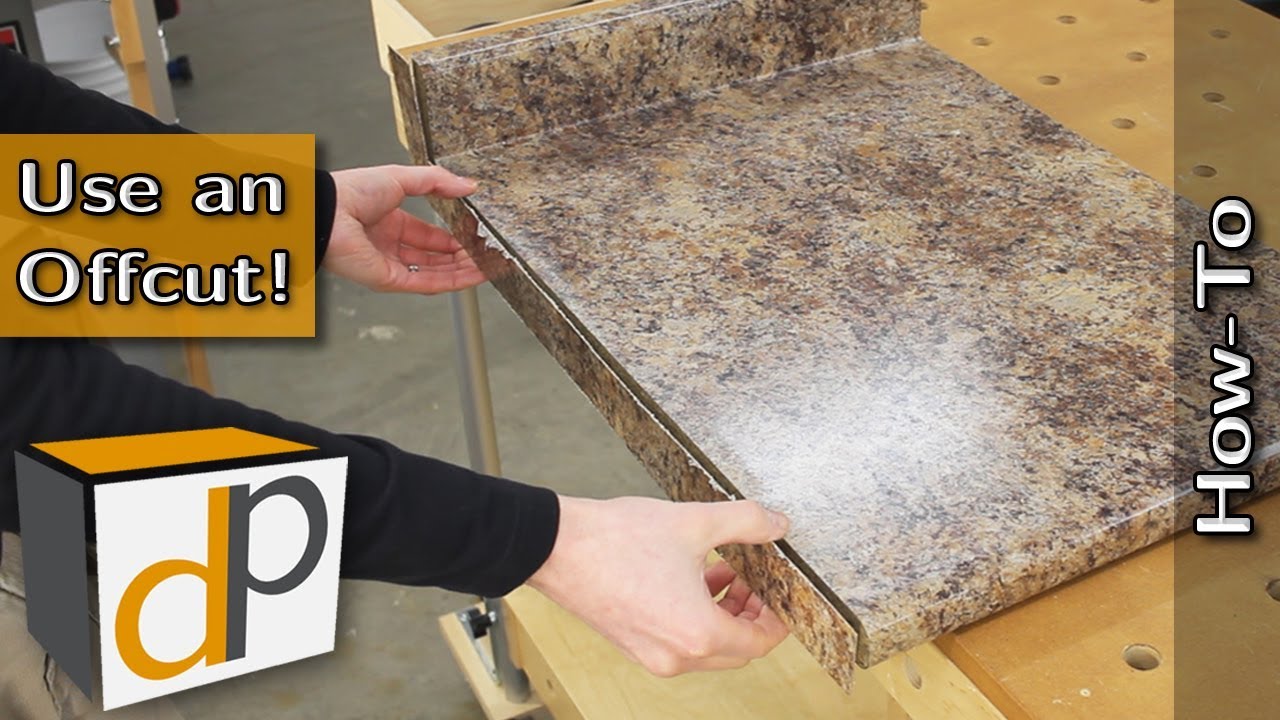
Begin by preparing the laminate and the countertop surface. Cut the laminate to the required size, ensuring that it slightly overhangs the edge to allow for trimming later. The substrate, usually made of particleboard or MDF, should be clean, dry, and free from any dust or debris. Sanding the substrate lightly with fine-grit sandpaper can help the adhesive bond more effectively.
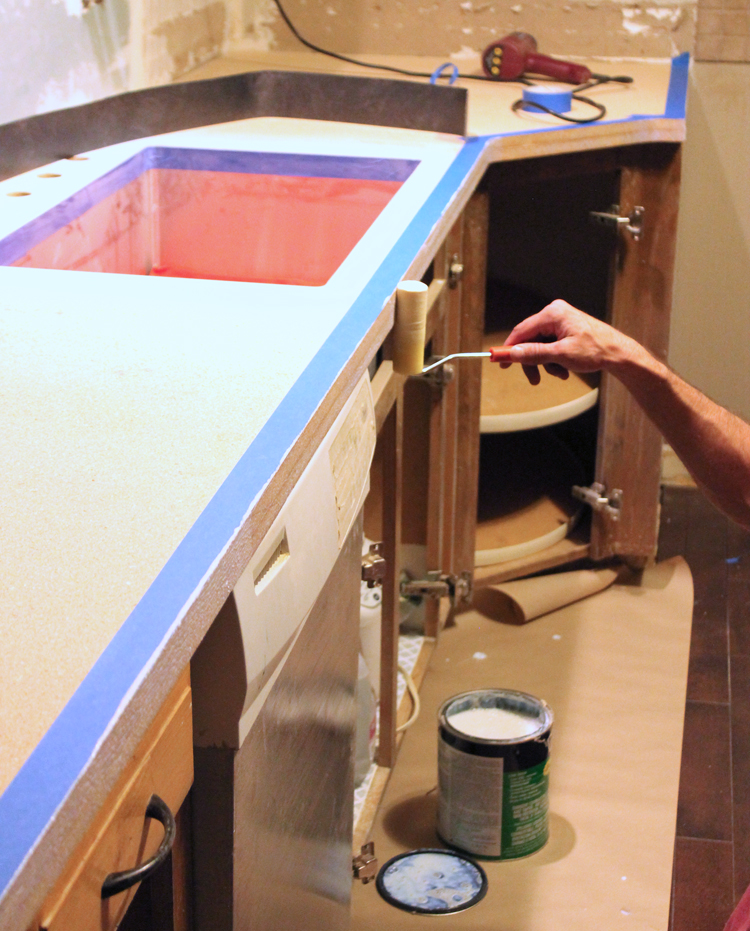
Next, apply the contact cement to both the substrate edge and the back of the laminate. It’s important to follow the manufacturer’s instructions regarding the application thickness and drying time. Typically, the adhesive should be applied evenly and allowed to become tacky, which usually takes around 15 to 20 minutes. Applying the adhesive too thickly or too thinly can affect the bond strength, so even application is key.
![]()
Once the adhesive is tacky to the touch, carefully align the laminate with the countertop edge. Starting from one end, press the laminate onto the edge, ensuring that it adheres smoothly and without air bubbles. Using a roller, apply firm pressure to bond the laminate to the substrate thoroughly. Rolling outwards from the center helps to eliminate any air pockets and ensures a strong bond.
After the laminate is firmly in place, trim the excess material using a utility knife or laminate trimmer. A straight edge can help guide the knife for a clean cut. Be cautious not to trim too much, as this could expose the substrate. It’s better to make several light passes with the knife rather than trying to cut through the laminate in one go, which can result in chipping or uneven edges.
The next step involves finishing the edges to create a smooth and seamless appearance. Sand the edges lightly with fine-grit sandpaper to remove any sharpness and ensure that the laminate edges blend seamlessly with the countertop surface. This step not only improves the aesthetics but also helps to prevent chipping and peeling over time.
Clamping the laminate while the adhesive cures can further strengthen the bond. Use clamps or heavy objects to apply consistent pressure along the edge for several hours, or as recommended by the adhesive manufacturer. Ensuring that the bond is fully set before using the countertop is crucial for long-term durability.
Clean up any excess adhesive that may have oozed out during the pressing process. A clean cloth dampened with a small amount of solvent or adhesive remover can be used to gently wipe away the excess without damaging the laminate. Ensure that all adhesive residue is removed to maintain a clean and professional finish.
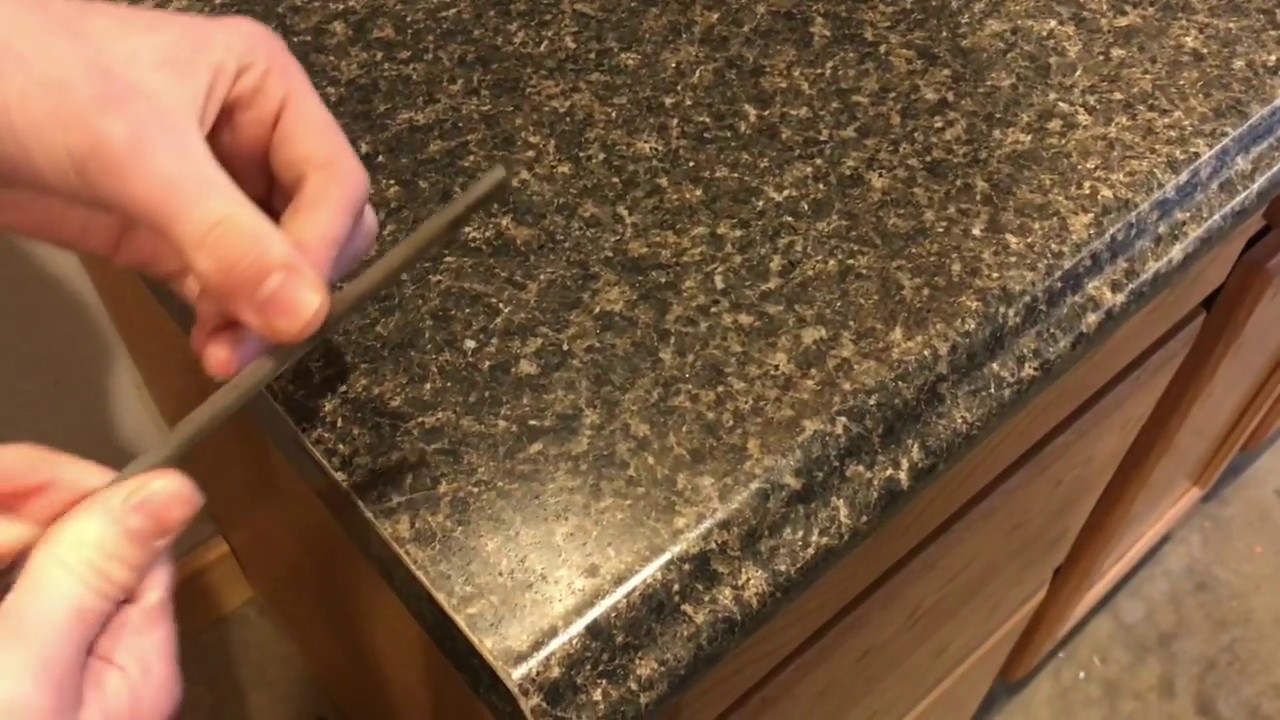
For internal corners or more complex edge profiles, additional care and precision are required. Use a laminate file to smooth any internal corners and to ensure that the edges meet seamlessly. Patience and attention to detail are key in these areas to avoid gaps and ensure a high-quality finish.
Maintaining your newly laminated countertop edges involves regular cleaning and avoiding harsh chemicals or abrasive cleaning tools that can damage the laminate surface. With proper care, the laminate edges will remain durable and attractive for many years.
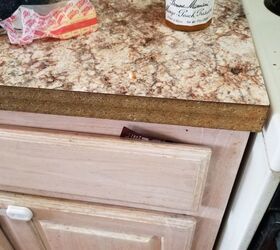
If you encounter any issues during the installation, such as bubbles or lifting edges, it’s important to address them promptly. Bubbles can often be fixed by applying additional heat and pressure to the area while lifting edges might require a small amount of adhesive and careful re-rolling.
Regular inspection of the laminate edges can help identify any potential problems early. Look for signs of wear or damage, such as peeling or chipping, and address these issues before they become more significant. Proper maintenance will extend the life of your laminate countertops and keep them looking their best.
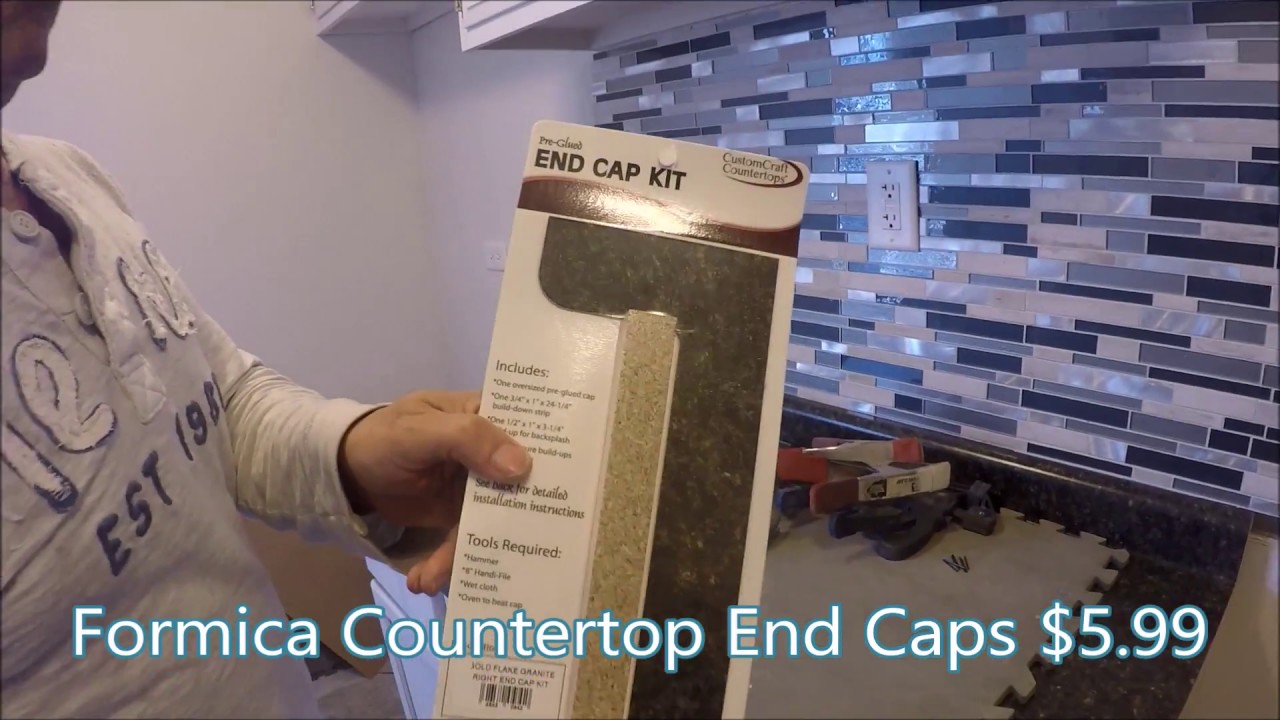
Understanding the different types of laminate adhesives available can also enhance your installation. While contact cement is the most commonly used adhesive, there are water-based and solvent-based options, each with its own set of advantages. Choosing the right adhesive for your specific project can improve the overall outcome and durability.
Finally, practicing on a small, inconspicuous area or a scrap piece of countertop can help you refine your technique before tackling the entire project. This practice run allows you to become comfortable with the tools and materials, ensuring a smoother process when working on the actual countertop.

Common Mistakes to Avoid
One common mistake is not allowing the contact cement to become sufficiently tacky before pressing the laminate onto the substrate. If the adhesive is still too wet, it will not form a strong bond, and the laminate may lift or bubble over time. Always follow the manufacturer’s instructions regarding drying times.
Another mistake is applying the adhesive unevenly. Uneven application can lead to weak spots where the laminate does not adhere properly, resulting in potential lifting or bubbling. Using a roller or brush to apply the adhesive evenly is essential for a strong bond.
Failing to use clamps or sufficient pressure during the curing process is also a common error. Without adequate pressure, the adhesive may not bond as strongly as needed, leading to weak adhesion and potential problems down the line. Clamps or heavy objects should be used to apply consistent pressure while the adhesive cures.
Not trimming the laminate correctly can result in rough or uneven edges. Using a dull knife or trying to cut too quickly can cause the laminate to chip or crack. It’s important to use a sharp utility knife and take your time, making multiple light passes to achieve a clean cut.
Neglecting to sand the edges after trimming is another frequent oversight. Unsanded edges can be sharp and prone to chipping. Lightly sanding the edges ensures a smooth finish and helps prevent future damage.
What type of adhesive should I use for gluing laminate countertop ends?
The most commonly used adhesive for gluing laminate countertop ends is contact cement. It provides a strong, durable bond that is ideal for laminate surfaces. There are both water-based and solvent-based contact cement available, with solvent-based typically offering a stronger bond and quicker drying time. However, water-based adhesives are less toxic and easier to clean up. Always follow the manufacturer’s recommendations for the specific type of laminate and substrate you are working with to ensure the best results.
How do I prevent air bubbles when gluing laminate countertops?
To prevent air bubbles when gluing laminate countertops, ensure both the laminate and the substrate are clean and free of dust and debris before applying the adhesive. Apply the adhesive evenly to both surfaces and allow it to become tacky according to the manufacturer’s instructions. When pressing the laminate onto the substrate, start from one end and work your way to the other, using a roller to apply firm, even pressure. Rolling outwards from the center helps to eliminate any air pockets and ensures a strong bond.
Can I use a regular utility knife to trim laminate edges?
Yes, a regular utility knife can be used to trim laminate edges, but it must be sharp to avoid chipping or cracking the laminate. When trimming, use a straight edge to guide the knife and make multiple light passes rather than trying to cut through the laminate in one go. This method reduces the risk of uneven cuts and ensures a clean, smooth edge. For best results, use a laminate trimmer or a specialized laminate cutting tool if available.
How often should I seal the edges of my laminate countertop?
Sealing the edges of laminate countertops is not typically necessary, as the adhesive used during installation should provide adequate protection. However, if you notice any lifting or potential for moisture to infiltrate the edges, applying a sealant can help protect the substrate. In general, regular maintenance and immediate repair of any damage will help keep the laminate in good condition without the need for frequent sealing.
What should I do if the laminate starts to lift or bubble after installation?
If the laminate starts to lift or bubble after installation, it can often be repaired by reapplying adhesive and pressure. For small bubbles, use a heat gun or hair dryer to warm the area, then press down with a roller to flatten it out. For lifting edges, apply a small amount of contact cement or laminate adhesive under the lifted area, allow it to become tacky, then press down firmly and use clamps or heavy objects to apply pressure until it sets. If the problem is extensive, it might be best to consult a professional for repair or replacement.
How to FINISH a Formica countertop laminate edge
How can I reglue a Formica countertop?
How To Install Sheet Laminate On A Countertop
How to Install Laminate Countertops Lowes
Related articles: