Embarking on a DIY marble countertop painting project can transform your kitchen or bathroom into a luxurious space without the hefty price tag of real marble. The process requires careful preparation, the right materials, and some patience. First, you need to gather all the necessary supplies. This includes a high-quality primer, acrylic paints in various shades to mimic marble veins, brushes, sponges, painter’s tape, and a durable topcoat. Having all these on hand before you start will ensure a smoother workflow.
Before you begin painting, it is crucial to thoroughly clean the countertop surface. Any grease, dirt, or residue can prevent the primer and paint from adhering properly. Use a degreasing cleaner and then rinse with water. Allow the surface to dry completely. Next, lightly sand the countertop with fine-grit sandpaper to create a slightly rough texture, which helps the primer stick better. Wipe away the dust with a damp cloth.
Applying painter’s tape around the edges of the countertop and any fixtures is essential to protect them from paint. After taping, you can apply the primer. A good primer will help the paint adhere better and provide a uniform base color. Use a high-quality, oil-based primer for the best results. Apply it evenly across the surface and allow it to dry according to the manufacturer’s instructions, usually a few hours.
Once the primer is dry, it’s time to start painting. Begin with a base coat of paint that will serve as the background color of your marble. A light gray or white works well. Use a foam roller for an even application and let it dry completely. This step sets the foundation for the marble effect. Now comes the fun part: creating the marble veins. Using a small brush or a fine-tipped artist’s brush, start painting veins across the surface.

To create realistic veins, use a combination of gray and black acrylic paints. Dip your brush in water to thin the paint slightly, which helps in achieving a more natural look. Start with light pressure, dragging the brush in random, uneven patterns. Marble veins are not uniform, so vary the thickness and direction. You can also use a feather to soften the edges of the veins and make them look more natural. Blotting with a sponge can add texture and blend the colors.
After you’ve painted the veins, it’s important to step back and assess your work. If the veins look too harsh, you can soften them by lightly sponging over them with your base color. This blending technique helps integrate the veins into the surface, giving a more authentic marble appearance. Allow the paint to dry completely before moving on to the next step.
The final step is sealing your masterpiece with a topcoat. A clear, high-gloss polyurethane topcoat will not only protect the painted surface but also give it the glossy finish typical of real marble. Apply multiple thin coats, allowing each coat to dry completely before applying the next. This builds up a durable, glossy finish that enhances the look of your painted marble countertop.

While waiting for the topcoat to dry, be sure to keep the area free of dust and debris. Any particles that settle on the surface can mar the smooth finish. It’s a good idea to cover the countertop with a clean, dust-free cloth or plastic sheet during the drying process. Once the final coat is dry, remove the painter’s tape carefully to avoid peeling off any paint.
Maintaining your DIY marble countertop is essential for its longevity. Use mild, non-abrasive cleaners to avoid damaging the surface. Avoid placing hot items directly on the countertop, as this can damage the paint and topcoat. Using cutting boards and trivets can help prevent scratches and heat damage.
Over time, you might notice minor scratches or wear on the surface. These can often be touched up with a bit of matching paint and a small brush. Regular maintenance and care will keep your painted marble countertop looking beautiful for years. Remember, while this DIY project can save you money, it requires time and attention to detail to achieve a high-quality finish.

In terms of cost, DIY marble countertop painting is significantly cheaper than installing real marble. The materials are affordable, and the project can usually be completed over a weekend. This makes it an attractive option for homeowners looking to upgrade their space on a budget. Plus, the satisfaction of creating something beautiful with your own hands adds to the value.
Before starting this project, it’s also worth considering the existing color scheme and style of your kitchen or bathroom. The marble effect should complement the other elements in the room. This might influence your choice of base color and the shades used for the veins. A well-coordinated look can elevate the overall aesthetic of your space.
If you’re not confident in your artistic abilities, consider practicing on a piece of cardboard or plywood before tackling the countertop. This allows you to experiment with different techniques and get a feel for how the paint behaves. Practice can help build confidence and ensure better results when you move on to the actual countertop.
Common Mistakes to Avoid:
One common mistake is not properly preparing the surface. Skipping steps like cleaning, sanding, and priming can lead to poor paint adhesion and a finish that won’t last. Another frequent error is using the wrong type of paint. Acrylic paints work best for this project, and using anything else might result in a less durable finish. Applying too much paint at once is another pitfall. Thin layers are key to achieving a smooth, realistic marble look.
Not allowing enough drying time between layers is also a mistake. Each layer of paint and topcoat needs to dry completely before the next is applied to avoid smudging and uneven surfaces. Additionally, neglecting to seal the painted surface can leave it vulnerable to damage from everyday use. A good topcoat is essential for protecting your work. Lastly, not maintaining the painted surface properly can lead to premature wear and tear. Regular cleaning with non-abrasive cleaners and avoiding placing hot items directly on the countertop will help preserve its beauty.
How long does it take to paint a countertop to look like marble?
The time required to paint a countertop to look like marble can vary based on the size of the surface and the complexity of the design. Generally, you should allow a weekend for the entire project. This includes time for cleaning and prepping the surface, painting, and allowing sufficient drying time between layers. Each step is crucial for achieving a high-quality finish, so patience is key. Rushing the process can lead to subpar results.
What type of paint should I use for a DIY marble countertop?
For a DIY marble countertop, acrylic paints are highly recommended. They are easy to work with, provide vibrant colors, and are durable when sealed properly. You will need a variety of shades, typically white, gray, and black, to create the marble veins. Additionally, using a high-quality primer and a clear, high-gloss polyurethane topcoat is essential for ensuring the paint adheres well and the finished surface is protected from damage.
Can I use any countertop for painting, or are there specific types that work best?
While you can paint most types of countertops, some materials are more suitable than others. Laminate and solid surface countertops are ideal candidates because they have smooth, non-porous surfaces that are easy to prepare and paint. Granite and marble countertops can also be painted, but it is generally less common due to the value and natural beauty of these materials. Proper preparation, including thorough cleaning and sanding, is crucial regardless of the countertop type.

How durable is a painted marble countertop compared to real marble?
A painted marble countertop, when done correctly and sealed with a high-quality topcoat, can be quite durable and resistant to everyday wear and tear. However, it will not be as hard or heat-resistant as real marble. To maintain the longevity of your painted countertop, use cutting boards, trivets, and non-abrasive cleaners. Avoid placing hot items directly on the surface to prevent damage. With proper care, a painted marble countertop can last for several years.
What are the maintenance requirements for a painted marble countertop?
Maintaining a painted marble countertop involves regular cleaning with mild, non-abrasive cleaners to avoid scratching the surface. Avoid using harsh chemicals or scrubbing pads that can damage the paint and topcoat. It is also advisable to use trivets for hot pots and pans and cutting boards to prevent scratches from knives. Occasionally, you might need to touch up small scratches or worn areas with a bit of matching paint and a brush. Regular care will help keep your countertop looking fresh and beautiful.
Can I change the color or design of my painted marble countertop later?
Yes, you can change the color or design of your painted marble countertop later if desired. The process involves lightly sanding the existing surface to remove the topcoat, then cleaning and priming it again. Once the surface is prepared, you can repaint it with your new design and colors. This flexibility allows you to update the look of your countertop to match new decor or personal preferences. However, keep in mind that each repainting project will require the same careful preparation and sealing to ensure a durable finish.

Giani Carrara White Marble Countertop Paint Kit-FG-MB WHTEP KIT

Giani Marble Countertop Paint Kit

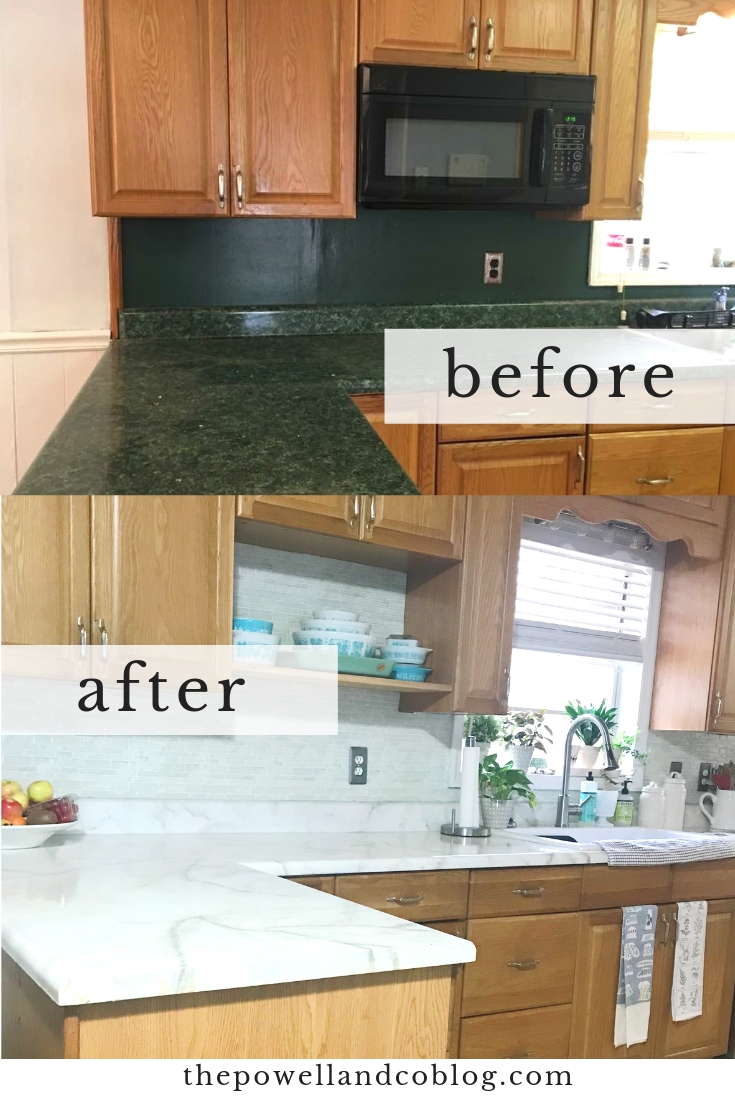
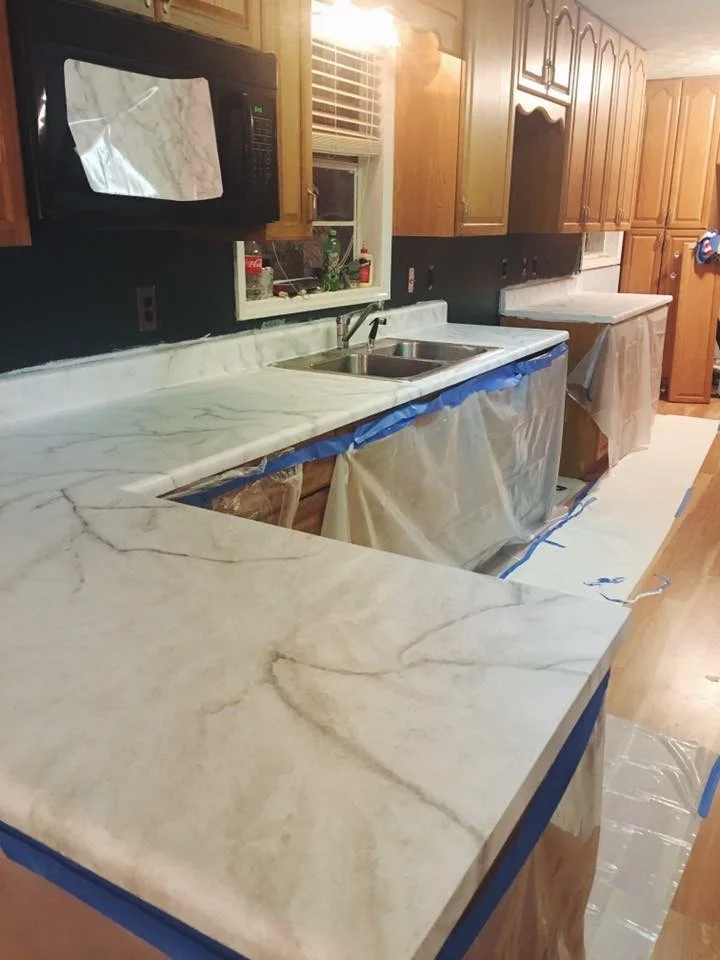
Faux DIY Marble Countertops

Related articles:
- DIY Refinishing Cultured Marble Countertops
- Marble Countertops In Bathrooms
- Cultured Marble Countertops
- Gray Kitchen Cabinets Marble Countertops
- Modern Kitchen Marble Countertops
- Refinish Cultured Marble Countertop
- Carrara Marble Countertops Bathroom
- Marble Countertops Types
- How To Refinish Marble Countertops
- White Gray Marble Countertops
