Installing laminate countertops yourself can be an incredibly rewarding project, saving you money and giving your kitchen or bathroom a fresh, updated look. While laminate is one of the most cost-effective countertop materials available, its durability and variety of designs make it a popular choice for DIY enthusiasts. Installing laminate countertops might seem like a daunting task, but with the right tools, materials, and step-by-step instructions, you can achieve professional-looking results. Before diving in, ensure you’ve accurately measured your space and have all the necessary materials ready.
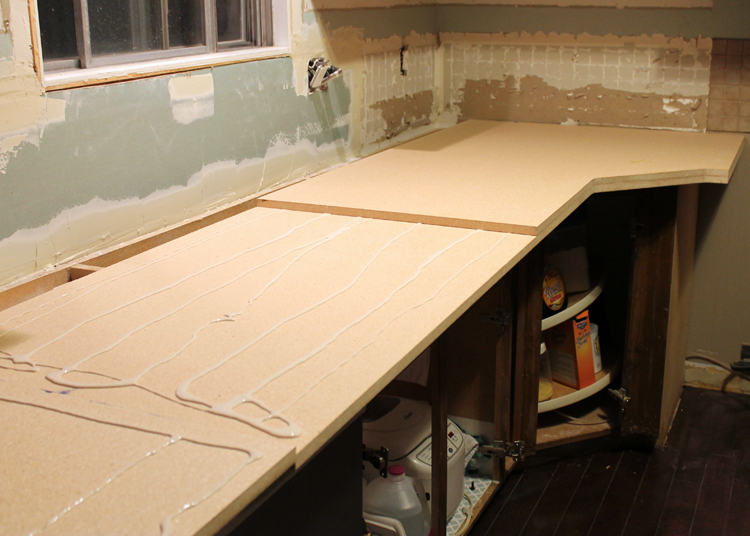
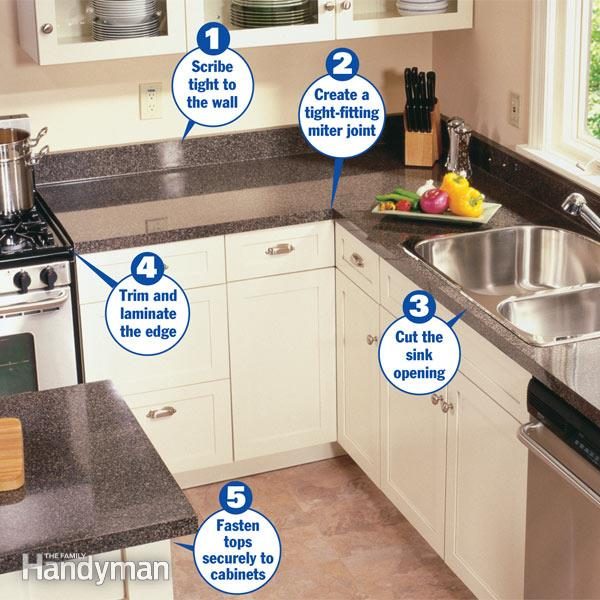
To begin, you’ll need to measure your countertop area carefully. Always measure twice to ensure accuracy because any mistake at this stage can lead to improper fitting, which will affect the final result. It’s essential to factor in overhangs—typically around 1 inch beyond the edge of the cabinets—and make provisions for corners or odd angles in the kitchen. If you’re replacing old countertops, make sure to remove them completely, inspecting the cabinets underneath for any signs of damage. Repair or reinforce any weak spots before proceeding.
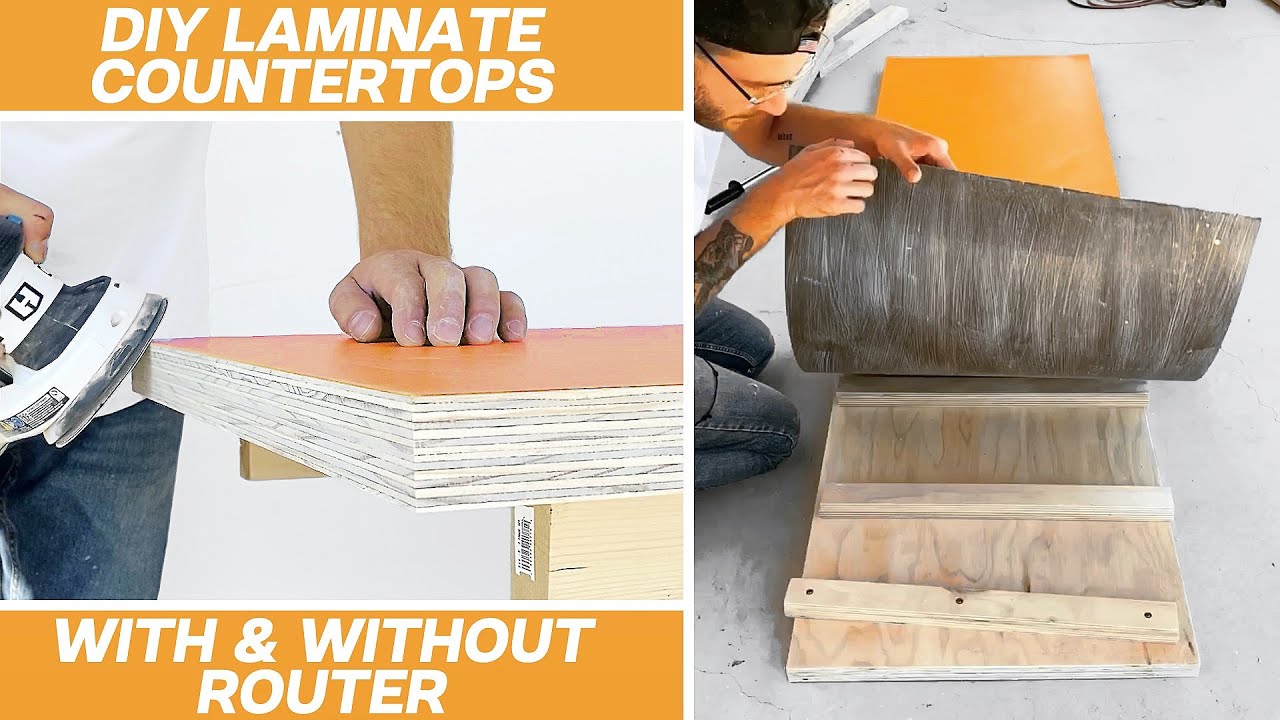
When it comes to cutting the laminate, precision is key. You’ll want to use a circular saw or jigsaw with a fine-toothed blade to cut the laminate to the appropriate size. Ensure that the side of the laminate with the pattern or finish is facing downward to avoid chipping when you make the cuts. Smooth out any rough edges with a file or sandpaper to ensure a snug fit against the walls and edges of your kitchen cabinets. If your countertop includes cutouts for sinks or stovetops, use a jigsaw to carefully create these openings, again ensuring that your measurements are precise.
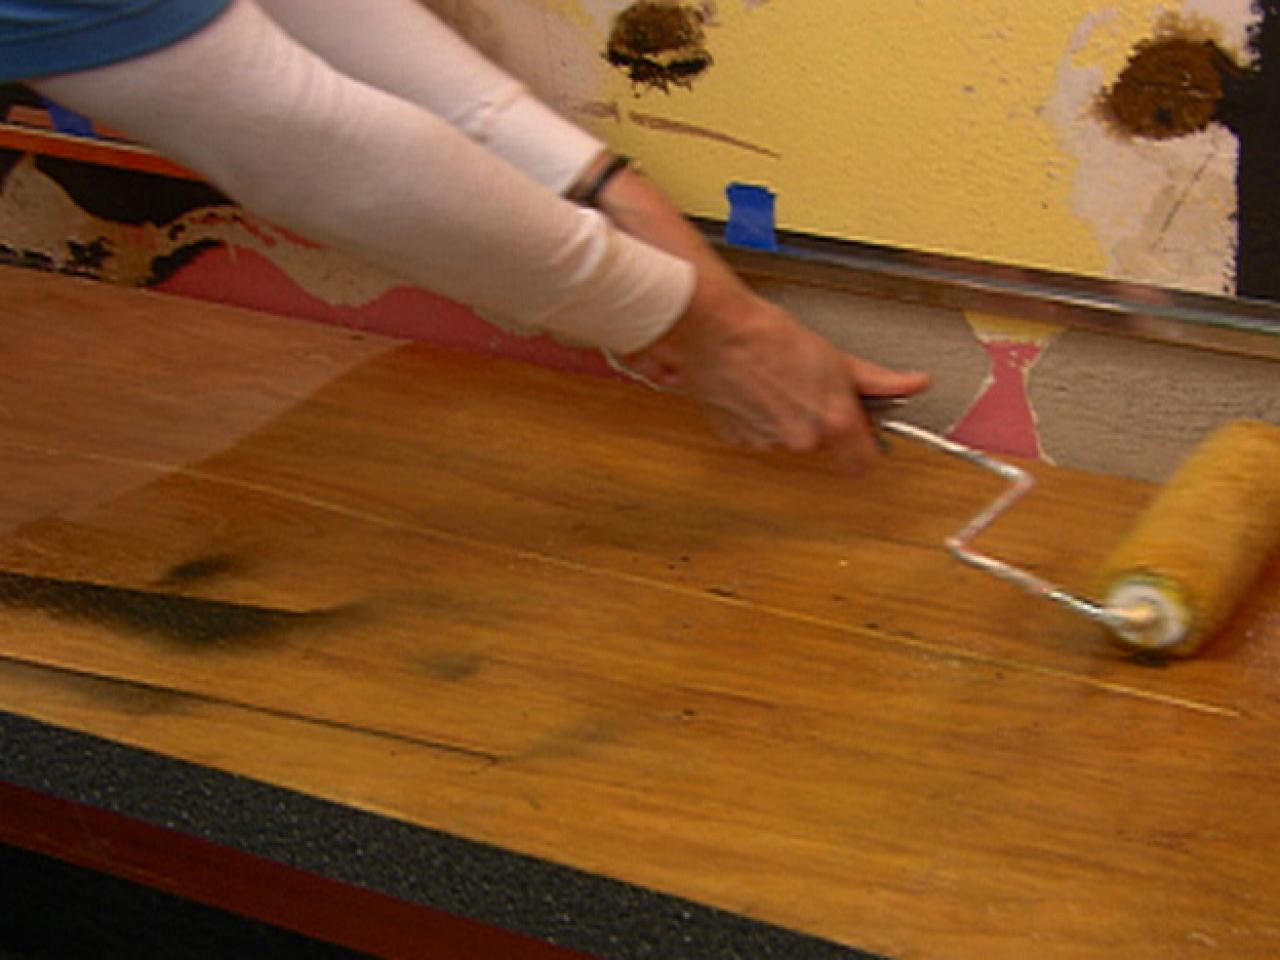
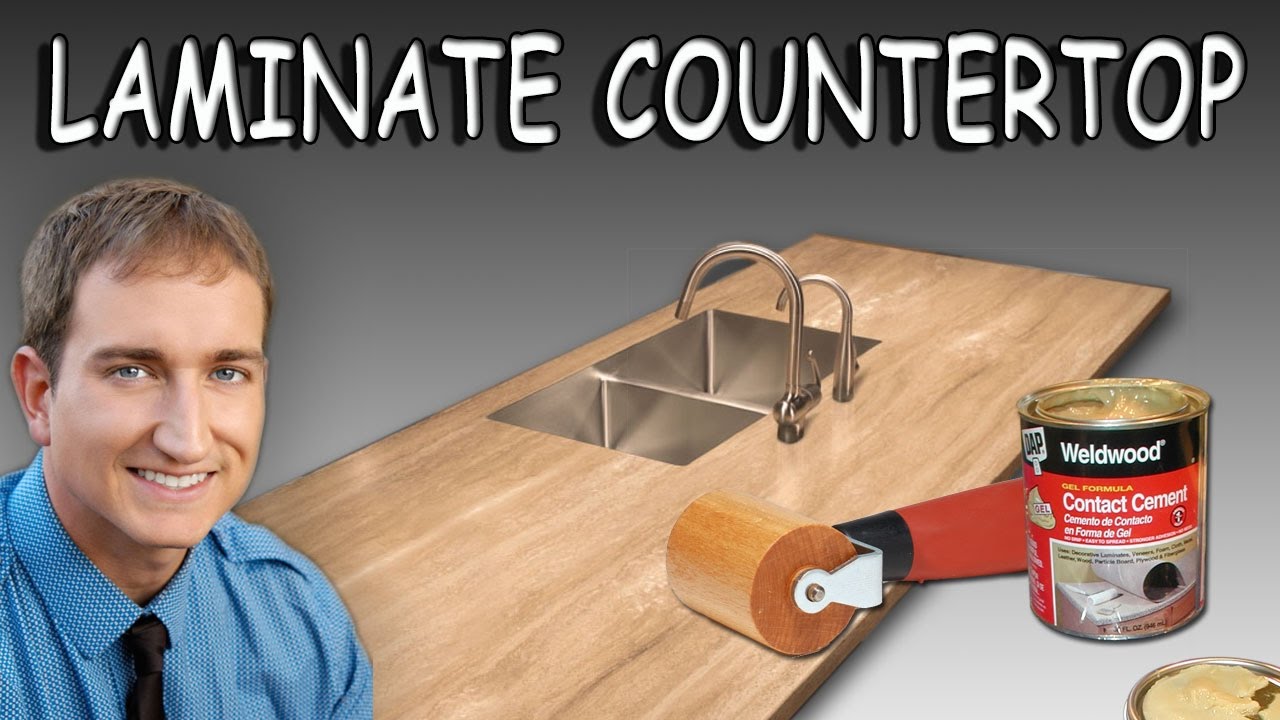
Before attaching the laminate, it’s essential to apply adhesive to both the laminate and the substrate. Contact cement is commonly used for this purpose, but you need to apply it carefully to avoid any air bubbles, which can ruin the final look. Once the adhesive has dried to a tacky consistency, position the laminate over the countertop base carefully, as contact cement adheres immediately upon contact. Starting from the center and working outwards, use a roller or a heavy object to press the laminate into place and ensure an even bond.

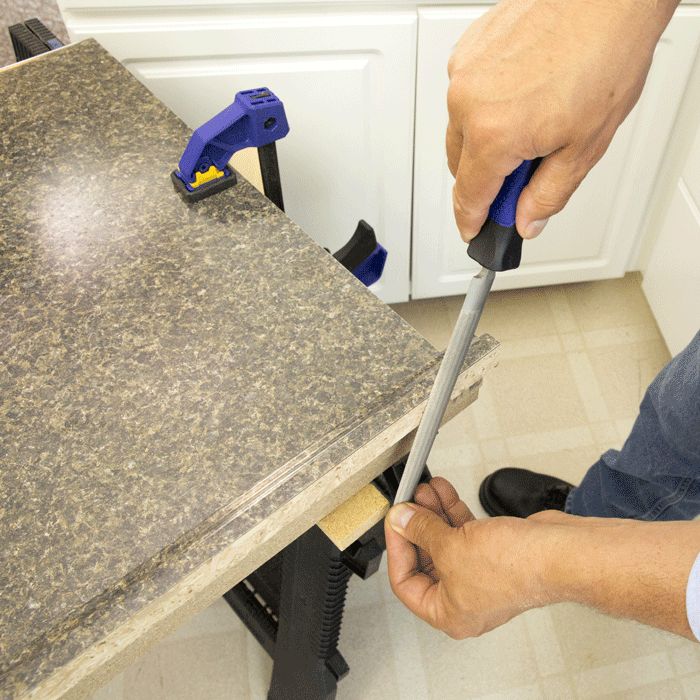
For edges, you may need to use a separate strip of laminate. The process is similar to attaching the top piece, but requires even more precision since it’s highly visible. Using a flush trim router or a sharp utility knife, trim away any excess laminate from the edges. Be cautious during this step; one wrong cut can ruin an otherwise perfect installation. Sand the edges gently to smooth out the transition from the top to the sides.
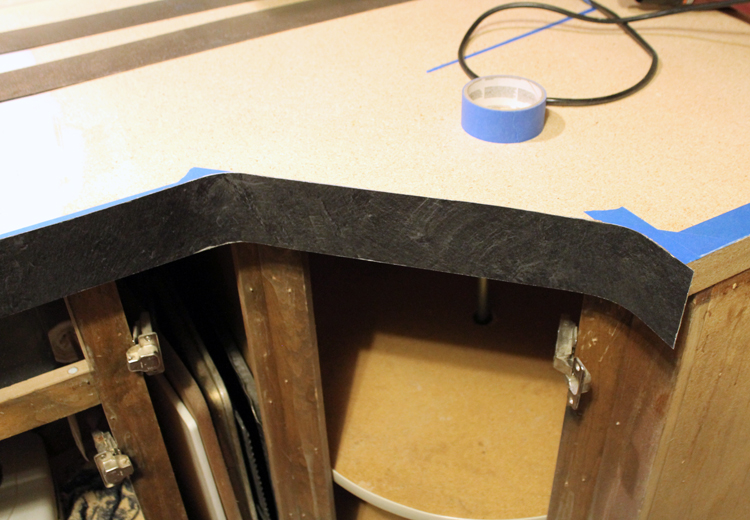
Sealing the seams and edges is critical to ensure the longevity of your laminate countertops. Use silicone caulk or a specialized laminate edge sealant to seal any seams between the countertop and the walls or any joints in the laminate itself. This will prevent moisture from seeping into the substrate, which can cause warping or damage over time. Proper sealing is especially important around sink areas, where water exposure is more frequent.
Once the laminate is in place and the edges are sealed, it’s time to install the backsplash. Many laminate countertops come with matching backsplash pieces that attach directly to the countertop and the wall behind it. Use the same adhesive and sealing techniques to ensure that the backsplash is secure and protected from moisture. Ensure the seams between the backsplash and the countertop are sealed tightly with caulk for a polished and professional look.

As the final step, give everything a thorough inspection to make sure the laminate is properly adhered and that there are no visible flaws. You’ll also want to give your new countertop a gentle cleaning with a mild cleanser to remove any adhesive residue or dust that might have accumulated during installation. With a bit of patience and careful work, you now have a sleek, durable laminate countertop that looks just as good as any professionally installed option.
Common Mistakes to Avoid: There are a few pitfalls that many DIYers encounter when installing laminate countertops, and it’s important to know them ahead of time so you can avoid making costly mistakes. One common mistake is not allowing the adhesive enough time to dry before attaching the laminate. Rushing through this step can cause poor adhesion, leading to bubbles or loose spots over time. Another mistake is improper measurements; cutting your laminate too small will leave you scrambling to fix a gap that can’t be easily covered. Always double-check your dimensions before making any cuts.
Using the wrong type of saw blade or not properly supporting the laminate while cutting can result in jagged edges or chips in the finish. It’s also important to make sure your workspace is clean and free of debris. Even a tiny particle trapped beneath the laminate can create a noticeable bump in the final product. Finally, failing to seal seams and edges properly can lead to moisture damage, which might not be immediately apparent but will manifest over time as the substrate begins to swell and warp. Investing extra time in sealing and waterproofing is essential for ensuring the longevity of your laminate countertops.
How long does it take to install laminate countertops?
The time required depends on the complexity of the job and your experience level. For most DIYers, the entire process—from removing the old countertops to installing the new laminate—can take anywhere from a full day to a weekend. It’s important not to rush the job, particularly when it comes to cutting and fitting the laminate, allowing adhesive to dry, and ensuring proper sealing.
What tools are necessary for installing laminate countertops?
To install laminate countertops, you’ll need a few basic tools: a circular saw or jigsaw with a fine-tooth blade, a tape measure, a level, clamps, contact cement, a roller, a flush trim router or utility knife, and caulk. Some additional tools, like a jigsaw for cutting sink holes or a laminate roller for ensuring an even bond, can also be useful depending on the specifics of your project.
Can I install laminate countertops over existing countertops?
While it’s possible to install laminate over existing countertops, it’s generally not recommended unless the existing surface is completely smooth, even, and free of any damage. Irregularities in the old countertops can transfer through to the new laminate surface, and you may face challenges with the adhesive bonding properly. It’s usually best to remove the old countertops entirely.
How do I prevent laminate from chipping when cutting?
To avoid chipping the laminate, always cut with the finished side facing down, especially when using a circular saw. A fine-tooth blade designed for laminate or plywood will help make cleaner cuts. You can also place masking tape over the cut line to help reduce chipping. When cutting with a jigsaw, move slowly and steadily to maintain control and minimize chipping.
How do I maintain my laminate countertops?
Laminate countertops are low-maintenance but require some care to ensure longevity. Clean spills promptly, especially liquids that could seep into seams. Use mild cleaners, avoiding harsh chemicals or abrasive sponges that can scratch the surface. It’s also a good idea to use cutting boards and trivets to protect the laminate from sharp knives and hot pans.
Is laminate a good choice for countertops?
Yes, laminate is an excellent choice for countertops due to its affordability, ease of installation, and wide variety of design options. Modern laminates can mimic the appearance of more expensive materials like stone or wood while being much easier to work with. Though not as durable as granite or quartz, laminate can last for many years with proper care, making it a cost-effective solution for budget-conscious homeowners.

How to Install Laminate Countertops
How to DIY Laminate Countertops
How to Install Laminate on Countertops
How To Install Sheet Laminate On A Countertop
How to Install a Countertop (DIY)
Related articles:
- Painting Kitchen Laminate Countertops
- Quartz Laminate Countertops
- Laminate Countertops Installation
- Laminate Countertop For Kitchen Island
- Kitchen Island Laminate Countertops
- Cheap Laminate Countertops
- Laminate Countertops That Look Like Stone
- Plastic Laminate Countertops
- Laminate Countertop Ideas For Kitchen
- Dark Green Laminate Countertops