When considering a kitchen remodel, DIY kitchen countertops using tile offers a budget-friendly and creative solution. Tiled countertops provide a durable surface that can withstand the daily wear and tear of a busy kitchen, while also allowing for a high degree of customization in terms of color, pattern, and texture. Unlike some countertop materials that require professional installation, tile can be installed by homeowners with basic DIY skills, making it an accessible option for many.
Choosing the right type of tile is the first step in creating a DIY tiled countertop. Porcelain and ceramic tiles are popular choices due to their durability and water resistance. Porcelain tiles are denser and less porous than ceramic, making them particularly well-suited for areas exposed to moisture and high traffic. For a more luxurious look, natural stone tiles like granite, marble, or slate can be used, though they require additional maintenance and sealing to protect against stains and damage.
Planning the layout is a crucial aspect of tiling a countertop. Accurate measurements of the countertop space are necessary to determine the number of tiles needed and to plan for the arrangement of tiles and grout lines. A dry layout, where tiles are placed on the countertop without adhesive, helps visualize the final look and allows for adjustments. This step is important for ensuring that the tiles fit properly around edges, corners, and fixtures like sinks or cooktops.
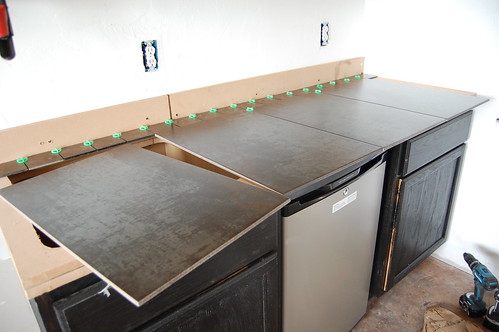
Substrate preparation is essential for a successful tile installation. The substrate, or surface onto which the tiles will be adhered, must be flat, stable, and clean. Common substrates include cement board, which provides a sturdy and moisture-resistant base for the tiles. The cement board is attached to the existing countertop structure using screws and a thin layer of mortar, creating a solid foundation that prevents tile movement and cracking.

Applying the adhesive is the next step in the process. Thin-set mortar is commonly used to adhere tiles to the substrate. This mortar provides a strong bond and can be applied using a notched trowel to create grooves that help the tiles adhere securely. Careful attention is needed to ensure that the mortar is applied evenly and that each tile is pressed firmly into place. Working in small sections allows for better control and ensures that the mortar does not dry out before the tiles are set.
Cutting tiles to fit around edges, corners, and fixtures is often necessary to achieve a professional look. A wet saw or tile cutter can be used to make precise cuts. Measuring and marking tiles before cutting helps ensure accuracy and reduces waste. Safety precautions, such as wearing protective eyewear and gloves, are important when cutting tiles to prevent injuries from sharp edges and flying debris.
Grouting the tiles is a key step in the tiling process. Grout fills the spaces between tiles, providing stability and a finished appearance. Choosing the right grout color can enhance the overall look of the countertop, with options ranging from contrasting colors for a bold effect to matching colors for a seamless appearance. Grout is applied using a rubber float, which helps press the grout into the joints and remove excess from the tile surface. After the grout sets, a damp sponge is used to clean off any residue, leaving a smooth and even surface.
Sealing the grout is essential for protecting it from stains and moisture. Unsealed grout is porous and can absorb spills and dirt, leading to discoloration and damage over time. Applying a grout sealer creates a protective barrier that repels liquids and makes the grout easier to clean. Regular re-sealing is recommended to maintain the grout’s protective properties and keep the countertop looking its best.
Tile edges can be finished with trim pieces or bullnose tiles to create a polished look. These pieces cover the exposed edges of the tiles, providing a smooth and aesthetically pleasing transition between the countertop and the surrounding areas. Trim pieces come in various materials and styles, allowing for customization to match the design of the countertop. Proper installation of trim pieces enhances the durability and appearance of the tiled surface.
Maintenance of tiled countertops is straightforward but requires attention to detail. Regular cleaning with a mild, non-abrasive cleaner helps keep the tiles and grout looking fresh. It’s important to avoid harsh chemicals and abrasive pads that can damage the tile surface or the grout. Spills should be wiped up promptly to prevent staining, and cutting boards should be used to protect the tiles from scratches and chips caused by knives and other sharp objects.
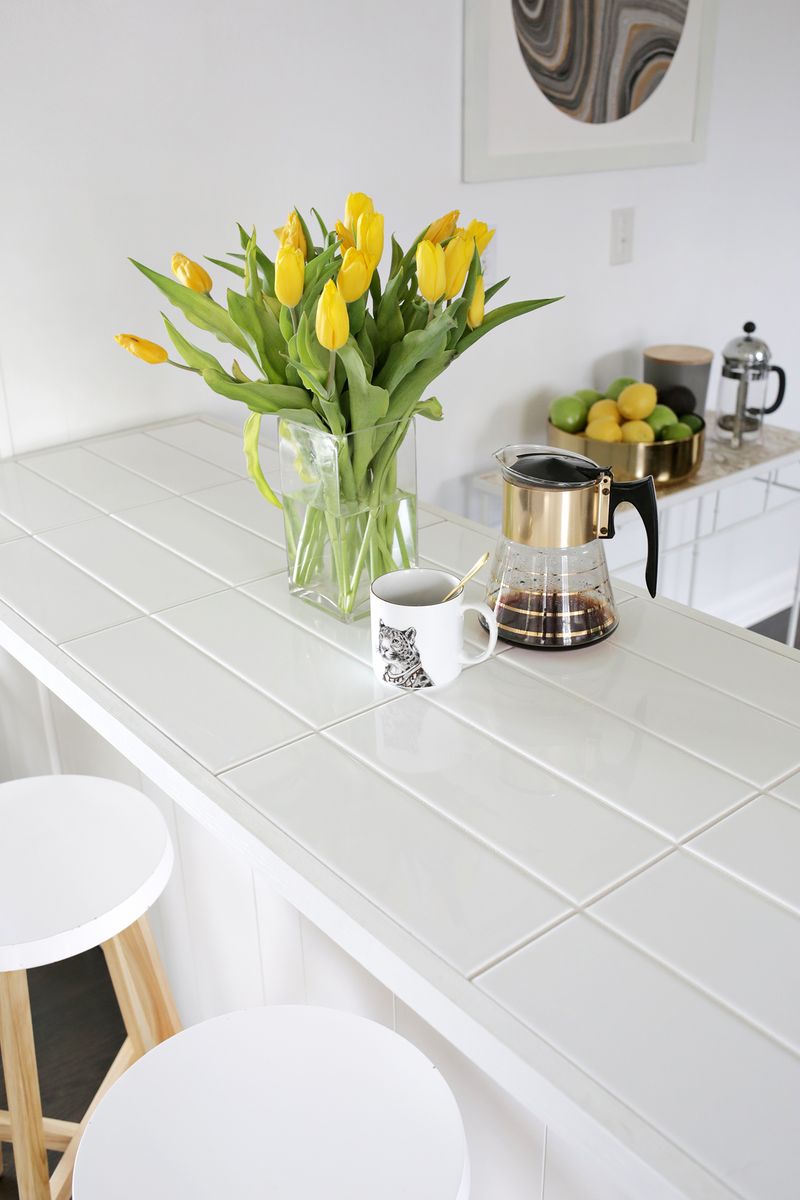
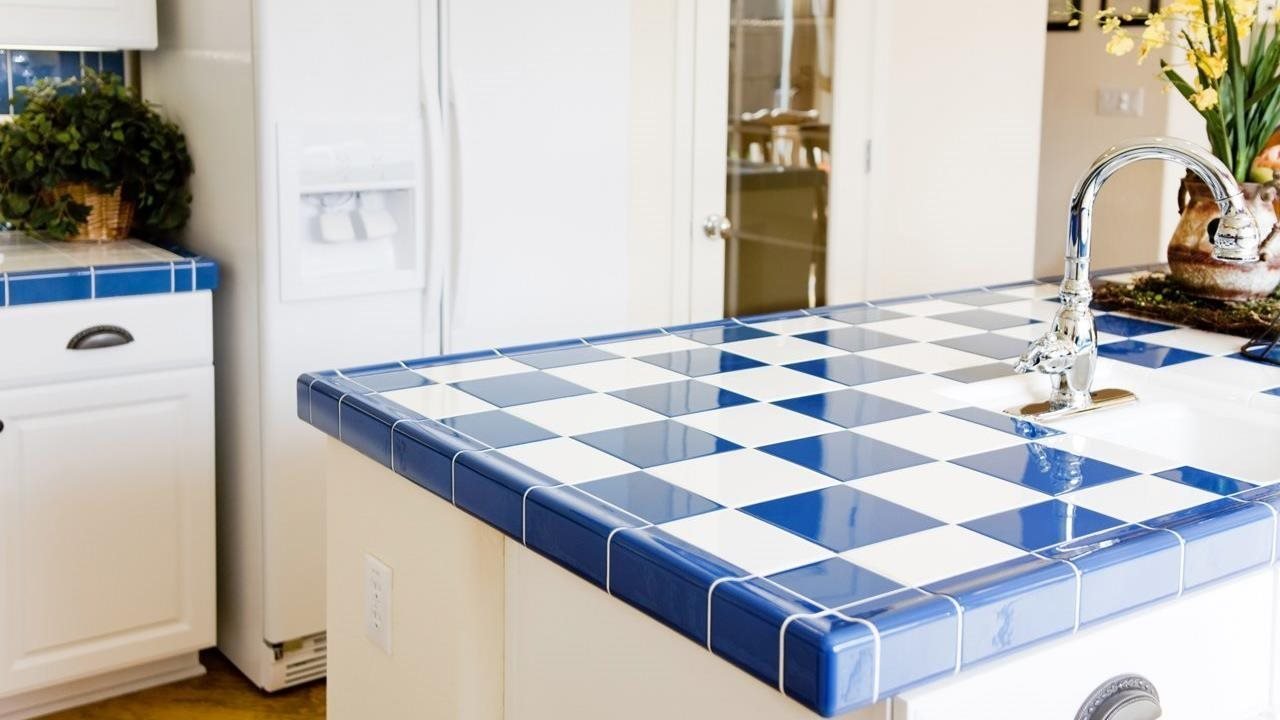
Tiled countertops offer numerous design possibilities. Homeowners can choose from a wide variety of tile colors, patterns, and textures to create a unique look that complements their kitchen’s style. Mosaic tiles can be used to create intricate patterns or accent areas, while larger tiles can provide a more uniform appearance. Mixing different types of tiles or incorporating decorative inserts can add visual interest and create a personalized design.

One advantage of tiled countertops is their ability to be repaired or updated easily. If a tile becomes damaged or the design becomes outdated, individual tiles can be replaced without the need for a complete countertop overhaul. This makes tiled countertops a flexible and cost-effective option for homeowners who like to refresh their kitchen’s look periodically. Keeping spare tiles on hand simplifies repairs and ensures a consistent match.
The cost of DIY tiled countertops can vary depending on the type of tiles chosen and the size of the project. Ceramic and porcelain tiles are generally more affordable than natural stone options, making them a popular choice for budget-conscious homeowners. DIY installation can significantly reduce labor costs, making tiled countertops an economical option compared to professionally installed surfaces like granite or quartz.
Environmental considerations are also a factor in choosing tiled countertops. Tiles are made from natural materials, and many manufacturers offer eco-friendly options that use recycled content or sustainable production methods. Additionally, the long lifespan and repairability of tiled countertops reduce the need for frequent replacements, contributing to a more sustainable kitchen design.
DIY kitchen countertops using tile offer a versatile, customizable, and budget-friendly option for homeowners looking to update their kitchens. With a wide range of tile choices and design possibilities, tiled countertops can be tailored to fit any kitchen style and personal taste. Proper planning, substrate preparation, and installation techniques are key to achieving a durable and attractive surface. Regular maintenance and the ability to easily repair or update the tiles make tiled countertops a practical and stylish choice for modern kitchens.

Common Mistakes to Avoid
When installing DIY tiled countertops, several common mistakes can impact the quality and longevity of the finished surface. One frequent error is inadequate substrate preparation. The substrate must be flat, stable, and clean to ensure that the tiles adhere properly. Skipping this step or using an unsuitable substrate can lead to tiles shifting or cracking over time. Using a high-quality cement board and ensuring it is securely fastened provides a solid foundation for the tiles.
Another mistake is incorrect application of adhesive. Thin-set mortar should be applied evenly with a notched trowel to create proper adhesion. Applying too much or too little mortar can result in uneven tiles or poor bonding. Working in small sections helps control the application and ensures that the mortar remains workable. It is also important to follow the manufacturer’s recommendations for mixing and applying the mortar.
Improper cutting of tiles is also a common issue. Accurate measurement and careful cutting are essential for fitting tiles around edges, corners, and fixtures. Rushing this step can lead to poorly fitting tiles and a less professional appearance. Using the right tools, such as a wet saw or tile cutter, and taking time to measure and mark tiles correctly helps achieve precise cuts and a better overall fit.
Failing to properly grout and seal the tiles can lead to issues with moisture and stains. Grout should be applied and cleaned according to best practices, ensuring that all joints are fully filled and excess grout is removed. Sealing the grout is crucial for protecting it from stains and moisture, which can cause discoloration and damage. Regular re-sealing helps maintain the grout’s protective properties and keep the countertop in good condition.
Neglecting edge finishing can also detract from the appearance of tiled countertops. Exposed tile edges can look unfinished and be prone to chipping. Using trim pieces or bullnose tiles to cover the edges provides a polished look and protects the tiles from damage. Ensuring that edge pieces are properly aligned and secured enhances the overall durability and aesthetics of the countertop.

What types of tiles are best for kitchen countertops?
Porcelain and ceramic tiles are popular choices for kitchen countertops due to their durability, water resistance, and ease of maintenance. Porcelain tiles are particularly dense and less porous than ceramic, making them well-suited for areas exposed to moisture and high traffic. Natural stone tiles like granite, marble, or slate offer a more luxurious look but require additional maintenance and sealing to protect against stains and damage. Choosing the right type of tile depends on the desired aesthetic, budget, and maintenance preferences.
How do I prepare the substrate for tiling a countertop?
Preparing the substrate involves ensuring that the surface is flat, stable, and clean. Common substrates for tile installation include cement board, which provides a sturdy and moisture-resistant base. The cement board should be securely fastened to the existing countertop structure using screws and a thin layer of mortar. Proper substrate preparation prevents tile movement and cracking, ensuring a durable and long-lasting countertop. It is essential to follow the manufacturer’s recommendations for installing the substrate.
What is the best way to apply adhesive for tiles?
Thin-set mortar is typically used to adhere tiles to the substrate. The mortar should be mixed according to the manufacturer’s instructions and applied evenly using a notched trowel. The notches create grooves that help the tiles bond securely to the substrate. It is important to work in small sections to ensure that the mortar remains workable and does not dry out before the tiles are set. Each tile should be pressed firmly into place to ensure proper adhesion and alignment.
How do I grout and seal tiled countertops?
Grouting involves filling the spaces between tiles with grout, which provides stability and a finished appearance. The grout should be applied using a rubber float, pressing it into the joints and removing excess from the tile surface. After the grout sets, a damp sponge is used to clean off any residue. Sealing the grout is essential to protect it from stains and moisture. A grout sealer creates a protective barrier and should be applied according to the manufacturer’s instructions. Regular re-sealing helps maintain the grout’s protective properties.
How can I maintain and clean tiled countertops?
Maintaining tiled countertops involves regular cleaning with a mild, non-abrasive cleaner. Harsh chemicals and abrasive pads should be avoided as they can damage the tile surface and grout. Spills should be wiped up promptly to prevent staining, and cutting boards should be used to protect the tiles from scratches and chips caused by knives and other sharp objects. Periodic re-sealing of the grout helps protect it from stains and moisture, ensuring the longevity and appearance of the tiled countertop.
Remodelaholic Kitchen Mini-Makeover with Affordable Tiled DIY

How to Build Tile Countertops
Related articles: