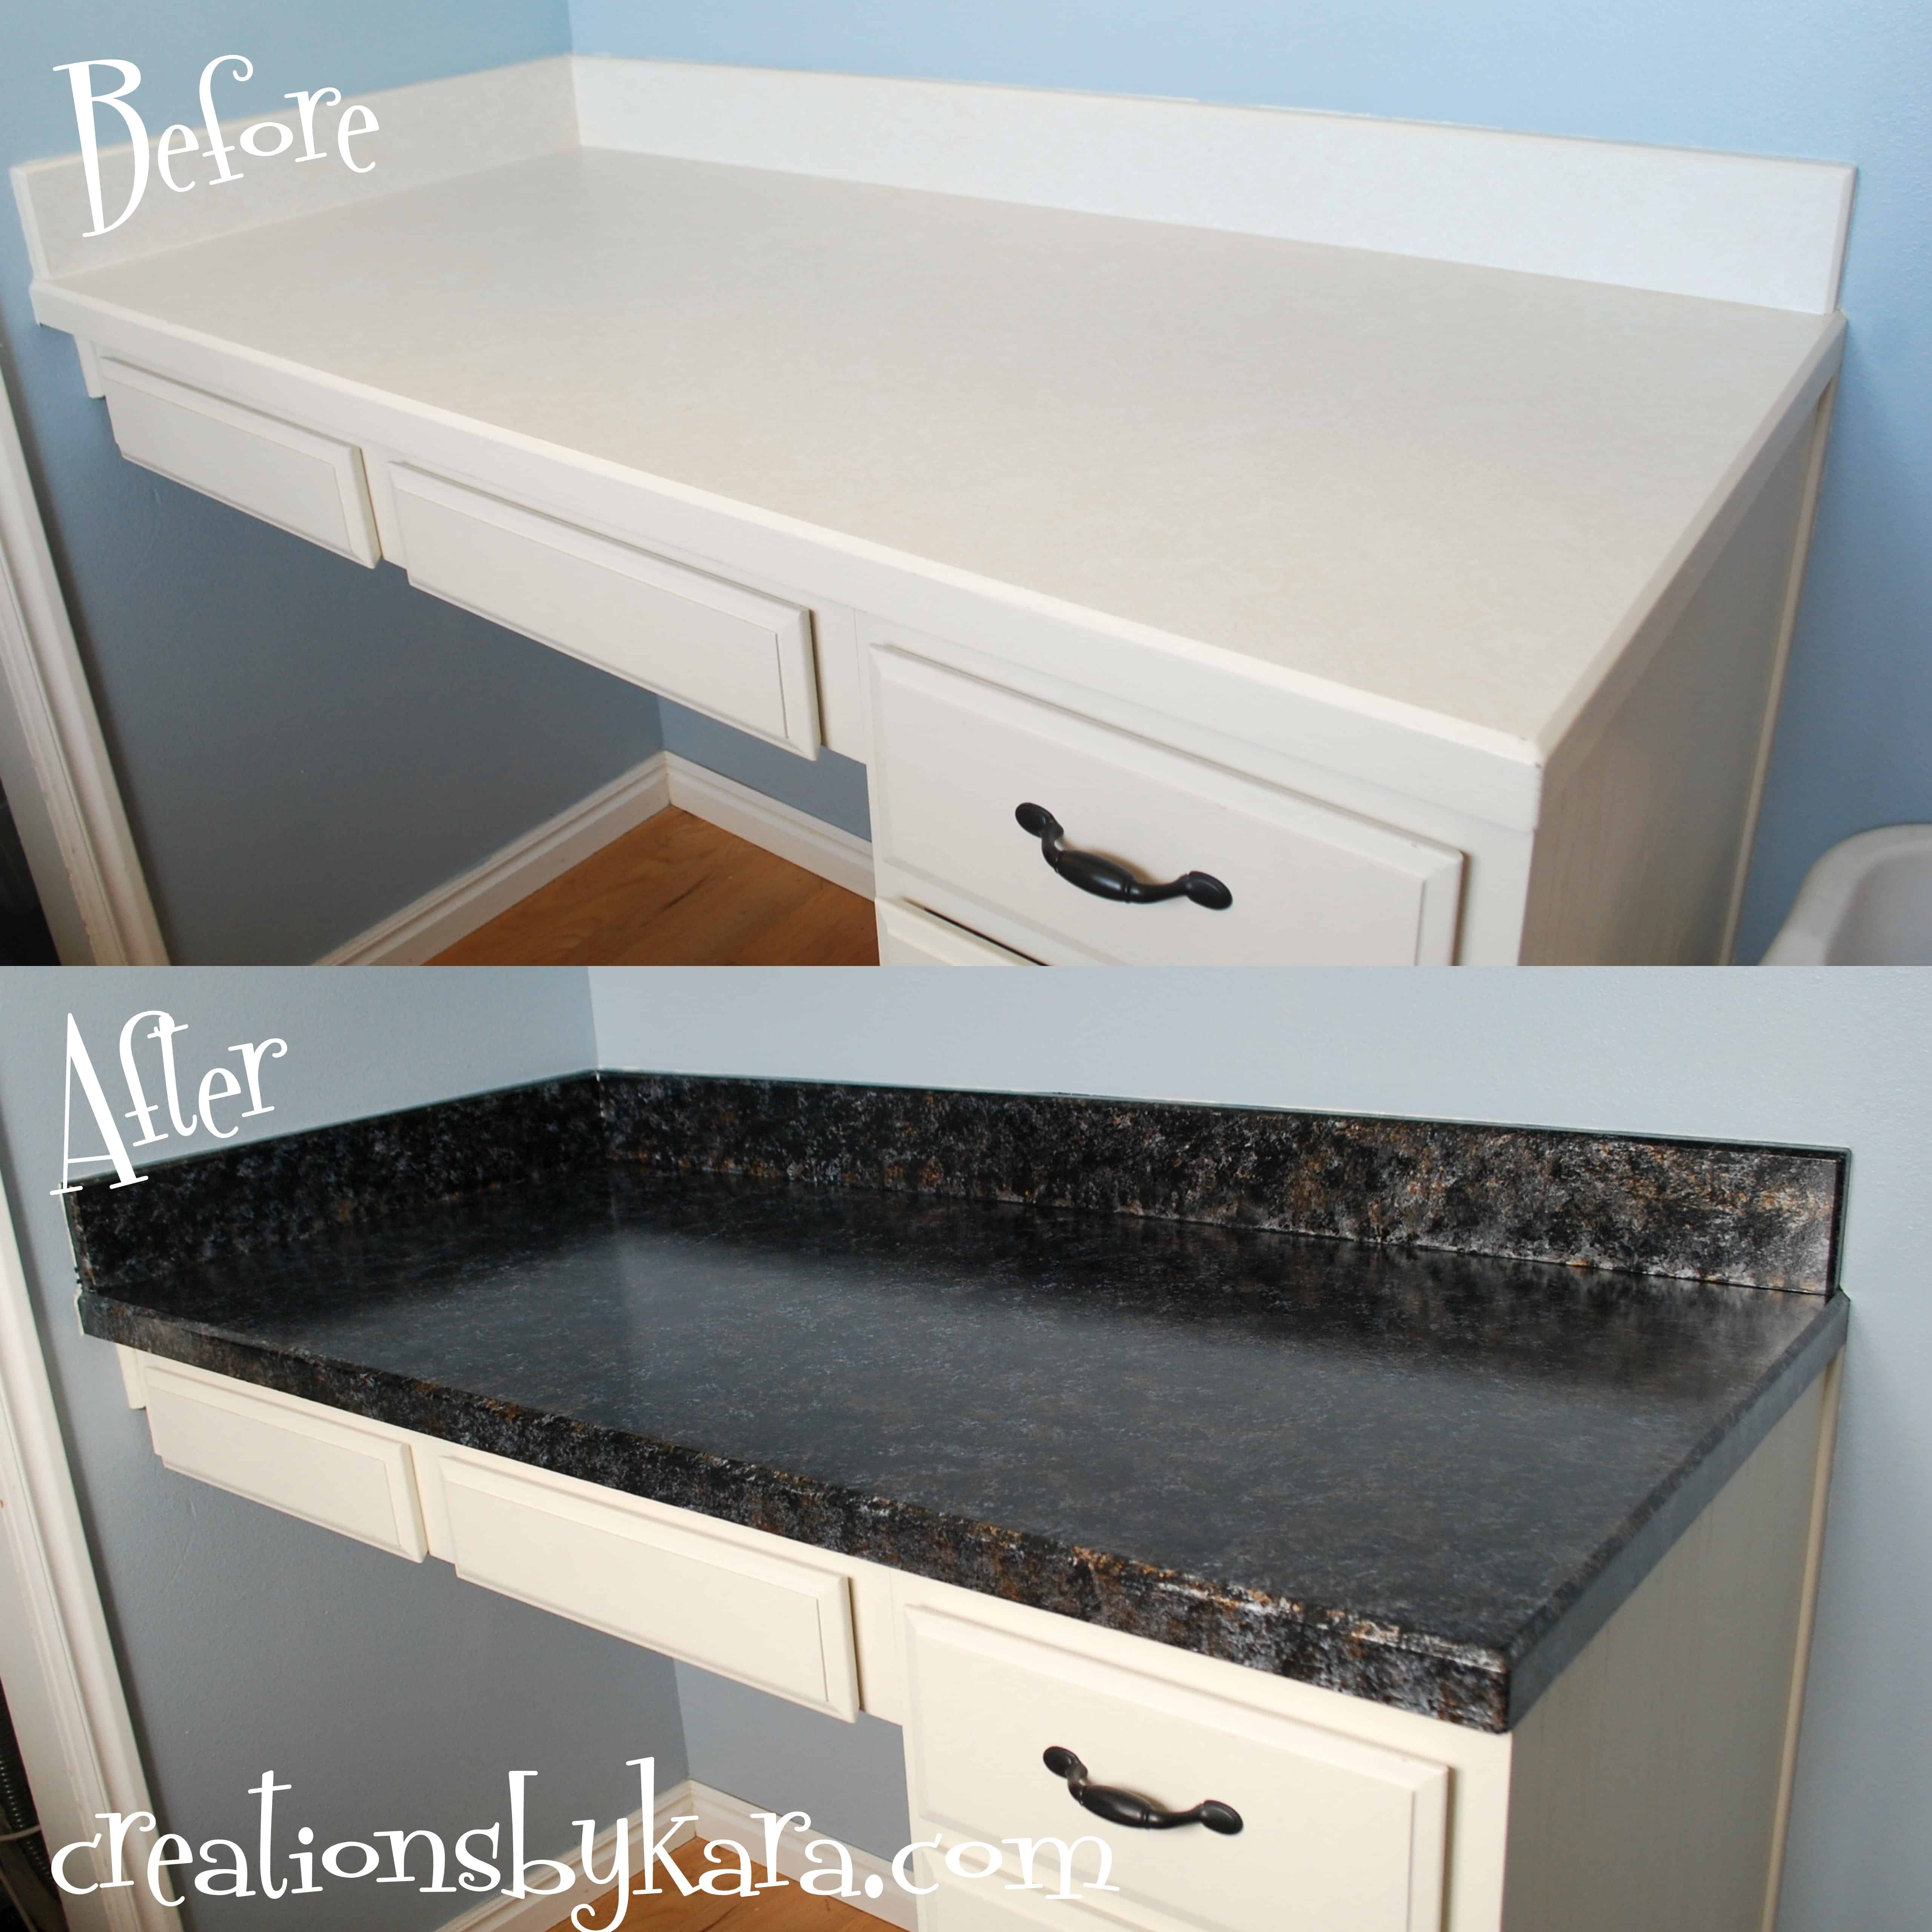
Transforming your kitchen or bathroom with the luxurious look of granite doesn’t necessarily require a hefty investment or professional installation. DIY faux granite countertop kits offer an affordable, practical, and aesthetically pleasing alternative to natural stone. These kits are designed to be user-friendly, allowing homeowners to achieve a high-end look on a budget. Here’s a comprehensive guide to using DIY faux granite countertop kits, including preparation, application, and finishing touches.
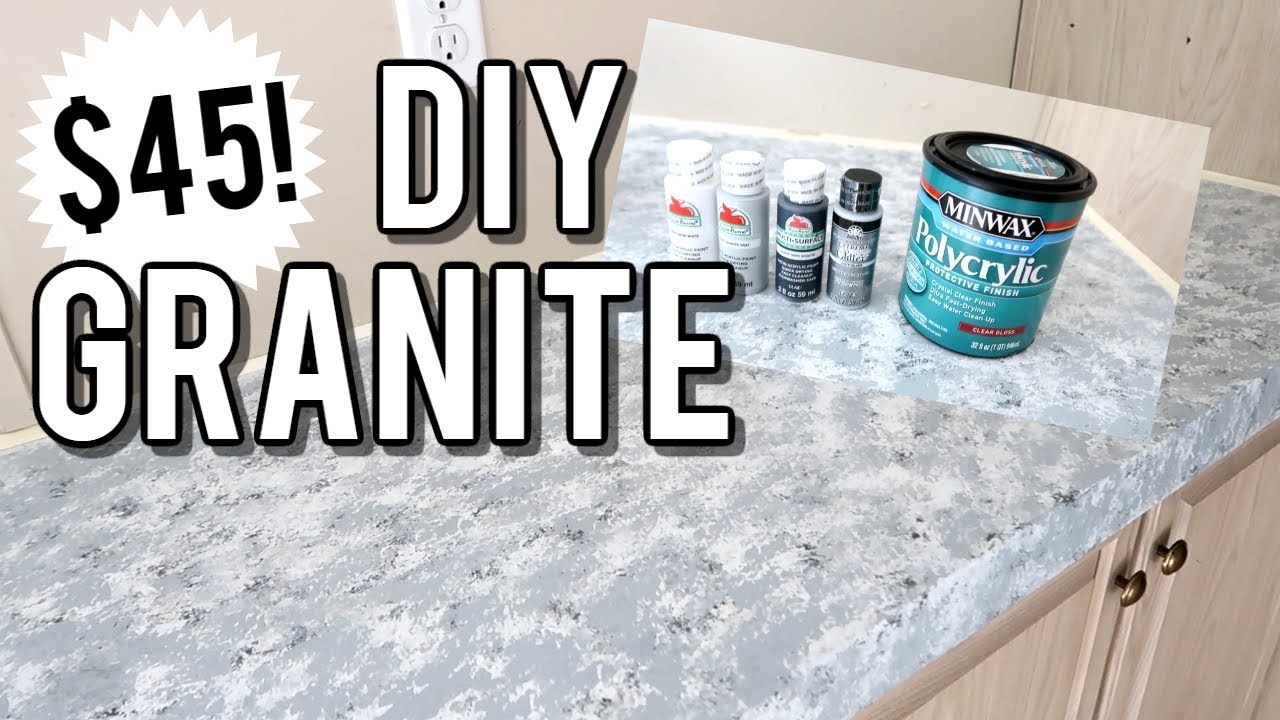
DIY faux granite countertop kits typically come with all the materials you need to get started, including primers, base coats, mineral colors, topcoats, and the necessary tools such as brushes, rollers, and sponges. The first step in transforming your countertop is thorough preparation. Clean the surface meticulously to remove any dirt, grease, or residue that could affect the adhesion of the new surface. Sanding the countertop lightly helps to create a rough texture for a better grip of the primer and paint.
Once the surface is prepped, applying a primer is crucial. The primer ensures that the base coat adheres properly to the countertop. Most kits include a high-bond primer designed specifically for this purpose. Apply the primer evenly using a roller, ensuring full coverage. Allow it to dry completely, as per the instructions on the kit, before moving on to the next step.
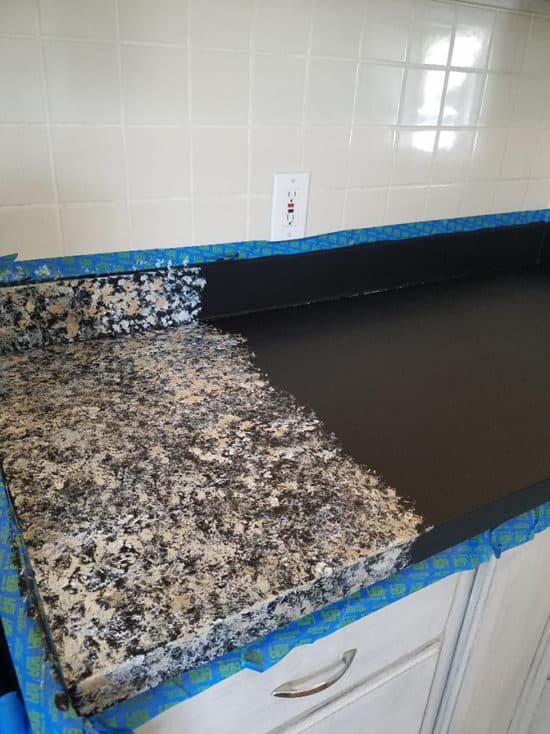
After the primer is dry, the base coat is applied. The base coat is typically a solid color that serves as the foundation for the granite look. This coat needs to be applied evenly to avoid any streaks or patches that could show through the final finish. Depending on the kit, you might need to apply one or two layers of the base coat. Make sure each layer dries thoroughly before applying the next.
The next step is creating the granite effect using mineral paints or decorative flakes. This is where the transformation happens, and it requires some artistic touch. Kits usually provide several colors that you can blend to mimic the natural variations in granite. Use a sponge, brush, or stippling tool to apply the mineral paints in a random, natural-looking pattern. It’s essential to work in small sections and blend the colors while they are still wet to achieve a seamless granite look.

Patience is key during this stage. Take your time to layer and blend the colors until you are satisfied with the appearance. You might want to practice on a piece of cardboard first to get a feel for the technique. Remember, natural granite has a lot of variations and imperfections, so don’t aim for perfection—embrace the unique, organic look.
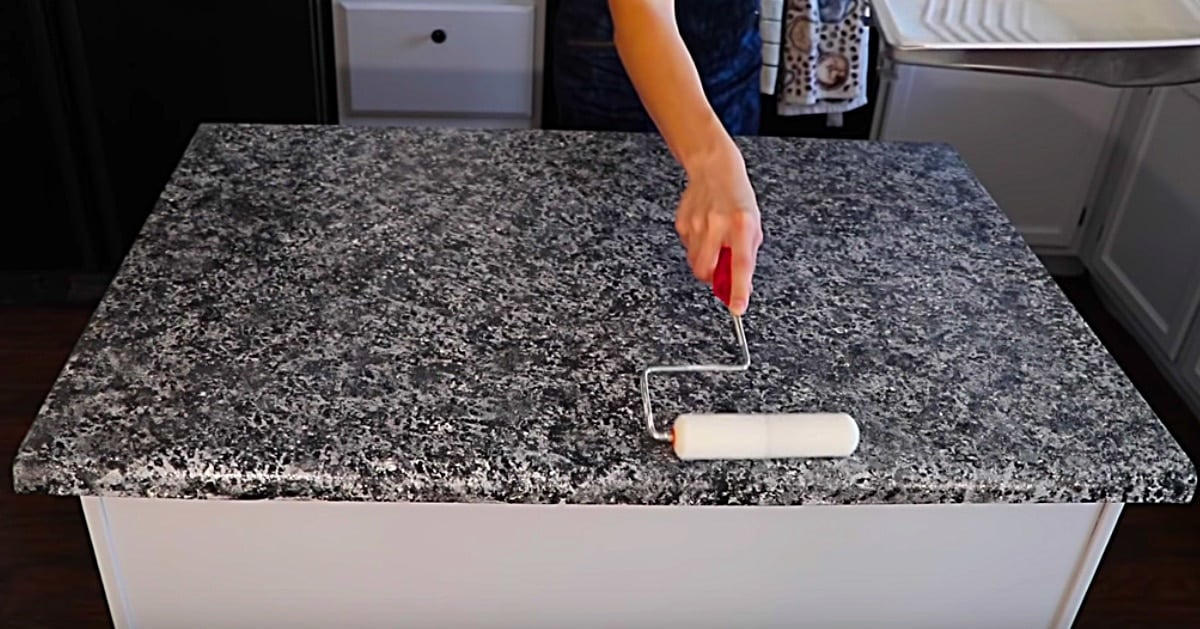
Once you’re happy with the granite effect, it’s time to apply the protective topcoat. The topcoat is what gives the countertop its glossy finish and protects it from daily wear and tear. Most kits include a clear, durable topcoat that is resistant to heat, scratches, and stains. Apply the topcoat using a foam roller for a smooth, even finish. Depending on the kit, you may need to apply multiple layers, allowing each layer to dry completely before adding the next.
Curing time is crucial after applying the topcoat. Follow the manufacturer’s instructions regarding how long to let the countertop cure before using it. This step is vital to ensure the durability and longevity of your new faux granite countertop. Avoid placing heavy objects or using the countertop extensively until it is fully cured.

Maintaining your new faux granite countertop is straightforward. Clean the surface regularly with a mild soap and water solution. Avoid using abrasive cleaners or scrubbing pads that could damage the finish. With proper care, your DIY faux granite countertop can last for many years, providing a beautiful, cost-effective alternative to natural granite.
DIY faux granite countertop kits are not only budget-friendly but also environmentally responsible. By choosing to refinish your existing countertops instead of replacing them, you reduce waste and the demand for natural stone, which has to be quarried and transported. This makes faux granite a sustainable choice for eco-conscious homeowners.
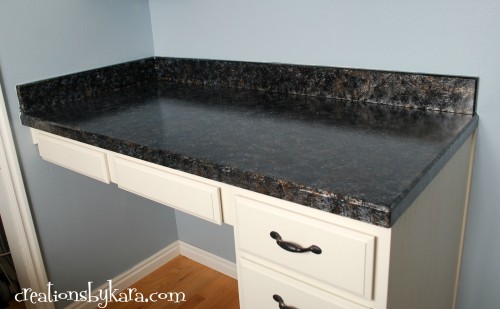
One of the advantages of DIY faux granite countertop kits is the variety of styles and colors available. Whether you prefer the classic look of white granite with subtle gray veining or the dramatic appeal of black granite with bold gold flecks, there’s a kit to match your taste. This flexibility allows you to customize your countertops to complement your existing decor perfectly.
These kits are also versatile in terms of application. While most commonly used in kitchens and bathrooms, faux granite can be applied to any solid surface, including tabletops, bar counters, and even outdoor kitchen areas. This versatility makes it a valuable tool in home improvement projects, allowing you to achieve a cohesive look throughout your home.
For those who enjoy DIY projects, using a faux granite countertop kit can be a fun and rewarding experience. It offers the satisfaction of transforming a space with your own hands, and the process itself can be quite enjoyable. It’s a manageable project for those with basic DIY skills, and there are plenty of online tutorials and resources available to guide you through each step.

Cost is another significant advantage of DIY faux granite countertop kits. Natural granite countertops can be very expensive, often costing hundreds of dollars per square foot. In contrast, a faux granite kit can transform a standard-sized countertop for a fraction of the cost, making it an excellent option for budget-conscious homeowners looking to update their space without breaking the bank.
DIY faux granite countertop kits also allow for easy updates and repairs. If the surface gets damaged or you simply want to change the look in the future, you can sand down the topcoat and apply new layers of mineral paint and topcoat. This flexibility means you can keep your countertops looking fresh and stylish for years to come, adapting to changing trends and personal preferences.
DIY faux granite countertop kits offer an affordable, versatile, and environmentally friendly option for updating your kitchen or bathroom countertops. With careful preparation, application, and maintenance, you can achieve a high-end granite look without the associated cost and hassle of natural stone. Whether you’re a seasoned DIY enthusiast or a beginner looking for a manageable project, these kits provide everything you need to transform your space with stunning results.
Common Mistakes to Avoid:
Inadequate Surface Preparation: Skipping or rushing the surface preparation can lead to poor adhesion of the primer and paint. Ensure the countertop is thoroughly cleaned and sanded before starting the project.
Uneven Application of Primer and Base Coat: Applying the primer or base coat unevenly can result in streaks or patches that show through the final finish. Take your time to ensure each layer is smooth and even.
Rushing the Drying Process: Allow sufficient drying time between each coat of primer, base coat, and topcoat. Rushing this process can compromise the durability and appearance of the countertop.
Using Harsh Cleaners: After completing the project, avoid using abrasive or harsh cleaners that can damage the topcoat. Stick to mild soap and water for regular cleaning.
Skipping Practice: Before applying the mineral paints directly to the countertop, practice your technique on a piece of cardboard. This helps you get comfortable with the blending process and achieve a more natural granite look.
What is included in a DIY faux granite countertop kit?
Most DIY faux granite countertop kits include a high-bond primer, base coat, multiple mineral colors for creating the granite effect, and a clear topcoat for protection. Additionally, they provide tools such as brushes, rollers, and sponges necessary for the application process. Detailed instructions are also typically included to guide you through each step.
How long does the entire process take from start to finish?
The time required to complete the project varies depending on drying times and the complexity of the design. Generally, the process can take anywhere from a few days to a week. This includes time for cleaning and prepping the surface, applying multiple coats of primer, base coat, and mineral paints, and allowing sufficient drying and curing times between each step.
Can I use a DIY faux granite countertop kit on any type of surface?
DIY faux granite countertop kits are designed to be versatile and can be applied to various surfaces, including laminate, wood, and even some tile. However, the surface needs to be properly prepped to ensure good adhesion. It’s essential to clean, sand, and prime the surface as instructed in the kit to achieve the best results.
How durable is a faux granite countertop compared to real granite?
While a faux granite countertop created with a DIY kit is not as durable as real granite, it can still be quite resilient if properly maintained. The clear topcoat provided in the kit adds a layer of protection against scratches, stains, and heat. Regular cleaning with mild soap and water and avoiding harsh chemicals or abrasive cleaners will help maintain the countertop’s appearance and durability.
What should I do if the faux granite finish gets damaged?
If the faux granite finish gets damaged, it can often be repaired by lightly sanding the affected area and reapplying the mineral paints and topcoat. This is one of the advantages of a faux granite finish—unlike real granite, which can be costly to repair, faux granite allows for easy touch-ups and refinishing to keep your countertops looking fresh and new.
DIY Faux Granite Countertops in Just a Few Easy Steps

How to Do TikTok DIY Marble Countertop Hack u0026 Whether Itu0027s a Good Idea
DIY faux granite countertops with Gianiu003d
DIY Granite Countertops – Yes, Really! – The Honeycomb Home
Pin on For the Home

Related articles:
- Granite Countertop Overlay
- Stains On Granite Countertops
- Black Pearl Granite Countertops
- Black Matte Granite Countertop
- Black Granite Kitchen Countertops
- Cutting Granite Countertops DIY
- Gray Granite Countertops
- Blue Gray Granite Countertops
- Granite Countertops Wood Island
- Backsplash Ideas For Granite Countertops