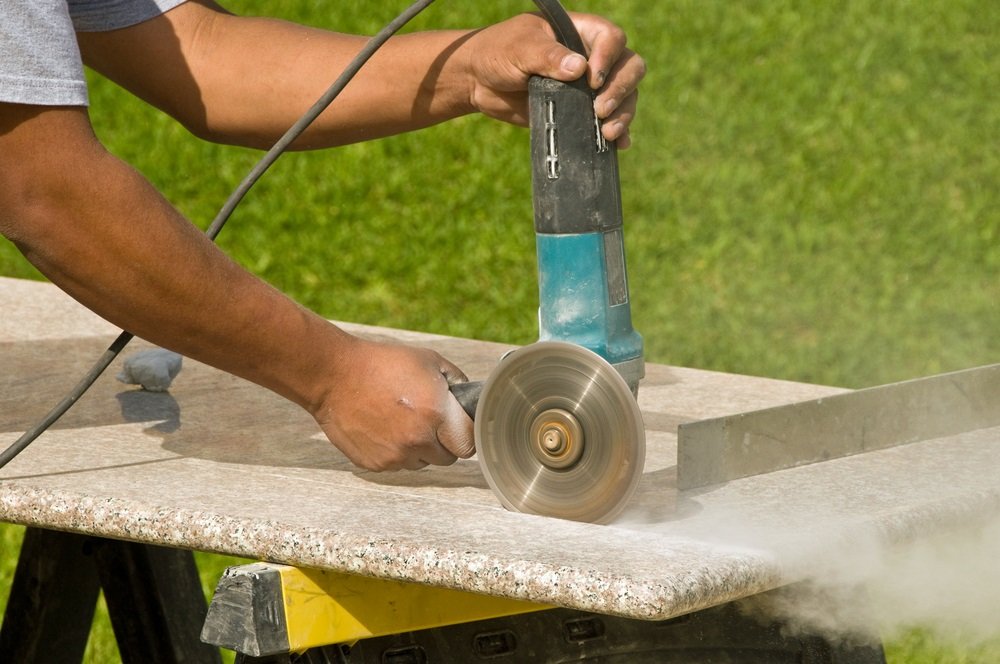
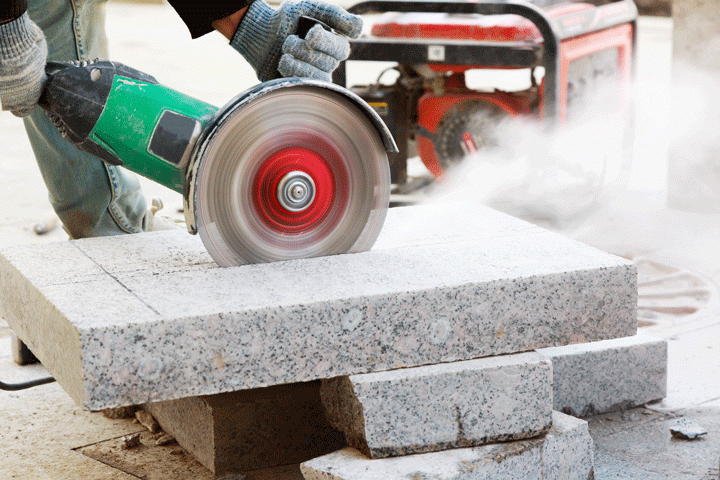
Granite countertops bring a timeless and luxurious feel to kitchens and bathrooms. They’re durable, heat-resistant, and add an impressive elegance to any space. However, granite is also heavy and extremely hard, making it challenging to work with. If you’re considering cutting granite countertops yourself, you’ll need patience, precision, and the right tools. DIY granite cutting is not for everyone, but with careful planning and execution, you can accomplish it. When done right, a DIY granite installation can save money and give you a sense of pride and satisfaction. However, it’s critical to be aware of the intricacies involved before diving into this project.
The first and most important step in any DIY granite project is preparation. Start by planning your workspace and setting up a stable area to work on the granite slab. Granite is a hard, dense stone that generates a significant amount of dust when cut, so choose a well-ventilated location. Ideally, this should be outdoors or in an area where you can control and capture the dust. Proper ventilation is key to keeping dust levels low and ensuring safety. You’ll also want to make sure your workspace is large enough to comfortably handle the granite slab, which is often heavy and unwieldy.
In addition to creating an appropriate workspace, gather the necessary tools. For a DIY granite cutting project, you’ll need a circular saw or an angle grinder fitted with a diamond blade designed for granite. Diamond blades are essential as they’re strong enough to handle the hardness of granite. A wet saw attachment can also be beneficial, as it reduces the heat generated during the cutting process and minimizes dust. Along with the saw, safety equipment like eye protection, a mask to filter out dust, gloves, and ear protection is crucial. Granite cutting is loud and generates sharp debris, so taking proper precautions will prevent injury.
Before making any cuts, measure everything multiple times. Granite is not forgiving; once a cut is made, it’s nearly impossible to correct mistakes without visible marks. Begin by measuring your countertop dimensions and marking them on the granite slab. Use a grease pencil or painter’s tape to outline the cutting area. Painter’s tape can also help to prevent the granite from chipping along the edges. Double-check your measurements against the area where you’ll be installing the countertop to ensure accuracy. Granite can be pricey, so accuracy in measurements and marking is vital.

When you’re ready to cut, make sure your slab is well-supported. Granite is dense but also somewhat brittle, so without proper support, it can crack or chip. Place the slab on a stable surface with ample support on both sides of the cut line. Some DIYers use a couple of sawhorses and a thick piece of plywood as a base for cutting granite. Whatever method you choose, the main goal is to prevent any unnecessary vibrations and ensure even support along the granite slab. For best results, clamp the granite down securely, as this prevents movement and adds an extra layer of safety.
As you start cutting, work slowly and apply even pressure to avoid splintering or chipping the edges. Let the diamond blade do the work instead of forcing the cut. Diamond blades are designed to grind away the granite rather than cut it like wood, so slow and steady is the way to go. A water source like a spray bottle can help keep the blade cool and reduce dust if you’re not using a wet saw. Even with water, expect to produce a lot of dust. It’s a good idea to stop periodically, clear away debris, and inspect your work to ensure precision and safety.
Granite cutting often involves making straight cuts, but if your countertop design requires curves or notches, you’ll need an angle grinder. An angle grinder allows for finer, more precise cuts, particularly around edges or sink cutouts. Mark the curve or notch carefully with painter’s tape, and use slow, deliberate motions to follow the line as closely as possible. Curved cuts are challenging with granite, but by using a high-quality diamond blade and a steady hand, you can achieve clean lines. Patience is essential; rushing this part of the job can result in uneven cuts or cracks.

Once you’ve made the cuts, it’s time to smooth the edges. Rough, unfinished edges can be both unsightly and potentially dangerous. Start by using a diamond polishing pad on a hand polisher to smooth out any rough areas. Begin with a coarser grit, around 50, and gradually work up to finer grits, finishing with at least 3000 for a smooth, glossy edge. Polishing not only enhances the aesthetic appeal but also protects the edges from chipping over time. When polishing, keep the pad moving consistently along the edge to avoid creating dips or uneven spots.
Installing the granite countertop after cutting and polishing it is another challenging part. Carefully move the countertop to its location with enough help, as granite is very heavy. Align the countertop with the cabinets or surface it will rest on. A bead of silicone caulk can be applied along the top of the cabinets for additional stability. Place the granite down carefully and apply gentle pressure to secure it. If you have cutouts, like for a sink, double-check that they line up correctly before sealing. Silicone or epoxy can be used around the edges to hold the granite securely in place.
It’s important to remember that granite is porous, so after installation, consider sealing it. Sealing helps protect the surface from stains and makes cleaning easier. While many granite slabs come pre-sealed, it’s wise to apply a high-quality sealant after installation to enhance durability. Granite sealants are usually applied with a clean cloth and allowed to soak in for about 15 minutes before being wiped off. Sealing should be done at least once a year to maintain the countertop’s shine and resistance to stains.
DIY granite cutting and installation require careful planning, attention to detail, and an understanding of the material. Granite is challenging to work with, and mistakes can be costly, both in terms of time and money. Therefore, it’s critical to approach this project with respect for the complexity of working with stone. Many DIY enthusiasts have successfully cut and installed granite countertops, but it’s essential to be realistic about your skills, patience, and ability to handle setbacks. If at any point you feel unsure, it might be best to consult with or hire a professional.

Common Mistakes to Avoid
Inadequate Measurements: One of the biggest mistakes people make is not measuring accurately. Incorrect measurements can result in an ill-fitting countertop, leading to costly replacements or awkward gaps in your kitchen. Measure multiple times, and ensure you account for any overhangs or edges.
Rushing the Cut: Granite cutting requires a slow and steady approach. Rushing the cut can lead to chipping or cracking, which is difficult to repair. Take your time, especially when making cuts for corners or curves.
Not Using the Right Blade: Using the wrong type of blade is a common error. Always use a diamond blade specifically designed for cutting granite. Regular blades aren’t strong enough for this dense material and can quickly become damaged, resulting in uneven cuts.
Inadequate Support for the Slab: Granite needs even support along the entire length of the slab during cutting to prevent cracking. Don’t underestimate the weight and density of granite; ensure it is supported properly on both sides.
Skipping Safety Precautions: Granite cutting generates dust and noise, making protective gear essential. Skipping masks, goggles, or ear protection can lead to respiratory issues and eye or hearing damage.
Poor Polishing Technique: Failing to polish properly can leave rough, unattractive edges. It’s easy to overlook, but gradually increasing your polishing grit ensures a smooth and polished finish.
Not Sealing the Granite: Granite is porous and prone to stains if left unsealed. Skipping the sealing process after installation can result in stains and a dull surface over time.

Can I cut granite countertops with a regular saw blade?
No, a regular saw blade is not suitable for granite. Granite is a dense and hard material that requires a diamond blade to cut effectively. A diamond blade is specifically designed to grind through hard materials like granite without dulling or chipping. Attempting to cut granite with a standard saw blade can lead to damaged equipment, poor-quality cuts, and even safety hazards.
Is it better to use a wet or dry saw for cutting granite?
A wet saw is generally better for cutting granite because it reduces dust and keeps the blade cool, which can result in a cleaner cut. However, if you’re working outdoors or in a well-ventilated area, you can use a dry saw with caution. With a dry saw, you should frequently spray water on the blade to keep it cool and reduce dust.
How do I prevent granite from chipping while cutting?
To prevent chipping, use a diamond blade specifically designed for granite and apply painter’s tape along the cutting line to protect the edges. Cutting slowly and steadily is also essential, as rushing can lead to chips or cracks. Keeping the blade cool, either by using a wet saw or periodically misting with water, also reduces the likelihood of chipping.

Do I need to polish the granite after cutting it?
Yes, polishing is an essential step after cutting granite. Polishing smooths the edges, enhancing the granite’s visual appeal and making it safer to handle. Start with a coarse grit and work your way to a finer grit for a smooth finish. Polishing helps protect the edges from chipping and gives the granite a professional appearance.
How should I transport a cut granite slab?
Transporting granite requires careful planning due to its weight and brittleness. Always carry it vertically rather than flat to prevent cracking. Use a sturdy dolly or enlist help to move it safely. Wrapping the edges with blankets or padding and securing it during transport can prevent accidental damage.
How often should I seal my granite countertop?
Granite should be sealed at least once a year to maintain its stain resistance and shine. High-traffic areas or light-colored granite may require more frequent sealing. To test if your granite needs sealing, sprinkle a few drops of water on it. If the water absorbs quickly, it’s time to reseal your countertop.

How to Cut Granite: A Step-by-Step Guide Marble.com

4 Easy Ways to Cut Granite Countertops – wikiHow

How To Install Granite Countertops On A Budget – Part 3 – Cut u0026 Fit With A Circular Saw

Related articles:
- Granite Countertop Overlay
- Stains On Granite Countertops
- Black Pearl Granite Countertops
- Black Matte Granite Countertop
- Black Granite Kitchen Countertops
- Cutting Granite Countertops DIY
- Gray Granite Countertops
- Blue Gray Granite Countertops
- Granite Countertops Wood Island
- Backsplash Ideas For Granite Countertops