Butcher block countertops have a distinct charm, providing a warm, rustic feel that can elevate the ambiance of a kitchen. Unlike stone or laminate, butcher block countertops bring the beauty of natural wood into the heart of the home, making them both functional and aesthetically pleasing. However, after years of use, your once-pristine butcher block countertop might start to show signs of wear and tear. If it’s looking a little rough around the edges, a redo can breathe new life into it without the need for a full replacement. The process of refinishing butcher block countertops is not as daunting as it may seem. It typically involves sanding, resealing, and sometimes staining the wood, depending on the look you want to achieve.
The first step in redoing butcher block countertops is to assess the current condition of the wood. If there are deep gouges, scratches, or stains, you’ll need to sand these out. For those who haven’t tackled a sanding project before, you’ll be glad to know that sanding is a fairly straightforward process, but it requires patience and the right tools. Start by using a coarse-grit sandpaper, around 80 grit, to remove the top layer of wood and any imperfections. Once you’ve sanded the entire surface, switch to finer grits of sandpaper—100 and then 220—to achieve a smooth, even finish. Be sure to sand with the grain of the wood to avoid creating scratches that go against the natural flow of the wood grain.
Once sanding is complete, the next step is to clean the surface. Sawdust will inevitably cover everything after sanding, so it’s crucial to wipe down the countertop thoroughly. Use a vacuum cleaner with a brush attachment to remove the bulk of the dust, followed by a damp microfiber cloth to catch any remaining particles. Ensuring that the surface is clean will allow any sealers or stains to adhere properly and provide a smooth, flawless finish. At this point, your butcher block should already start looking fresh and new, but we’re not done yet.
If you want to change the color of your butcher block, now’s the time to apply a stain. Staining your butcher block can dramatically change the look of your kitchen, allowing you to experiment with darker or lighter shades depending on the vibe you’re going for. When applying the stain, use a clean rag or brush and work the stain into the wood evenly, making sure to wipe off any excess to prevent blotchiness. Always test the stain on a small, inconspicuous area of the countertop to ensure you’re happy with the color before proceeding with the entire surface.
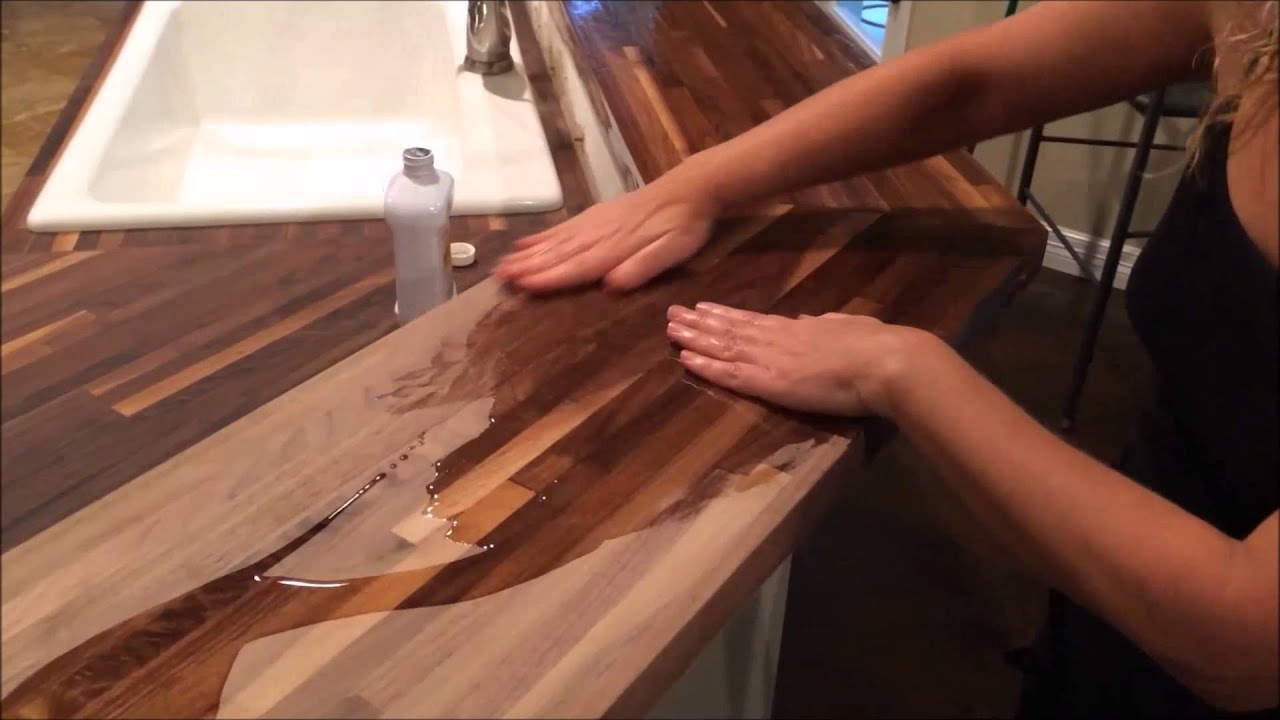
After staining (or if you choose to keep the natural color), the next critical step is sealing the butcher block. Wood is porous and can absorb liquids and bacteria if left unsealed, which is especially concerning for kitchen countertops. Several sealing options exist, including mineral oil, tung oil, or polyurethane, each with its pros and cons. For a more natural finish that’s food-safe, mineral oil is a common choice. It penetrates the wood deeply and helps preserve its natural beauty. However, mineral oil does require frequent reapplication, particularly in high-use areas. Polyurethane, on the other hand, provides a more durable, water-resistant surface but is not food-safe unless you use a water-based, food-safe version.
Sealing your butcher block is a relatively simple process. Using a clean cloth, apply a generous amount of oil or polyurethane to the surface, allowing it to soak into the wood. For oil finishes, you’ll need to repeat this process several times, allowing the oil to absorb between applications. Polyurethane requires fewer coats but needs to dry thoroughly between applications, which can take several hours. In either case, make sure the room is well-ventilated while working with these substances, as they can emit strong odors.
A key consideration when redoing butcher block countertops is the maintenance required to keep them looking their best. Unlike granite or quartz, wood requires regular upkeep, especially in high-traffic areas of the kitchen. For oiled countertops, you’ll need to reapply oil every few months to keep the wood hydrated and protected from spills. If you opt for a polyurethane finish, maintenance is less frequent, but you should still inspect the surface periodically for signs of wear, such as dull spots or scratches, and address them as needed.
Water damage is one of the biggest threats to butcher block countertops. Wood naturally expands and contracts with changes in moisture, and if water is allowed to seep into the surface, it can cause the wood to warp or crack. Always wipe up spills promptly and use cutting boards for food prep to protect the surface. Installing a small lip around the sink area can also help prevent water from pooling at the base, which is a common problem in kitchens with butcher block countertops.
Heat can also be damaging to butcher block countertops, so it’s important to use trivets or heat-resistant pads under hot pots and pans. Direct contact with a hot object can leave scorch marks on the wood, which may require deep sanding to remove. Similarly, sharp knives can easily gouge the surface if used directly on the countertop. While butcher block is often touted as a great surface for cutting, it’s still a good idea to use a dedicated cutting board to preserve the longevity of the countertop.
Over time, even with regular maintenance, your butcher block may develop small scratches or blemishes. Fortunately, one of the major advantages of wood countertops is that they can be easily repaired. Minor imperfections can often be sanded out and resealed, which is far easier and more cost-effective than repairing chips or cracks in stone countertops. This ability to refresh the surface makes butcher block a long-lasting choice for homeowners who are willing to invest a little time in its care.
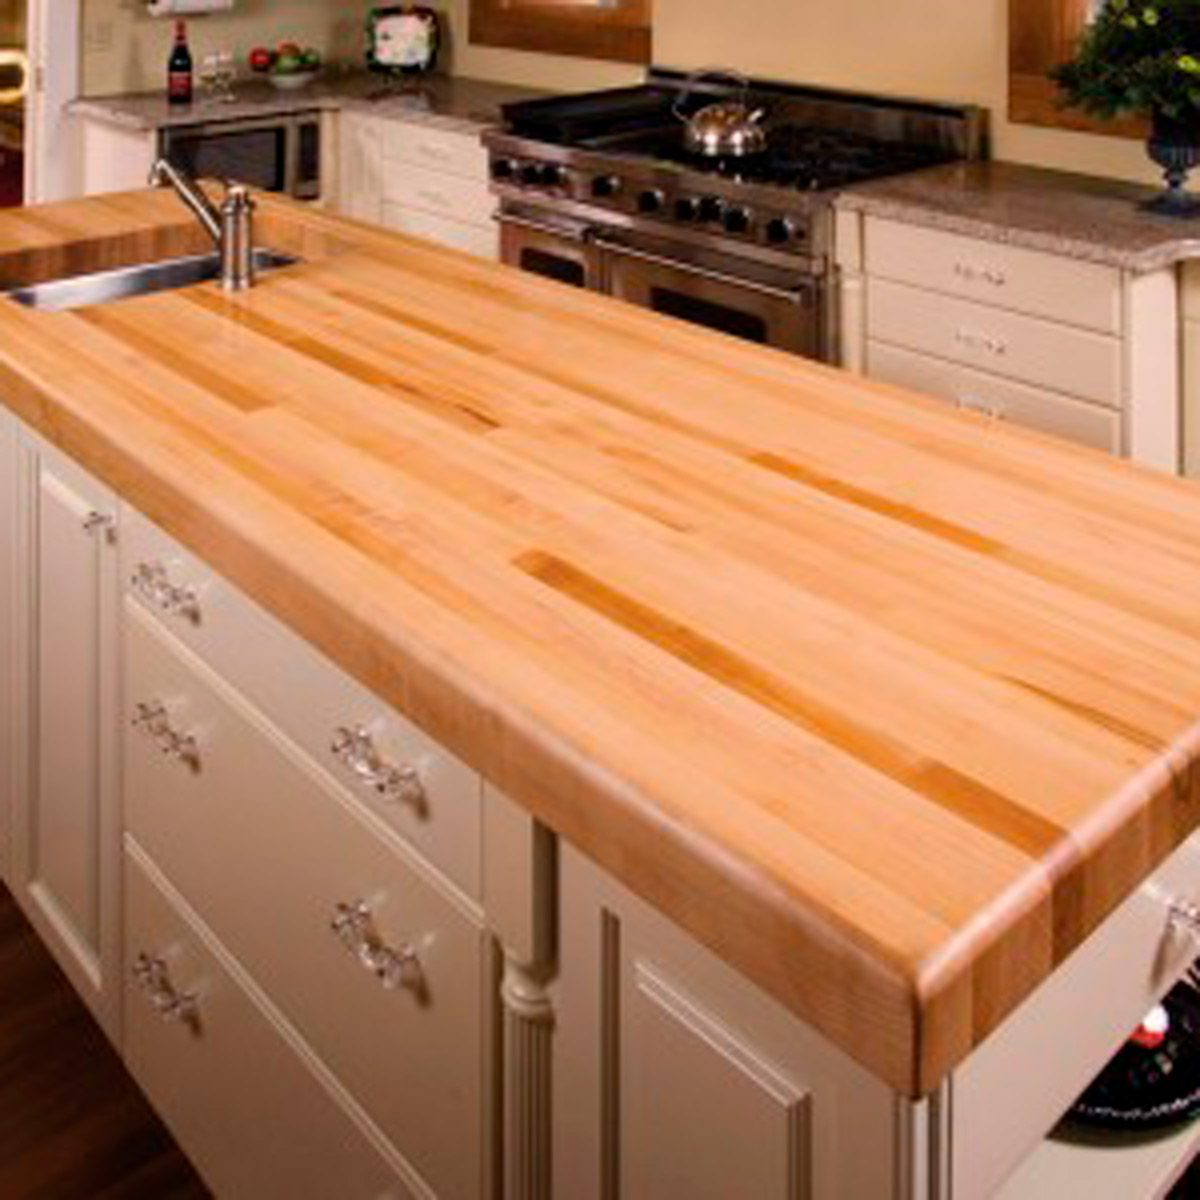
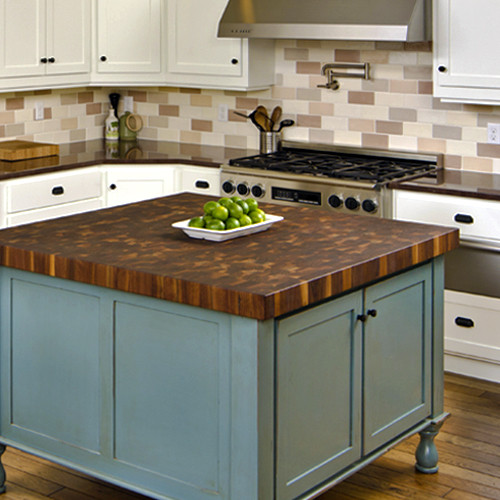
If you’re considering installing butcher block countertops for the first time, it’s important to choose the right type of wood. Hardwoods like maple, oak, and walnut are commonly used because they’re durable and stand up well to wear. Softer woods, like pine, may be more affordable but can dent and scratch more easily, making them less ideal for kitchen countertops. The thickness of the countertop is another factor to consider—thicker slabs offer more durability and the option for deeper sanding in the future if needed.

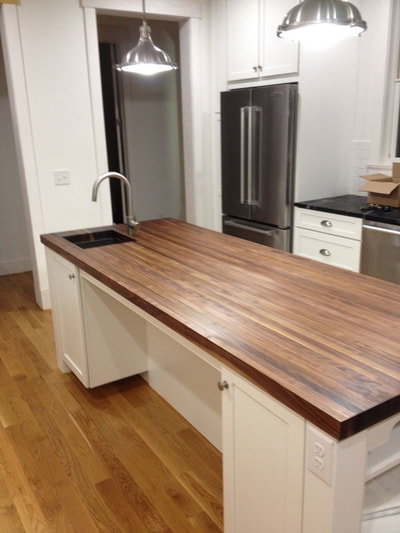
One aspect of butcher block countertops that many people appreciate is their versatility. Whether you prefer a sleek, modern kitchen or a cozy, country-style look, butcher block can be customized to suit a variety of design aesthetics. For a contemporary feel, you can pair a dark walnut countertop with stainless steel appliances and minimalist cabinetry. On the other hand, a light maple countertop can complement a farmhouse-style kitchen, creating a warm, inviting space that feels homey yet stylish.
Another factor to consider during the refinishing process is the edge profile of your butcher block. While some people prefer a straight, clean edge, others might opt for more decorative edges, such as beveled or rounded corners. The edge treatment can significantly impact the overall look of your kitchen, adding a subtle design element that complements the rest of the space. If your current edge profile is worn or chipped, this might be a good time to sand it down and opt for a new look.
Butcher block countertops offer not only beauty but also sustainability, especially when sourced from responsibly managed forests. Wood is a renewable resource, and many manufacturers offer countertops made from reclaimed wood or certified sustainable sources. By refinishing rather than replacing your countertop, you’re contributing to a more eco-friendly approach to home renovation. Additionally, using natural oils or waxes to seal your countertop further reduces the environmental impact compared to synthetic alternatives.
Finally, one of the most rewarding aspects of redoing a butcher block countertop is the satisfaction of completing a DIY project that can transform your kitchen space. With a bit of effort and the right tools, you can restore your countertop to its former glory, or even give it a completely new look. Not only will it enhance the aesthetic appeal of your kitchen, but it will also extend the life of the countertop for years to come.
Common Mistakes to Avoid
Skipping the sanding process: It may be tempting to skip sanding if the surface doesn’t seem too rough, but this step is essential for ensuring a smooth finish and allowing the sealer to adhere properly.
Not cleaning the surface properly: After sanding, failing to thoroughly clean the countertop can result in a rough, uneven finish when you apply the stain or sealant.
Using the wrong sealing product: Some people mistakenly use non-food-safe finishes on countertops where food preparation occurs. Always choose a finish that is safe for kitchen use, especially if you prepare food directly on the surface.
Over-applying stain or sealer: Applying too much stain or sealer can cause it to pool and create an uneven, blotchy finish. It’s better to apply several thin layers, allowing each to dry thoroughly before applying the next.
Ignoring moisture control: Failing to protect the butcher block from water damage by using proper sealing techniques or not addressing water spills immediately can lead to warping, cracking, and other damage.

How often should I oil my butcher block countertop?
I recommend oiling your butcher block countertop every 1 to 3 months, depending on how frequently you use it. Regular oiling keeps the wood hydrated, preventing it from drying out and cracking. If the countertop is in a high-traffic area, you might need to oil it more often. A good test is to sprinkle a few drops of water on the surface—if the water beads up, your countertop is well-oiled; if it absorbs, it’s time to reapply.
Can I use polyurethane on my butcher block countertop?
Yes, you can use polyurethane on a butcher block countertop, but make sure it’s a food-safe variety if you plan to use the countertop for food preparation. Polyurethane creates a more durable, water-resistant finish compared to oil, which can be a great option if you want low-maintenance countertops. Keep in mind that polyurethane finishes aren’t as easily refreshed as oil finishes, so any scratches or wear will require reapplication over the entire surface.
How do I remove deep scratches from my butcher block?
Deep scratches can be sanded out of the wood using coarse-grit sandpaper, followed by progressively finer grits to smooth the surface. After sanding, the countertop should be resealed to protect the wood. In some cases, a wood filler might be necessary for very deep gouges, although this can alter the appearance of the grain. Once the scratches are removed and the countertop is refinished, it will look nearly brand new.

Can I stain my butcher block countertop a darker color?
Absolutely, you can stain your butcher block a darker color if you want to change its appearance. After sanding the surface, apply the stain evenly and wipe off any excess. Keep in mind that different wood types take stains differently, so always test the stain on a small area before applying it to the entire countertop. Staining allows you to achieve a variety of looks, from rich walnut tones to sleek ebony finishes.
What’s the best way to clean my butcher block countertop?
For daily cleaning, use a mild soap and water solution to wipe down the surface. Avoid using harsh chemicals or abrasive cleaners, as these can damage the wood or remove the finish. After cleaning, dry the surface thoroughly to prevent water damage. For a deeper clean, you can occasionally use a mixture of vinegar and water, followed by re-oiling to maintain the wood’s finish.
Can butcher block countertops be used around a sink?
Yes, butcher block countertops can be used around a sink, but they require extra care. Be diligent about wiping up water and spills immediately to prevent the wood from absorbing moisture. Sealing the wood properly around the sink area is essential to avoid water damage. Some homeowners also install a small lip around the sink to further protect the edges from water pooling.
Related articles:
- Butcher Block Countertop For Kitchen Island
- Can You Paint Butcher Block Countertops
- Butcher Block Countertops With White Cabinets
- Pine Butcher Block Countertops
- Butcher Block Countertops Walnut
- Maple Butcher Block Countertops
- Care Of Butcher Block Countertop
- Butcher Block Countertops Maintenance
- Antique Butcher Block Countertops
- Butcher Block Countertop Sealing